How to Trace an Image in Illustrator in 5 Simple Steps

@dan
Tracing an image in Adobe Illustrator is one of the ways we can turn raster images into scalable vectors. The five-step process is quick and easy! Let's learn now how to turn your sketches into vectors with Image Trace.
The lessons covered in this post are from my course Adobe Illustrator Essentials for Beginners. When you become a BYOL member, you gain access to this course as well as my 30+ additional courses on Photoshop, Illustrator, Lightroom, Premiere Pro, Webflow, and more. As a BYOL member you will also enjoy personalized support, earn certificates, and tackle exciting community challenges. Head here to sign-up!
Step 1: Place an Image
To begin, let's add an image to our artboard. In the menu, go to File > Place. Select the image you want to use, and click the Place button.
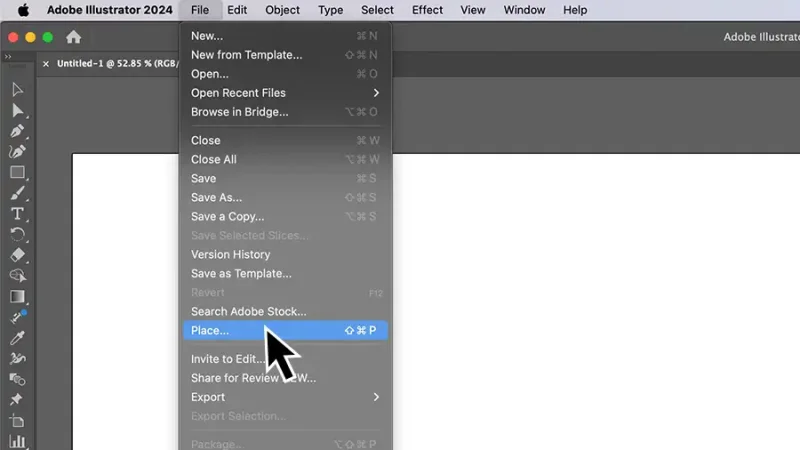
Find the Place option under the File menu option.
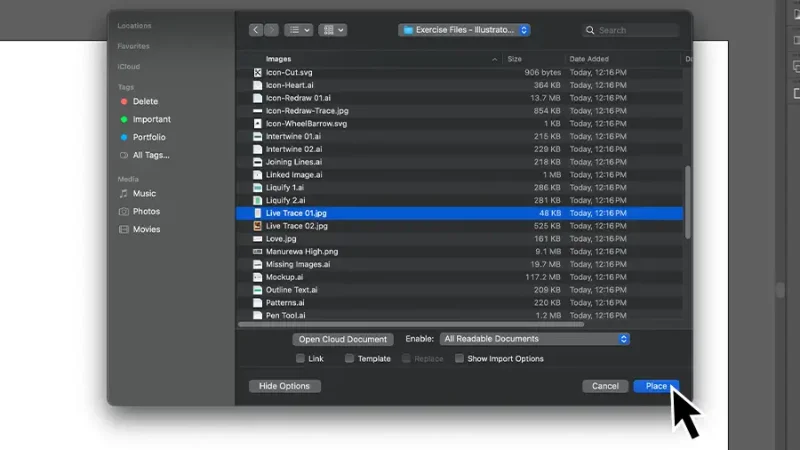
Use the navigation pop-up to locate your image.
To add the image to your project, click once on the screen to drop it in place. Alternatively, you can click-hold-drag your image to the exact size you want.
Step 2: Use Image Trace
With our image selected, we have two options for finding and using the Image Trace feature.
OPTION 1: Properties panel
Locate the Image Trace button in the Properties panel on the right-hand side. Click on the button and choose [Default]. We can make adjustments later.
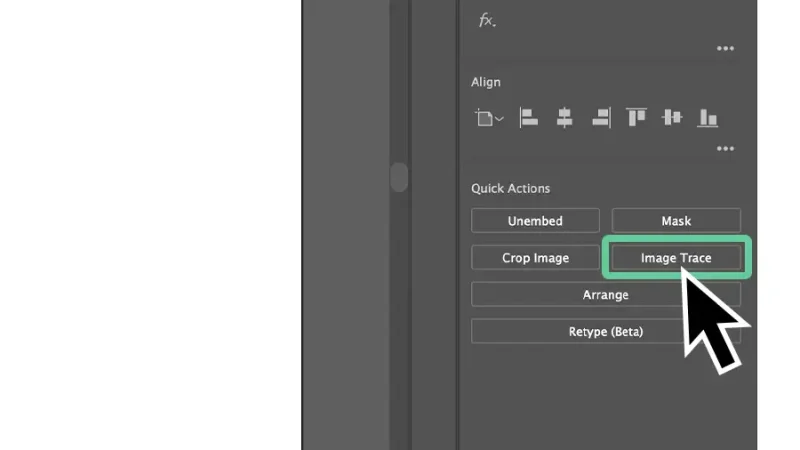
Image Trace button in the Properties panel.
OPTION 2: Menu item Window
In the top menu, go to Window and choose Image Trace to open a panel with more options to turn our sketch into a vector. Click the Trace button now.
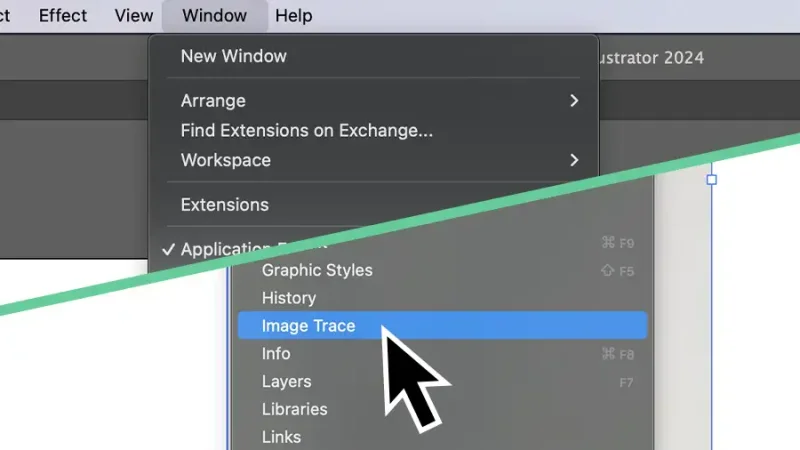
Locate the Image Trace panel under the Window menu item.
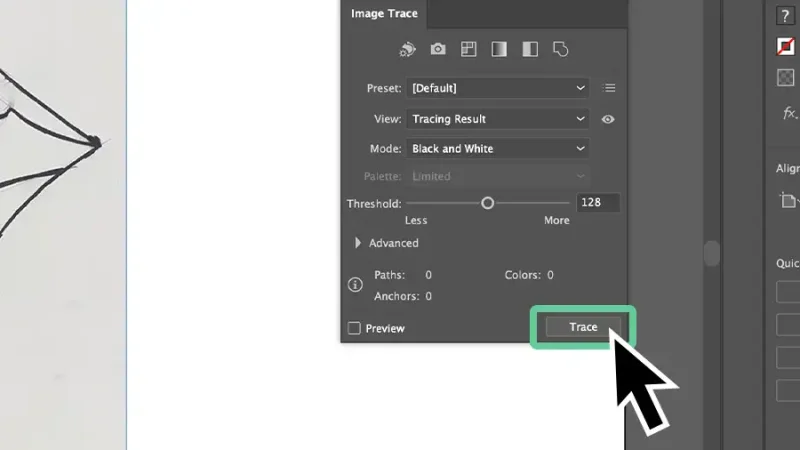
Use the Trace button to turn your raster image into a vector.
Step 3: Make Adjustments
After we have traced our image, we can make adjustments. The Threshold slider will adjust how much or how little of our sketch we want Illustrator to use. In the screenshot, we have increased the threshold to include more lines from our image.
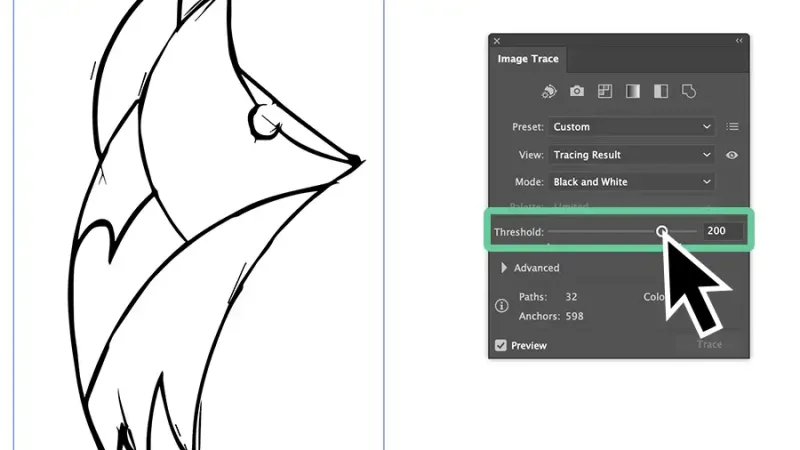
Drag the slider left and right to make adjustments.
Opening the Advanced options and clicking Simplify will reduce the number of anchor points on our new vector image. Again, use the slider to scale the number of points.
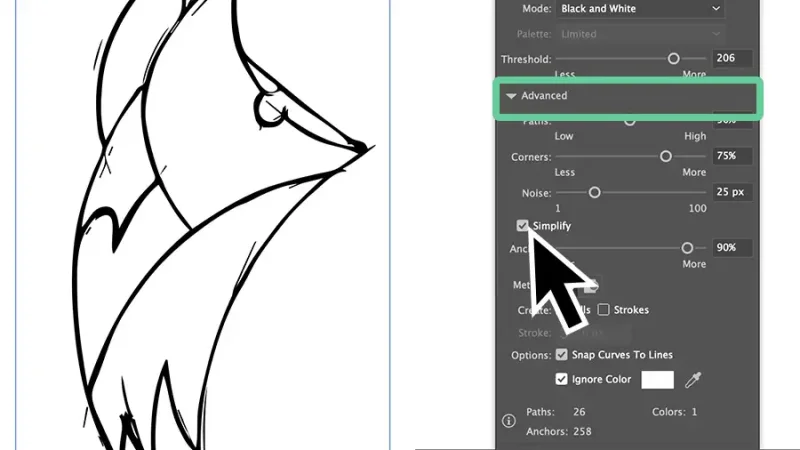
Use the Simplify option to reduce the number of anchor points.
Step 4: Expand the Image
Once our vector graphic looks close to what we want, it is time to finalize it. Locate the Expand button in the Properties panel. When clicked, we can see all the anchor points for our vector. The Direct Selection tool allows us to make final adjustments to our image.
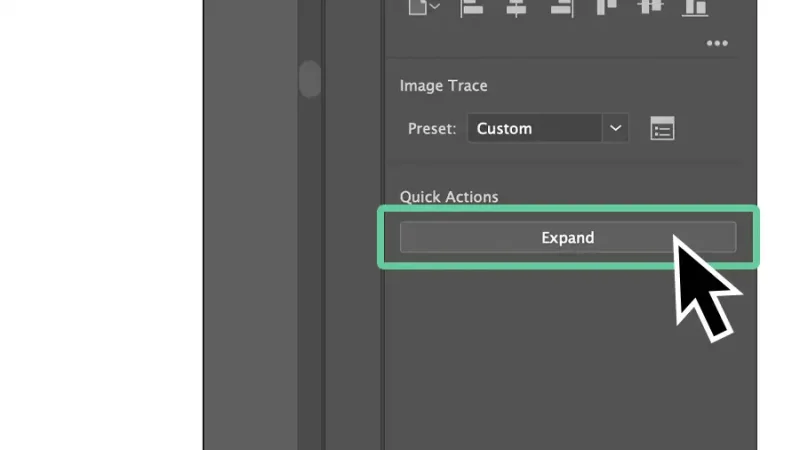
The Expand button is in the Properties panel.
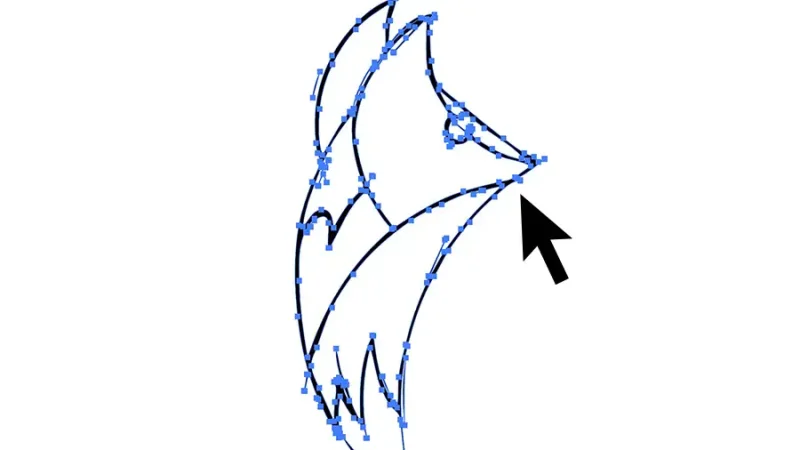
So many anchor points!
Bonus Step: Color the Image with Shape Builder
Now that we have a great-looking vector, let's color it! Grab the Shape Builder tool in the left panel or use the shortcut Shift + M. In the right panel, click on the square next to Fill and choose a color. We selected a color palette from our Libraries tab that we added from color.adobe.com.
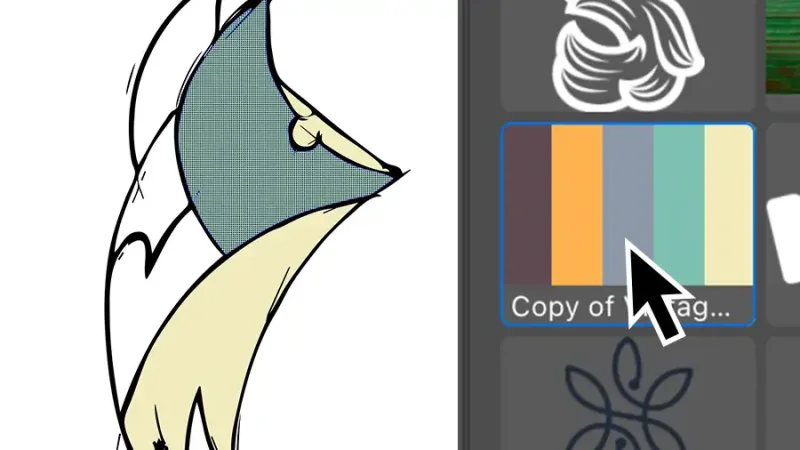
Ooohh, look at the pretty colors!
Image Trace Wrap-up
Using Image Trace turns your raster images into flawless, scalable vector artwork, making your designs stand out from the pixelated crowd. Not only do vector images give us more flexibility on many projects, but they also ensure a consistent and professional look across most platforms.
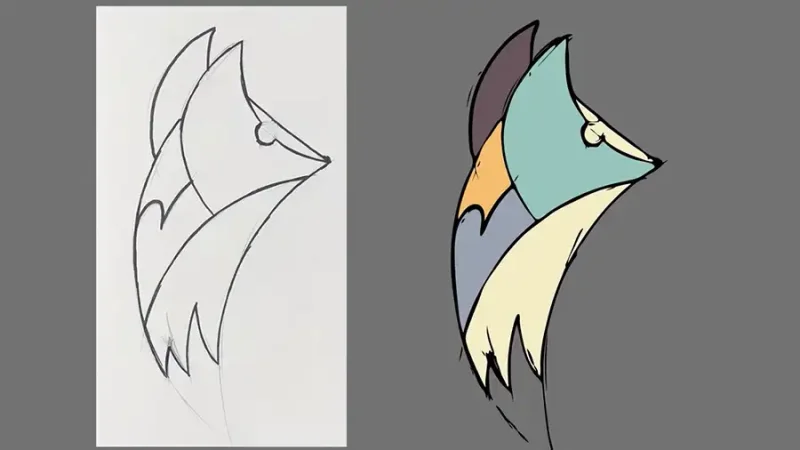
Before and After: Sketch to Vector
What’s Next?
You can dive deeper into Illustrator at Bring Your Own Laptop and explore the course this post was based on - Adobe Illustrator Essentials as well as my 30+ additional courses on Photoshop, Illustrator, Lightroom, Premiere Pro, Webflow, and more. As a BYOL member you will also enjoy personalized support, earn certificates, and tackle exciting community challenges. Head here to sign-up!
See you in class! – Dan
Popular posts

What Are the Best Canva Courses in 2026?
Daniel Walter Scott

Is Figma Free or Paid in 2026?
Daniel Walter Scott

What Are the Best Figma Courses in 2026?
Daniel Walter Scott

What Are the Best Adobe InDesign Courses? (2026)
Daniel Walter Scott
Go from zero to design hero with our awesome courses!