5 Simple Steps to Remove a Background in Photoshop

Daniel Scott
@dan
I’m writing to all the creative minds out there – and this time about Photoshop, Adobe’s bag of magic tricks for graphic and web designers, photographers, digital artists and, creatives in general.
Photoshop offers nearly 70 different tools that help you edit and retouch images, create powerful compositions, and build mockups for your products, apps, or websites.
Follow along to learn how to remove the background of a picture in Photoshop and breathe new life into your designs. If you make it to the end, I may surprise you with never-before-seen work of art that displays the full potential of this tool.
Before we start
This guide is based on a lesson from my Photoshop Essentials Training Course. Join the BYOL community to access this course and 30+ additional courses on everything from Photoshop to Figma and Premiere Pro. Learn all the skills you need to become the best designer you can be!
Step 1 – Select your background.
Let’s use the Quick Selection tool to (well, quickly) select that uninteresting background or that fun subject that will feel much better when placed in a happy new place!
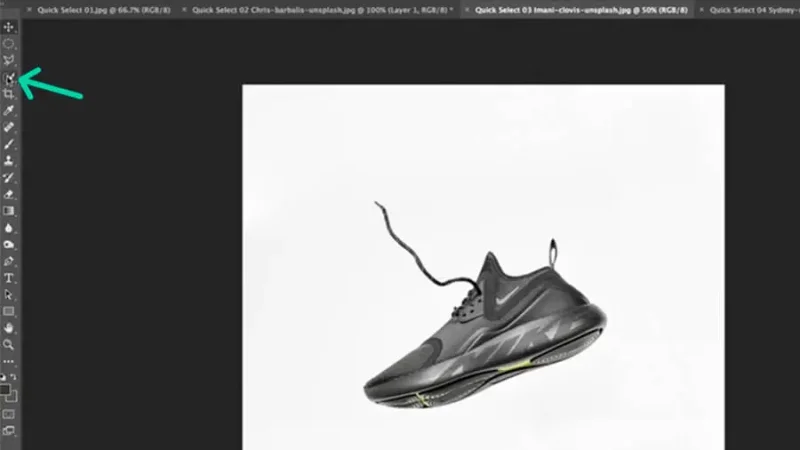
Running shoe on a white background
We will be working with the image of a shoe over a white background, as seen above. First thing to do is pick our Quick Selection tool from the left toolbar. If you can’t find it, you can use the search feature that sits on the workspace’s top right corner, click on the result and there you have it!
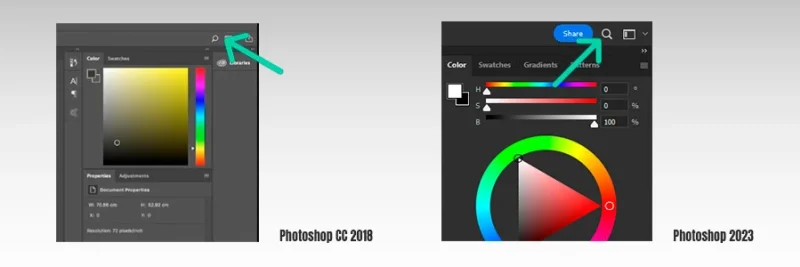
Search feature on Photoshop CC 2018 (left) and 2023 (right)
Next, we click and hold the left mouse button anywhere in the background and drag across the white space until it is all selected. How do you know it’s all selected? You’ll see the selection border – a.k.a. funny trail of “marching ants” – over the outside of the image and around your subject, the flying shoe!
Step 2 – Eyes on the subject.
With our background surrounded by “marching ants”, we now focus on the subject by easily inverting our selection. Let’s get it ready to run away from this void white scenario!
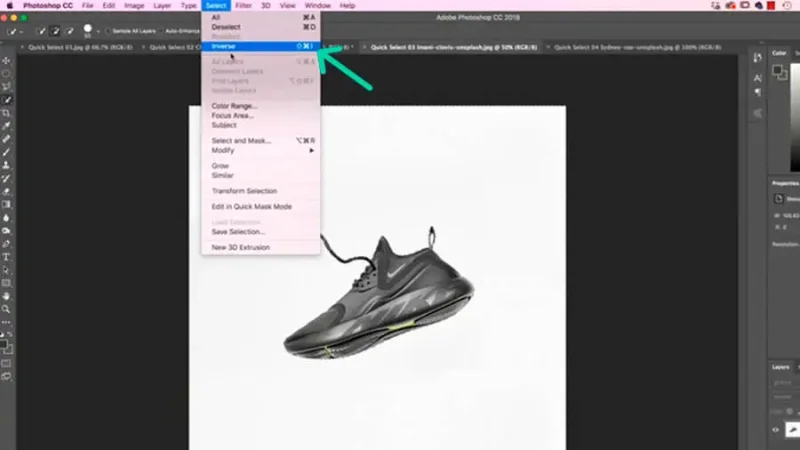
Invert selection from the Menu Bar or make it faster with shortcuts.
We will now set up the shoe to walk away by changing the focus of our image selection. Choose “Select” from the top Menu Bar and then click on “Inverse” (if you are, like me, a nerd for shortcuts, combine Control + Shift + i on a PC or Command + Shift + i on a Mac).
The selection border will now throw its arms around the subject and leave the background all by itself.
Are we all set to make some Photoshop magic? Almost there. Always remember to check for the hidden little details!
Timeout #1
There is a lot to discover about photo editing for design students and professionals. Have you ever thought about the basic rules behind this work?
Step 3 – The hidden little details.
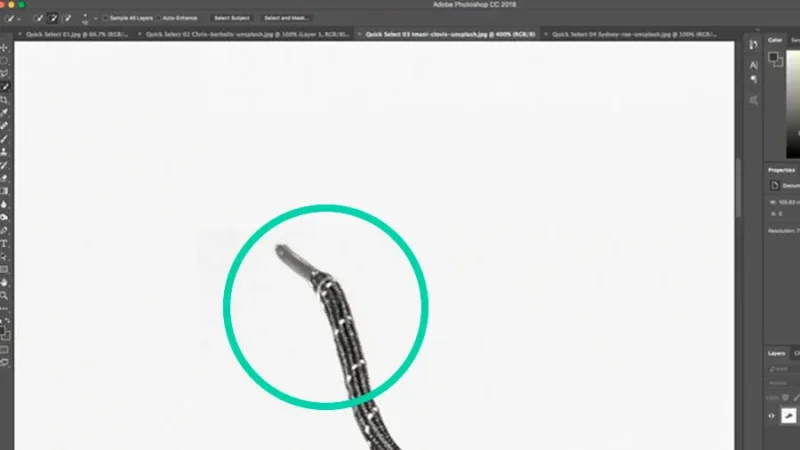
Now we zoom in and see if our selection has caught every little part of our shoe. Investing some time on these inspections will lead you up the path to Professional greatness!
Carefully observing our shoe, we find out that the tip of the shoelace, or anglet (don’t ask me how I know this), isn’t part of our selection. On the right, there is another part that the Quick Selection tool missed out: that ring on the back still has a bit of the background inside. We can fix this in no-stress mode!
Make sure every detail of your subject is selected.
With the Quick Selection tool still active, we look up at the Tool Options bar and make sure we have the “Add to selection” (the one with the “+” sign) option active. This will allow us to add the parts of the image that were left outside. Zoom in on the shoelace and adjust your brush size until it fits the anglet, click and drag until it’s all inside your selection border.
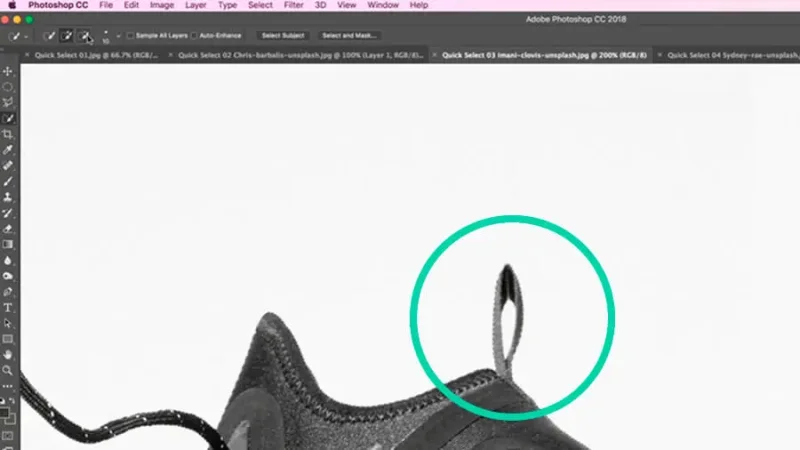
Always remember to check for gaps that show previous backgrounds.
Now we move to the ring on the back of the shoe, zoom in on it and (remember the Tool Options bar?) click on the icon with the “-“ sign (or “Subtract from selection” option). We can now subtract parts of our selection that were left inside the border. Cool! Click and drag inside the ring until all remaining white background is selected. Hit the delete button and away it goes!
Step 4 – Removing background – or moving the subject into a new one.
Your shoe selection is now complete and set to go! Time to move it to a fresh new background, one full of color, style, and texture that will build up the subject’s impact on users, add meaning and emotion to your design and make you feel like an image editing hero!
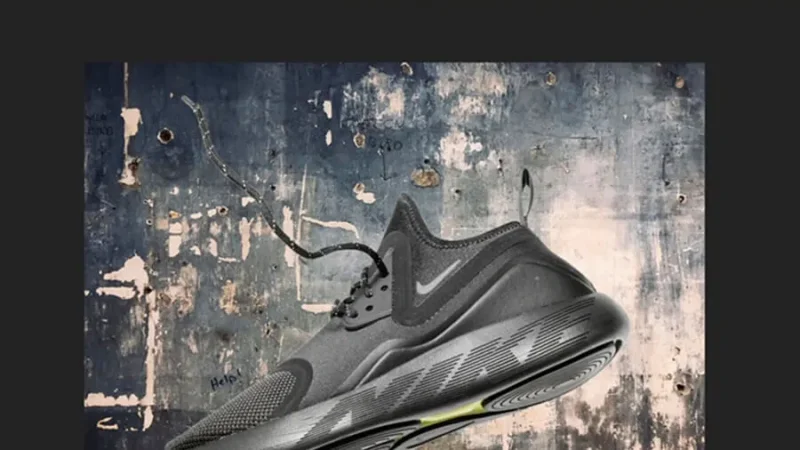
Your selection is now placed over a new background, rich in depth and texture.
This is the easiest step of all! Choose “Edit” from the top menu and click on “Copy” (or use the shortcut Control + c on PC or Command + c on a Mac).
Open your new image (the one with the background that best suits your project), go to the top menu, and click “Edit” and then “Paste”. Brilliant! Two clicks and your shoe now lives in a whole new stylish atmosphere.
Timeout #2
Should you stop here? No! Photoshop isn’t just about editing and retouching– it’s about making things feel believable. Even dreamlike imagery like special effects or fantasy themes with dragons and fairies, you should always look for the detail that make things look possible! When you work in Photoshop, go all the way!
Step 5 – Add realism by tidying things up.
This is a bonus for you. Let’s pause background removal and have a brief look at some edits and effects that will push your work to the top of the creative mountain.
Starting from the last image, we are aiming for realism. Let’s adjust scale, levels, and include a subtle shadow for depth.
We will go to “Edit” on the top bar and pick “Free Transform” to scale our shoe. You can use the shortcut Control + t on PC or Command + t on Mac. By adjusting the subject’s size, you will blend it more naturally with the background textures and leave room to bring more elements into your composition, like a cool logo or a marketing slogan.
Now let’s darken it to match the strong black on the background.
Adjusting your subject’s levels will blend it seamlessly with the new background.
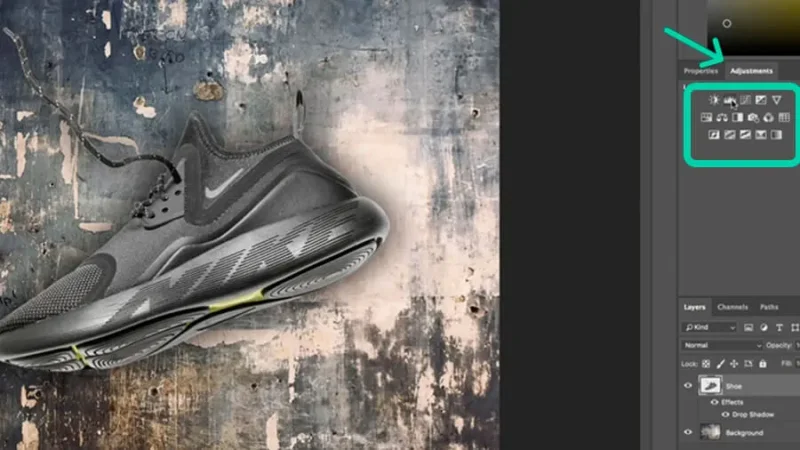
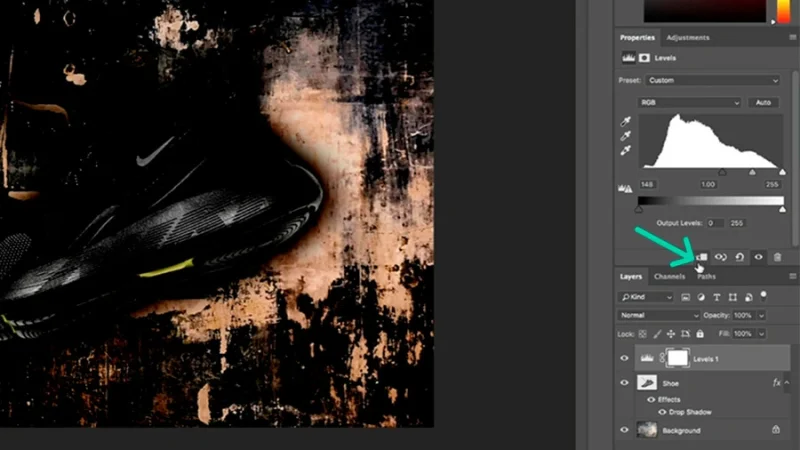
Select your subject’s layer, go to the Adjustments panel, and click on the Levels icon.
Pro tip: By default, the Levels tool will affect the selected layer and all the ones below it. In this example, you’d be adjusting levels for both shoe and background. To prevent this from happening, you must tell Photoshop that you only want to change that specific layer. You do this by clicking on the Clipping Mask icon below the Properties panel on the right.
Without setting a clipping mask over the selected layer, adjustments will affect different layers.
You can learn more about Photoshop’s array of selection tools in my Photoshop Essentials Training Course. Don’t miss it! It’s the ultimate place to go from Photoshop zero to Photoshop Hero!
Finally, let’s add a shadow to our subject. Remember to keep it subtle and natural. The best shadow effect is the one you’re not aware of. Select your layer, click on the effects “fx” icon at the bottom of your Layers panel and select “Drop Shadow”. Adjust the different settings until you’re happy with the result and click “OK”.

Shadows add extra depth and realism to a composition.
And that’s it!
Plain white to amazing in minutes. Isn’t this awesome? Now you know how to remove a background in Photoshop and turn images into the stuff dreams are made of. Our shoe is now ready for that social media ad, marketing campaign, or website homepage.
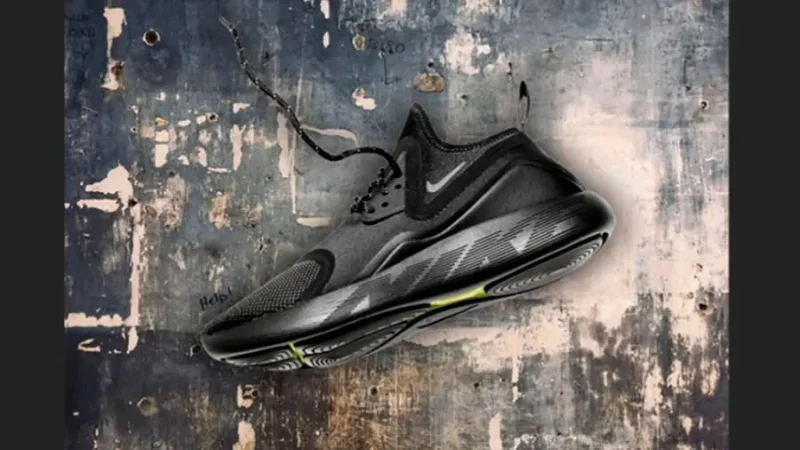
New composition, ready for an awesome marketing campaign!
BONUS! Imagination and the latest AI tools working together. Yes, they can!
As an example of some of the amazing magic that you can conjure using this technique and a little editing work, I leave you with artwork created by a Bring Your Own Laptop student, designed from an ordinary mobile phone photo and a background image generated on Adobe Firefly.

Finding new and impactful backgrounds will transform your projects, quick and easy!
What’s Next?
Ready to take your Photoshop skills to the next level? When you become a BYOL member, you gain access to my Photoshop Essentials and Photoshop Advanced courses as well as 30+ additional courses on Figma, Illustrator, Lightroom, Premiere Pro, Webflow, and more. As a BYOL member you will also enjoy personalized support, earn certificates, and tackle exciting community challenges. Get started here.
See you in class! - Dan
Popular posts
Adobe MAX 2025 - File Download
Daniel Scott
-1750161634.webp)
Modeling Shortcuts in Blender
Daniel Scott
Plugins in Illustrator
Daniel Scott
-1748277302.webp)
How to Straighten the Horizon in Photoshop
Daniel Scott
Go from zero to design hero with our awesome courses!


- Powered by Marvin
- Terms of use
- Privacy policy
- Cookie policy
-
- © Bring your Own Laptop Ltd 2026