
How to Crop in Figma: Step-by-Step Guide on Cropping Images

Daniel Scott
@dan
Figma is a powerful web design tool. Image cropping or masking in Figma is a helpful technique that allows designers to hide or reveal parts of an image using shapes. Using masks, designers can create beautiful compositions, crop images, and blur backgrounds. Let's explore three ways to crop in Figma by masking images with shapes.
The lessons in this blog post are from my Figma Essentials course. When you become a BYOL member, you gain access to this course as well as my 30+ additional courses on Figma, Photoshop, Illustrator, Lightroom, Premiere Pro, Webflow, and more. As a BYOL member, you will also enjoy personalized support, earn certificates, and tackle exciting community challenges. Get started here.
Option 1: Masking an image with a shape
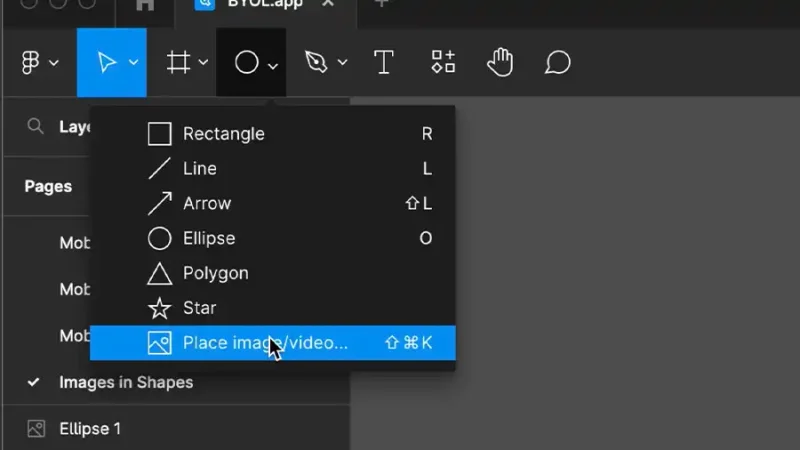
From the Shape tools dropdown menu, select Place image/video...
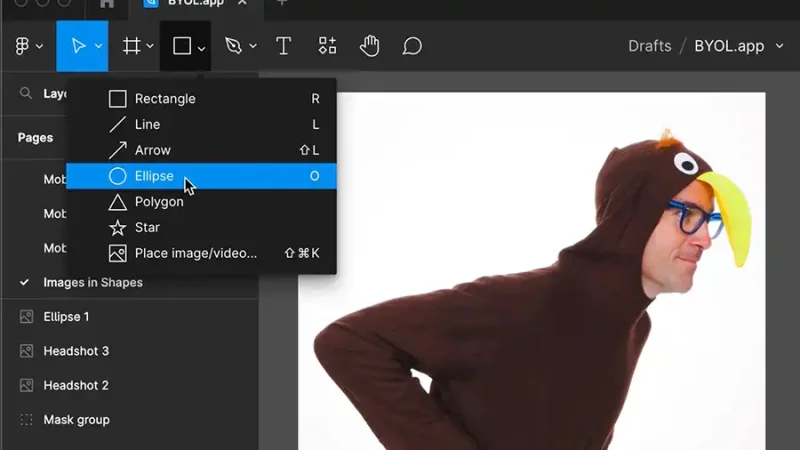
After placing your image in Figma on the canvas, return to the Shape tools menu and select a shape of your choice. We are using the Ellipse tool for our example.
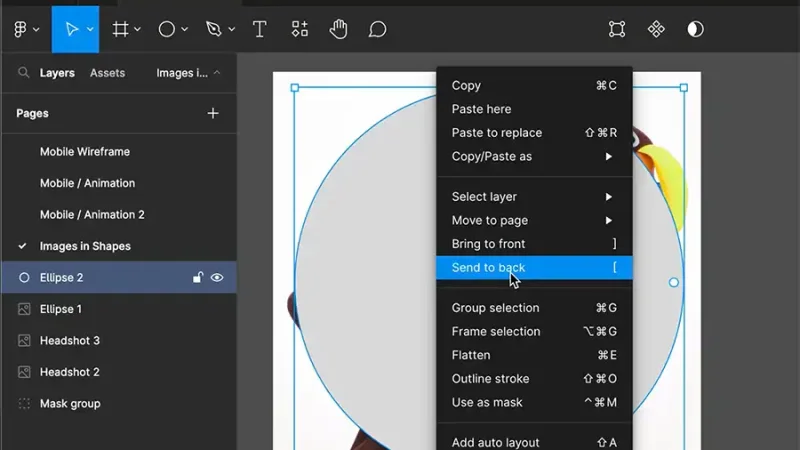
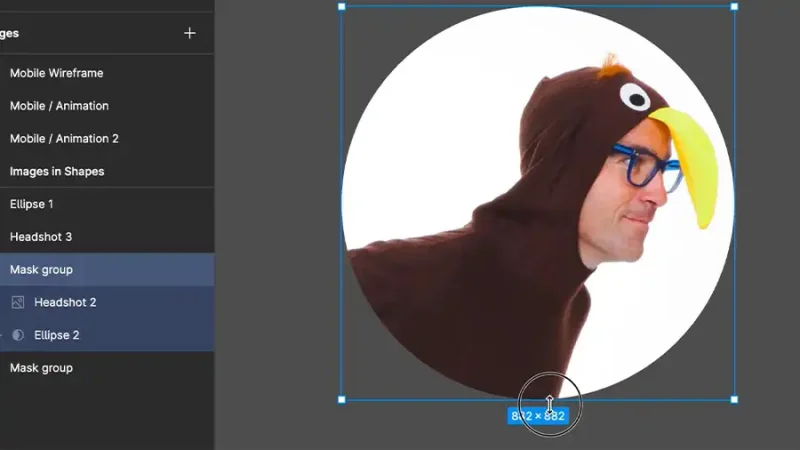
Now let's rearrange the order of the image and shape by right-clicking on the shape and choosing Send to Back.
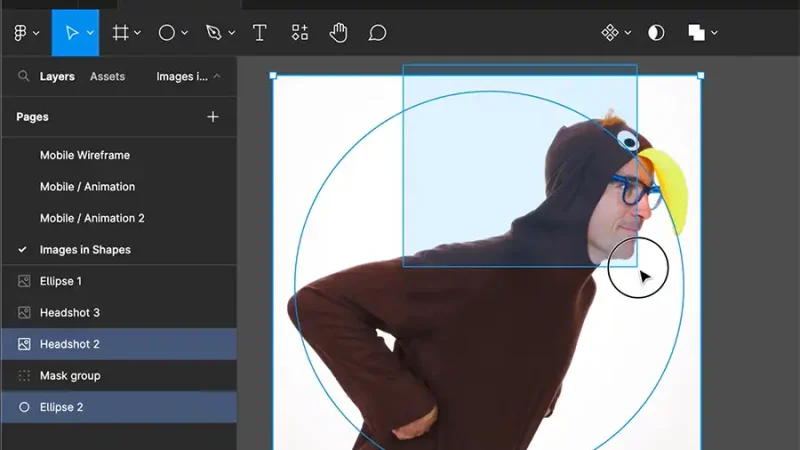
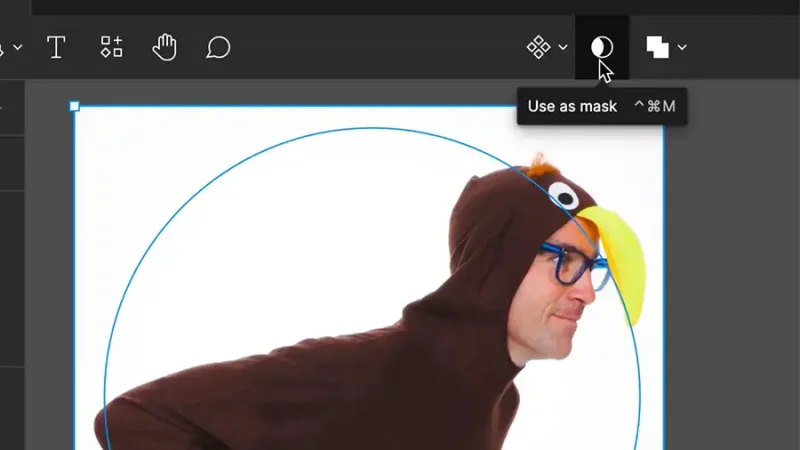
Select both the image and shape by clicking and dragging across them.
Click the Use as Mask icon in the toolbar with the items selected.
Finally, make adjustments to either the image, the shape, or both.
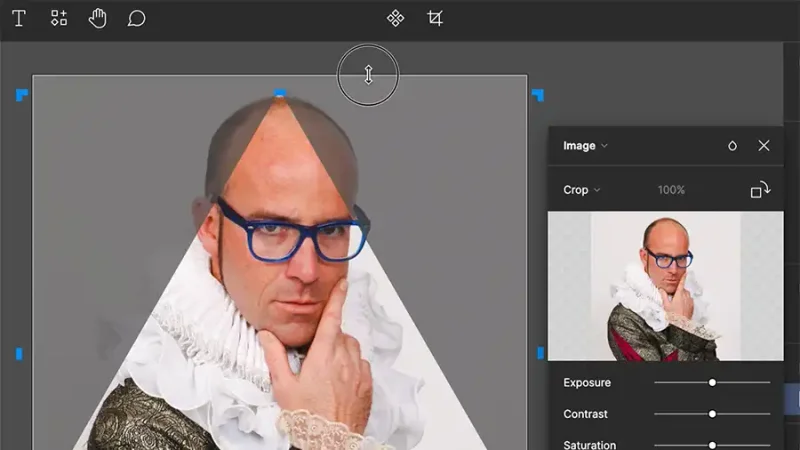
Option 2: Filling a shape with an image
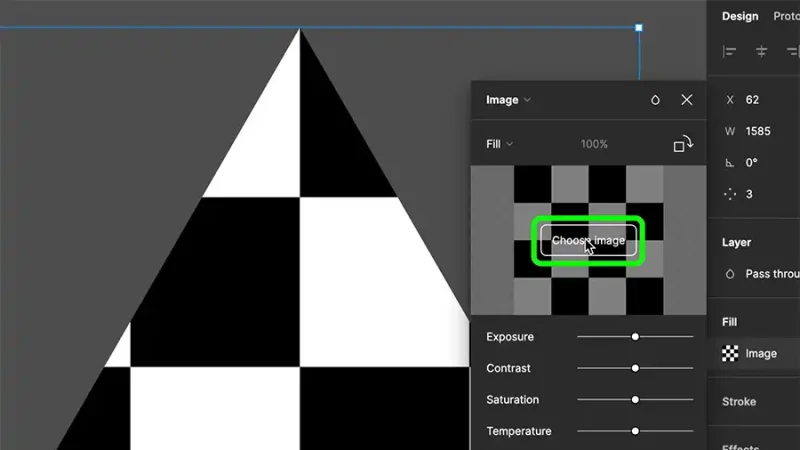
In this example, we will start with the Polygon shape from the Shape tools dropdown menu.

With our shape on the canvas, select the Fill color from the Design panel on the right-hand side. In the top left corner of the popup panel, open the dropdown menu by clicking Solid. Let's change this to Image.
Pro Tip: Looking for a keyboard shortcut? You can check out more tips and tricks on our Figma UI UX Cheatsheet to help you develop quicker workflows and produce more consistent designs.

Click Choose image and browse for a picture.
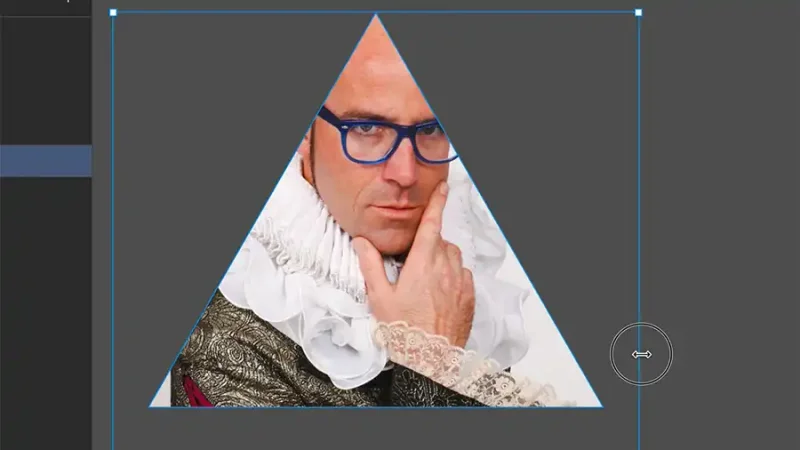
You are finished if you are happy with how your picture appears inside the shape. However, if you'd like to adjust the image or the shape, change the Fill option to Crop.
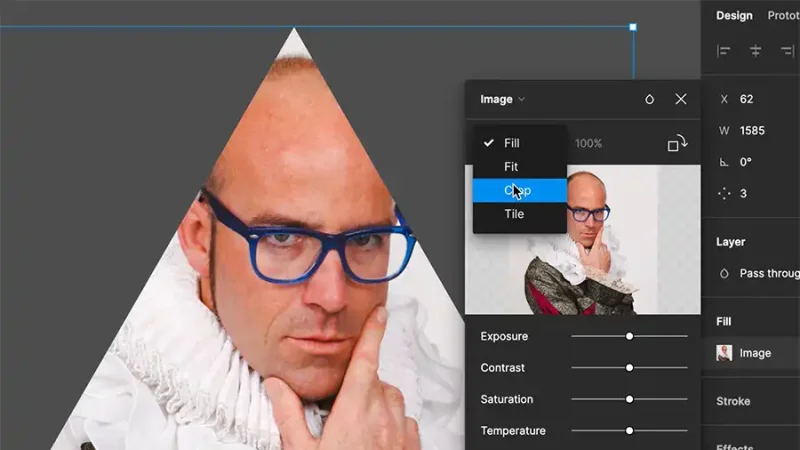
Use the edges of the image to change its dimensions. Remember to hold Shift while dragging to keep the proportions the same. Use the blue Crop handles to make adjustments to your shape.
Finally, resize your image in a shape by closing the popup panel, clicking on the group, and dragging the edges and/or corners.
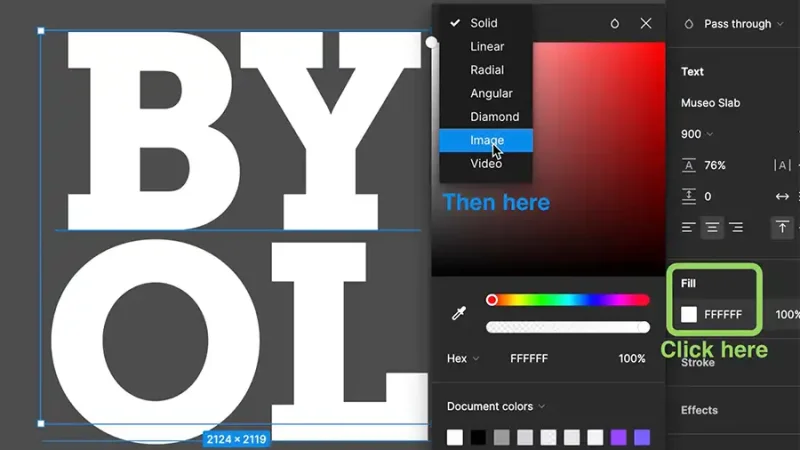
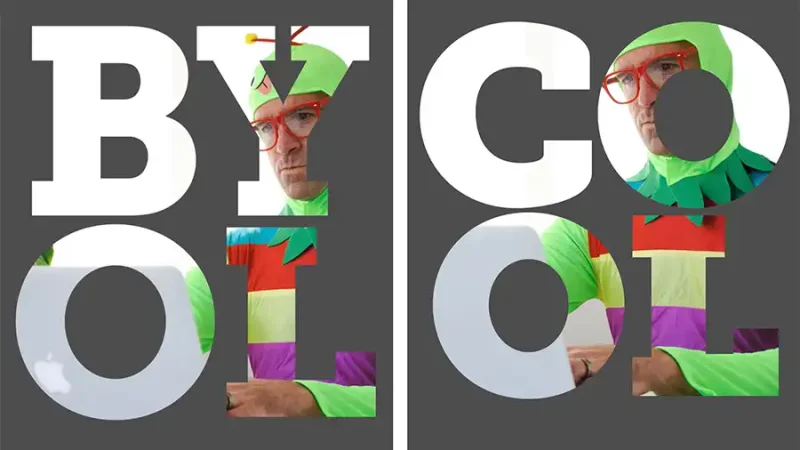
Option 3: Filling text with an image
This example is very similar to filling a shape with an image. We will start by clicking the Text tool in the main menu. Click and drag a box on your canvas and add some text.

With our text in place, select the Fill color from the Design panel on the right-hand side. In the top left corner of the popup panel, open the dropdown menu by clicking Solid. Let's change this to Image.
Click Choose image and browse for a picture.
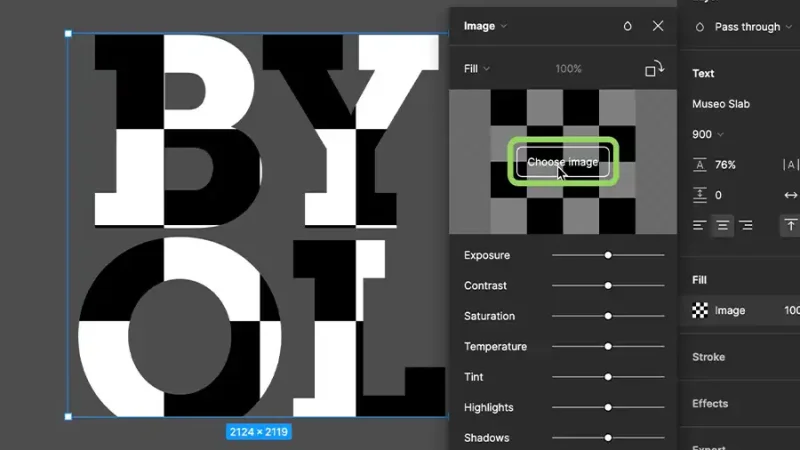
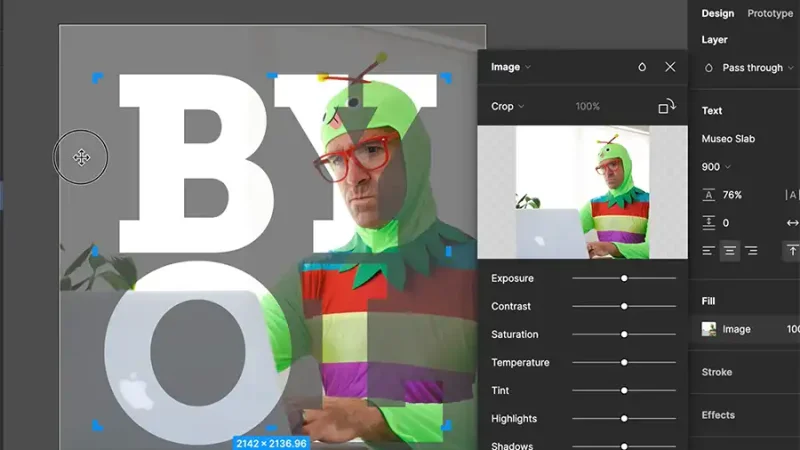
You are finished if you are happy with how your picture appears inside the text. However, if you'd like to adjust the image or the text, change the Fill option to Crop.
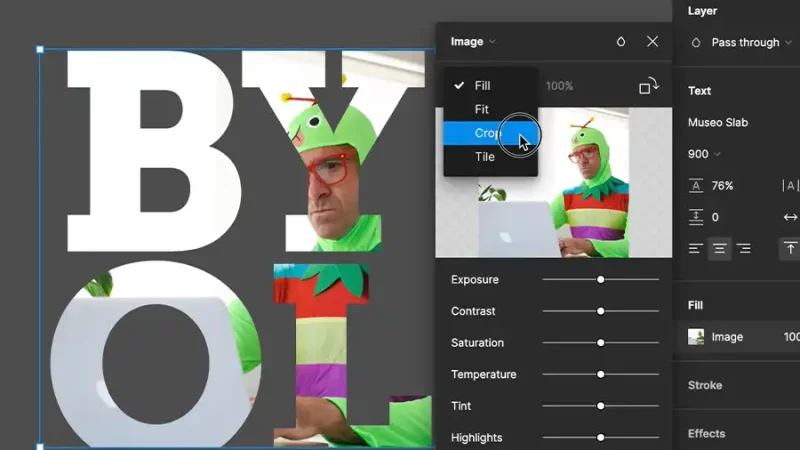
Use the edges of the image to change its dimensions. Remember to hold Shift while dragging to keep the proportions the same. Use the blue Crop handles to make adjustments to your text.
The best part about adding images this way is that the text is still editable!
Ready for more? Become a BYOL member!
Explore 30+ Essentials and Advanced courses in Figma, Photoshop, Illustrator, Lightroom, Premiere Pro, Webflow, and more. Enjoy personalized support, earn certificates, connect with other creators and tackle exciting community challenges.
START YOUR LEARNING JOURNEYUnlimited access to ALL content
Instant access to all of our courses and exclusive content while you're a member.
Priority advice and support
Ask us anything! Our amazing Teaching Assistants are here to support you
Certificates of achievement!
Celebrate and share the milestones in your learning journey
Masks in Figma Wrap-up
There you have it! Three easy ways to add images to shapes and text for your designs.
Go farther with Figma in my Figma Essentials course which covers the ins and outs of this great web design tool. The courses will teach you how to create wireframes, implement colors and images in your designs, as well as create icons, buttons, and other UI components. Plus, so much more.
When you become a BYOL member, you gain access to this course as well as my 30+ additional courses on Figma, Photoshop, Illustrator, Lightroom, Premiere Pro, Webflow, and more. As a BYOL member, you will also enjoy personalized support, earn certificates, and tackle exciting community challenges. Get started here.
See you inside!
Popular posts

Adobe MAX 2025 - File Download
Daniel Scott
-1750161634.webp)
Modeling Shortcuts in Blender
Daniel Scott
Plugins in Illustrator
Daniel Scott
-1748277302.webp)
How to Straighten the Horizon in Photoshop
Daniel Scott
Go from zero to design hero with our awesome courses!


- Powered by Marvin
- Terms of use
- Privacy policy
- Cookie policy
-
- © Bring your Own Laptop Ltd 2026