How to use Lightroom Remixes
Questions


Student Gallery
Be the first to share something.
Course info
Overview
I've won many Adobe teaching awards and recently reached a huge milestone....I have now had over a million people worldwide who have studied using my online courses like this one!
What’s in the course?
- - White balance
- - Temperature and color correction
- - Masking
- - Portrait
- - Wedding
- - Landscape
- - Wildlife
- - Automotive
- - Event
- - Architectural
- - Drone
- - Travel
- - Product
- - Food
- - Soften and smooth skin texture
- - Highlight eyes and whiten teeth
- - Enhance hair and make eyes and lips really stand out in a portrait
- - Remove unwanted elements from a photograph
- - Color grade videos
- - Reduce noise and graininess from photos
- - Best practices for white balance, temperature & color correction.
- - Unlock the power of masking.
- - You’ll cover all types of photography genres including Portrait, Landscape, Wedding, Night, Wildlife, Automotive, Event, Architectural, Drone, Travel, Product Food.
- - You’ll know how to color grade like a professional, simple grades and then moving into distinctive powerful color grades to make your images really pop.
- - You’ll retouch images, making skin smoother, eyes & teeth whiter. Make hair, eyes and lips standout in portraits.
- - Learn how to remove parts of an image.
- - Learn how to color grade videos.
- - You’ll even learn when and how it might be appropriate to jump out to Adobe Photoshop.
- - Do you have noisy, grainy images? After this course, you’ll know what tools and techniques to use to remove it.
- - Learn how to add the noise, grunge & grain back in for a powerful visual statement.
- - Need to work fast? You’ll learn where to find and how to use the best Presets, LUTS & Profiles.
- - You’ll take your skills and apply your edits in bulk to a huge group of images all at once.
- - Learn Lightroom's amazing organizational abilities. Quickly sorting, comparing, searching, grading & backing up images.
- - You'll learn the best settings for printing your images and sharing on social media without losing details and how to package up a shoot and easily share with a client
- - Adobe Lightroom CC Desktop (not Lightroom Classic)
- - No prior knowledge or experience with Lightroom is required
- - No prior knowledge or experience in Photography is required
- - This course is really aimed at people new to photo editing software and photography in general. We’ll start right at the beginning and work our way through step by step.
- - You might be using the biggest fanciest camera in the world or shooting on your phone that’s held together mostly with sellotape. It doesn’ matter, Lightroom is amazing for both.

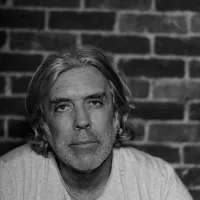
Daniel Scott
Founder of Bring Your Own Laptop & Chief Instructor
instructorI discovered the world of design as an art student when I stumbled upon a lab full of green & blue iMac G3’s. My initial curiosity around using the computer to create ‘art’ developed into a full-blown passion, eventually leading me to become a digital designer and founder of Bring Your Own Laptop.
Sharing and teaching are a huge part of who I am. As a certified Adobe instructor, I've had the honor of winning multiple Adobe teaching awards at their annual MAX conference. I see Bring Your Own Laptop as the supportive community I wished for when I was first starting out and intimidated by design. Through teaching, I hope to bring others along for the ride and empower my students to bring their stories, labors of love, and art into the world.
True to my Kiwi roots, I've lived in many places, and currently, I reside in Ireland with my wife and kids.
Certificates
We’re awarding certificates for this course!
Check out the How to earn your certificate video for instructions on how to earn yours and click the available certificate levels below for more information.
Downloads & Exercise files
Transcript
Hi everyone, in this video I'm going to show you what a remix is...
a remix is a way that a photographer can share their...
both their original image and their edit; original, edit, original, edit...
and the cool thing about it is there's loads of images in here...
you can see befores and afters...
oh...
and the nice thing is, when you go into them...
it actually shows you all the steps that they've done...
I can even hit 'Play', and look, it'll take me through all the different steps...
that that photographer went through to get to their final result...
you can start to see and learn where some of those big changes happen.
So I'm going to pause that there...
you can also see other people that have remixed that exact same image...
and start to see what they did and how they got to their different results...
all listed here...
gets better, you can remix it, you can go back to that original...
and make your own adjustments and upload it...
here's the one we do in this video, where is he, it's my cat...
here's my As Shot, and we're going to use the skills...
we've learned so far in this course to get to here...
oh, mesmerizing, cats are awesome, remixes are awesome...
let me show you how to do it in Lightroom.
All right, remixes, where are they?
They are over here in your photos, so 'P' to pop that out...
under 'Discover' there's one called 'Remixes', click on that...
so what are remixes? It allows you to edit other people's photographs...
up until now what we've been doing is grabbing stuff from...
like that signature edit site, and a few other free image libraries...
or using your own...
but sometimes you don't have the chance to, I don't know...
find a sunset, or a building, that's really cool...
so you can find other people's images to do it, and edit...
and that's what a remix is...
the original photographer uploads it to this remix here...
here it is, here, you can-- so me as the photographer can upload an image...
and I can share it with other people, say...
"Have a go, have a crack, see what you can do."
You can kind of tell, when you hover above these ones, they kind of toggle between...
the original, As Shot, and the edits...
so hover above it, before, that's after, before...
before, after, so you can start to see, sometimes they're kind of side by side...
and sometimes you need to hover above them, before, after...
so yeah, it's really amazing, so up until now we've been using kind of...
other people's stuff through signature edits...
now we're going to start in this course using remixes...
now the thing is, I'm going to show you the interface here...
and I bet you, Adobe are waiting...
just for me to release this video to go change it all up, that's what they do...
especially with remixes, they're changing this quite a bit...
because it's new, and it's awesome, so the interface might change a bit...
but the fundamentals will be the same...
so before we go and remix anything...
let's have a little look, about what's cool about it.
I'm going to use this one here, yours is not...
you know, it's going to be different for everybody...
so just click on one, not the remix button but the actual image itself...
because we're not going to remix it just yet...
we'll do that in a little bit, just click on it...
and what I like to do is switch it to this view...
you're going to be defaulted to this view...
I like to go to this Comparison view, As Shot...
and this is the original photographer's edit...
so that's the way they got it, and that's where they ended up...
the cool thing about it is you can play it and watch all their steps, can you see...
moving down there without me doing anything...
it's moving through all their edits...
so you as a newbie editor can start to see like...
where did all of the good stuff come from...
where is the bits that you might be up, color mixing, that's what we just did...
did a lot of color mixing...
color grading, sharpening...
there's going to be things in this list that you don't know about yet...
because we're going to go through the class still and get to them.
You can pause it by clicking it...
you can get it started again by playing it...
and just have a look, where is the big adjustments...
the tone curve here was a really big one...
we'll look at the tone curve later on, but like temperature...
just subtle changes, can you see, and then they get to the color mixes, pause it...
just to see what they've done, ah, they went up 14...
or they changed the temperature to this...
or I didn't even know there was a color grading option...
which we're going to get to in the course.
So it's really nice to see other people's edits...
yeah, that's the original edit...
but look, all the other people, other photographers...
other editors who have done a remix on it, there's loads...
you can go through and say, "Oh, that one looks cool, I wonder how they did it"...
'Play', As Shot, cropped it...
profile, tone curve, point curve...
point curve, what did they do, temperature, let's do more of that...
and you can kind of get ideas about how other people got to a place, super handy...
and you can copy them, you can save it as a preset...
we'll cover presets a little bit later in the video-- course as well...
but it's just really nice to see how other people got to where they're going...
and it's really nice to kind of see that As Shot, the comparison.
All right, I'm going to do a remix here now just to kind of take you through it...
and in the next video we'll do a class project where you have to do your own.
So at the moment you just watch this, so I'm going to go to my remixes...
I want to find an image I want to remix...
and it has a really good search option up here...
up until now it's been tricky to find good raw images but now we've got remixes...
we can decide, I only want to show remixables...
because that's what I want to do...
let's say you want to pick animals, food, or whatever you want, really handy...
you can do more specific searches, you might be, I don't know...
it depends, let's go animals, let's do cats, here we go...
and what I'm going to do is pick one that I want to remix...
you're going to be seeing a lot of the edits that people have done...
let's have a look at something, you wait there, I'll pick one.
All right, I found one, that took way longer than I thought...
because I want to do a demo of, like some of the color mixer stuff...
so I'm going to remix this one...
so basically it opens up Lightroom, with like, like we had shot it...
but the original is Lila and Lindsey Robinson...
and this is the As Shot, so now I get to start my own edit...
so I'm going to do some of this light adjustments, done that loads before...
so I'm just going to kind of speed this one up...
and what you might have seen in the speedy version...
there's a lot of me going like this, all the way...
that's what I do a lot in my editing process...
I kind of don't do small adjustments, I do big stuff...
and just see what it does, and how much, and how far...
and then I kind of just get jiggly jiggly down, you know, like...
let's get lower and lower, and lower...
so that's going to be my light adjustments...
backslash, '\', backslash, '\', and now I want to use my color mixer...
because that's why we practiced, before...
so I'm going to use my little target and I'm going to say...
actually this, I'm going to work on hue, no saturation...
I want to make...
this brighter, I'm just clicking and dragging it up...
before, after, before, after, can you see, it's a bit tricky, it's only subtle...
luminance as well, do I want it to be brighter, darker?
I think I want it to be darker, and I want the saturation to be higher...
before, after, before, after...
often I just do the eyeball on the color mixer...
because if I do the backslash it's going to do all my tone adjustments...
I keep saying tone, it's light...
at the same time I feel like it's too big a change...
I just want to see what I'm doing in the color mixer...
I'm using the target because the target's going to allow me just to grab...
specific things, like I'm going to grab the eyes, and like, what color is that?
Yellow, turns out, what is it...
yellow, and a little bit of, I don't know what that little dot is, too small...
but I'm going to exaggerate it, what are we dealing with?
Saturation, and just the hue...
luminance...
too far, Dan, too far...
kind of cool...
feel like it needs a vignette, we haven't done vignettes...
but I think I've thrown this in a few times...
it's under Effects, I think it's cool...
oh, look how more dynamic he looks.
So that's my remix...
obviously, you can go through everything that you've learned so far...
and we're going to go to Next...
this is the name of the image...
the original was done by this, we can add any comments...
it's a good way to help express what you were trying to do...
I'm going to post my remix, and it can take a little while...
for your remix to actually get processed...
and that's the first remix on this particular one...
oh no, my one hasn't appeared yet, let's have a look...
there's one, there's my one coming along...
so it's just the original photographer's remix so far...
As Shot, and my one will process, and be there in a second.
All right, so there's my edit, cool thing about it is...
you can play it as well and see what you did...
even though you were just there because there's As Shot...
and you can see it working through over here...
shadows, whites, contrast, blacks...
oh, very cool.
So now to share this with the assignments in social media...
there are, you can share the link, but what we're after is...
before and after photographs...
so you're going to use screenshots...
so what we can do is go to the top here, As Shot...
and take a screenshot of this, get this last one, take a screenshot...
and those are the things that you can post...
make sure you credit the original photographer...
so jump in there and figure out who that was...
and make sure you credit them if you are posting on social media.
Now in terms of taking a screenshot...
on a Mac, I know it off by heart, it's 'Command Shift 4'...
and you just got to click and drag...
and wait for the play button to go away, it does go away eventually...
and you end up with a screenshot on your desktop...
and then you go to this last one and do the same thing, 'Command Shift 4'...
drag a box around it all, and just wait until it goes...
and you'll have two before and afters to submit, on your desktop...
on a PC it's different, you have to check what it is on your version of Windows...
just do a Google, "screenshot on PC"...
and you can use that to post your before and after.
All right, we'll leave that one here...
I was going to show you how to send your own images up...
we'll do it in the next video because this one's already too long...
everyone needs a wee break, and a cup of tea, you go do that...
I'll see you in the next video.
- Powered by Marvin
- Terms of use
- Privacy policy
- Cookie policy
-
- © Bring your Own Laptop Ltd 2026