What is Premiere Pro?

Daniel Scott
@dan
In this post, I will be introducing Adobe’s professional-level video editing app: Premiere Pro! An the industry standard for movies, television, marketing and online content, Premiere Pro is the first choice for beginners and experts who dream of having their name on Hollywood’s Walk of Fame!
We’ll be exploring Premiere Pro’s top tools, workflow and integration with other Adobe apps, learning features, ecosystem workflow, and comparing it with some of the current competitors, so enjoy the read and have fun!
When you become a BYOL member, you gain access to my Premiere Pro courses as well as my 30+ additional courses on Photoshop, Lightroom, InDesign, Figma, and more. As a BYOL member you will also enjoy personalized support, earn certificates, and tackle exciting community challenges. Head here to sign-up!
What is Premiere Pro?
Premiere Pro is Adobe’s solution for video editing, and is used in a vast range of productions, from professional film, tv shows, and documentaries, to commercials and online content such as YouTube or social media videos.
The versatility of Premiere Pro makes it a fantastic option for all creatives.
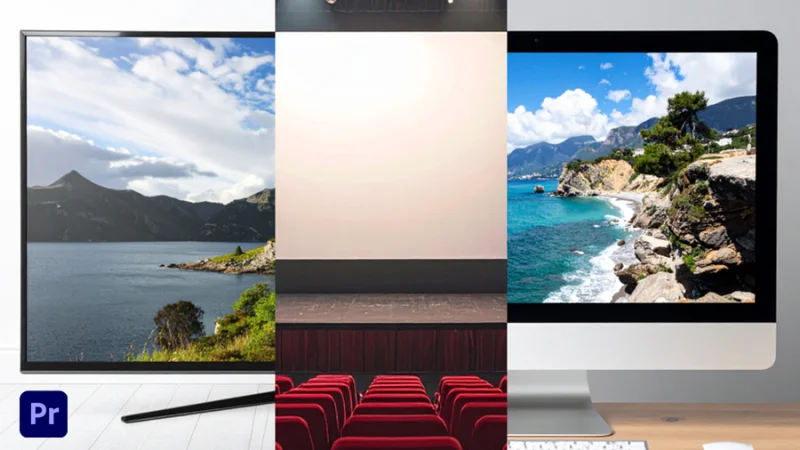
Every time you turn on your television or streaming app, go to the movies with friends, or browse your YouTube and social media platforms for new content, you can be sure you will find Premiere Pro videos.
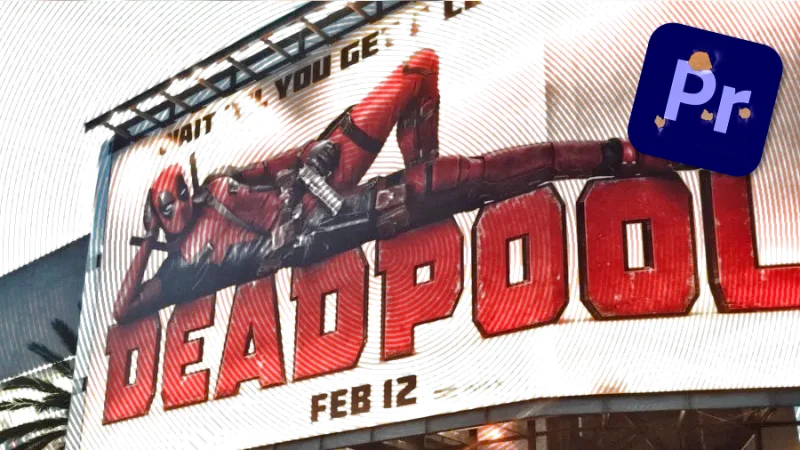
Did you know that “Saturday Night Live” uses Premiere Pro for post-production work? And that the movie “Deadpool” was entirely edited in this app? Professionals use Premiere Pro because it allows for complete control over the editing process, due to timeline-based and non-linear workflows (we’ll get to that in the next topic) and top-notch features like color grading, audio mixing, and special effects integration with other apps, like After Effects.
Premiere Pro takes on Hollywood! Will you be the next star?
There’s endless potential! Are you planning your first award-winning motion picture or editing your family vacation video? Read on and figure out if Premiere Pro is the right choice for you.
What are Premiere Pro’s Top Features?
Premiere Pro offers professional-level features – that can be easily learned by beginners – making it one of the most powerful and versatile video editing software in the industry. Without making things too nerdy and technical (we’ll leave that for our Essentials and Advanced courses), let’s have a look at all the game-changing tools you will be working with.
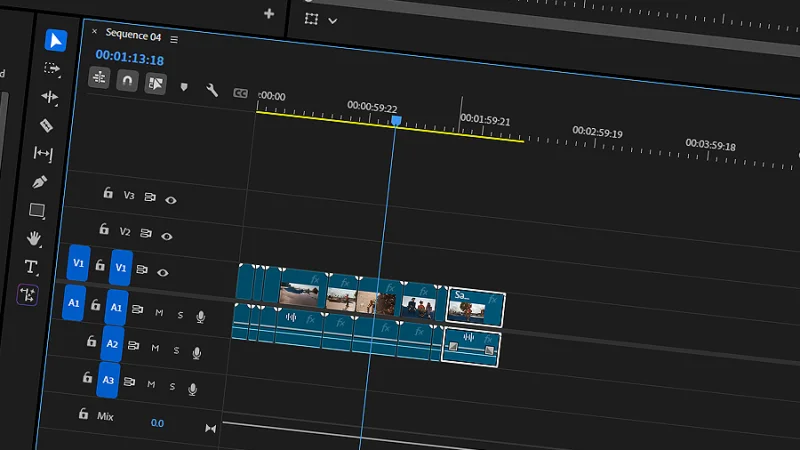
Timeline
Premiere Pro allows for a non-destructive workflow based on timeline-based and non-linear editing. Let’s start by understanding what these are:
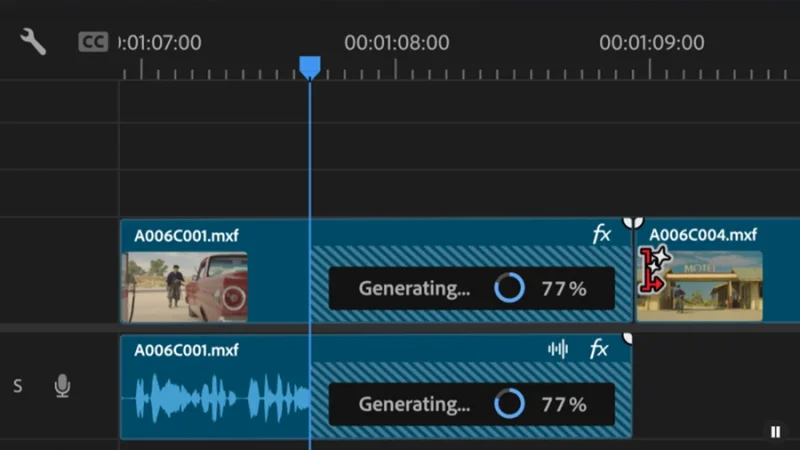
You can drag and drop your footage (raw, unedited videos captured with a camera) into a multi-layered Timeline to create a new scene, or Sequence. You don’t have to set a specific order to your clips as you drop them in the Timeline, because it is incredibly easy to arrange, cut, and trim them to any size and order, without any changes to the original files. Cool, huh?
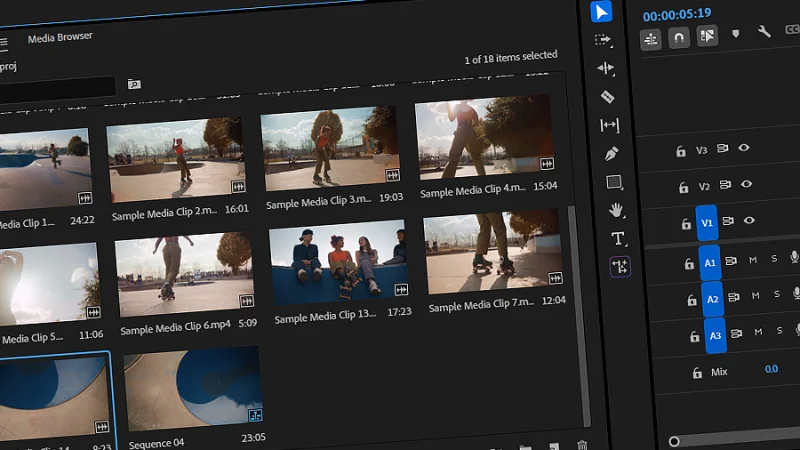
It is so easy to add your footage clips to Premiere Pro’s timeline and start editing!
Advanced Audio Mixing
Sound is key to a professional edit and efficient storytelling. Premiere Pro offers incredible audio mixing and enhancement tools. Without leaving the Timeline, you can balance audio levels across different clips for best sound consistency, add, clean, and enhance voice layers, remove background noise or bring that epic soundtrack that will make your production intense and memorable! If you still want to take your audio to an upper level, Premiere Pro shares your audio with Adobe Audition so you can finetune every detail. Awesome!
Audio is a vital part of an editor’s work. Give it full attention and use Premiere Pro’s tools to make it sound unique.
Color Correction and Grading
Colors are another vital piece for video editing. Properly set, colors ensure consistency and play as important a role as the soundtrack. Colors also add vibrancy and intensity to a scene, guide the viewer’s focus to specific details, and set the overall mood to the whole story.
So, is there any difference between Color Correction and Color Grading?
Yes, absolutely!
Editors start with Color Correction – making the shots look natural, balanced, and visually realistic. You should start with fixing white balance, so whites look absolutely white. This step is key for what comes next, has an impact on all the other corrections, and on the grading process itself. Next, you focus on exposure – making sure the shot is not too dark or too bright. Then you move to contrast and saturation – to make details accurate and clearer, skin tones more natural, or skies look as real as possible. Finally, you need to ensure that these visual settings flow across all clips for consistency.
Color Grading takes this polished footage and adds the emotional appeal, enhancing the storytelling, or adding that signature, or visual identity. Will we ever forget the cold, green tones revealed when characters were inside the Matrix…? Editors choose the best palettes for the emotional connection and response they are looking for by making colors warm or cool, vibrant or smooth, or emphasizing specific tones. Settings like contrast, shadows, or highlights are fine-tuned in this step to add a special cinematic appearance.
Transitions and Visual Effects
Star Wars fans recognize the importance of Transitions immediately! How can we forget those horizontal and vertical sweeps across the screen that moved us from the dark corridors of an Imperial Cruiser down to the vast plains of Tatooine? We can manage transitions in Premiere Pro, to make sure that all shots flow seamlessly, hinting at a shift in time, space, or tone. Premiere Pro offers multiple options for transitions – from the Star Wars classic wipes to cinematic fades to white and black – all of these are fully customizable, to give you all the creative freedom you need!
Visual Effects in Premiere Pro are not about explosions, lasers, or deadly robots coming from the future, although the integration with After Effects can do a great job with many of these. Visual Effects in Premiere Pro adds a new layer of quality and meaning to your videos. All these effects can be combined and fully customized. Here’s some of the tools you may be using from the beginning:
Warp Stabilizer – Automatically smooths handheld footage to reduce motion impact.
Ultra Key – Green screen editing for backgrounds, subjects, and special effects.
Gaussian and Directional Blur – Used to stylize, add depth, or make your scenes feel all dreamy and smooth.
Lens Distortion – Fixes or reproduces camera lens effects, like curvature or fisheye distortions, bending of light, and other tricks can make your videos more realistic and unique.
Noise or Posterize Effects – Aiming for that vintage VHS look or digital glitch vibe? These are the fully editable tools that will take you there!
There’s a lot more to explore on Transitions and Visual Effects, this is just a glimpse of what Premiere Pro has in store for you!
Titles and Motion Graphics
Written words direct and support your content and stories in Premiere Pro. These may come in the form of:
Main Titles – Opening title or closing message.
Lower Thirds – Animated nameplates or location information.
Subtitles – Text in sync with dialogue or narration for translation and accessibility compliance.
Callouts – Text that points out specific elements in the frame – like in a class video!
Social/Brand Tags – Wordmark Logos or social media handle information.
All these text elements are fully editable! You can keep your videos on-brand and give them a recognizable production look by adjusting font, color, animation, drop shadow, and backgrounds – all in a quick and easy settings panel.
Motion Graphics templates (or MOGRT files) are frequently imported from apps like After Effects and applied to Premiere Pro to add next-level, animated titles to videos, but keep in mind that there are many more types of animated templates that you can adapt and use on your edits, like animated logos, graphs, icons, call-to-actions, etc.
Multicam Editing
Multicam editing is perfect for editing and synchronizing footage captured with multiple cameras, like sports, corporate and social events, concerts, interviews, etc. With Multicam editing, you can switch between multiple camera angles and pick the best shots from each as you make your trims and cuts. Oh, and Premiere Pro also gives you a valuable hand in audio sync as well! Awesome, right?

Multicam editing is incredible to create flawless and exciting sports action cuts!
Learning Premiere Pro
I have to make it clear that Premiere Pro has a learning curve to be climbed, if you want to deliver superhero-level videos to your clients, employers, social media followers, or friends and relatives. However, nothing stops you from using Premiere Pro to create your content from day one and develop your skills as you gradually add layers of complexity to your productions.
Premiere Pro is that flexible! Content creators, video editors, marketing teams, students, and award professionals have all they need to successfully create and export their projects!
So, how can we learn Premiere Pro?
Premiere Pro has some built-in beginner tutorials that you can explore to have a first feel of how the app works at basic level. That’s a great way to know if you connect with this creative work and want to push on – or if you relate strongly to other fields in design, like photo and image editing, illustration, typography, 3D, etc.
There are tons of online tutorials, forums, and vast communities that share knowledge, experience, and portfolio pieces that will inspire you as you learn, but I would strongly recommend combining these with some more structured learning, as it helps you grow with consistent and clear directions and goals as you go.Check out my Essentials and Advanced courses at Bring Your Own Laptop and take your videos to the next level!
One last tip: practice, practice, practice! Ask for feedback and practice some more!
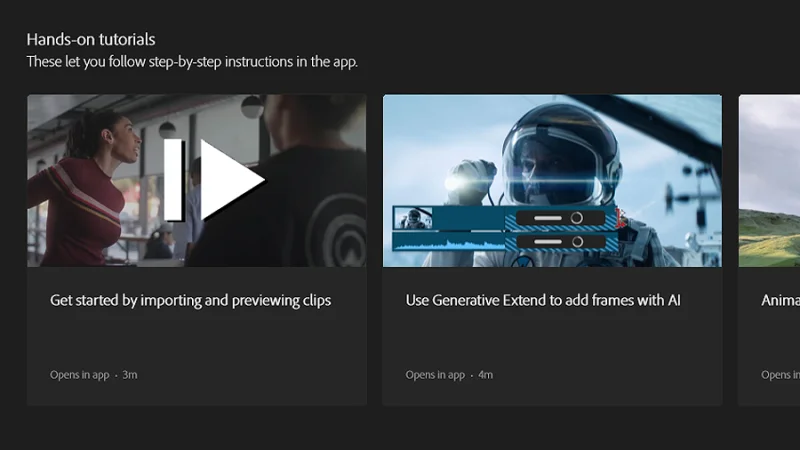
Curious about what can be done with Premiere Pro? Adobe gives you an in-app precious hand!
Premiere Pro Workflow and Integration
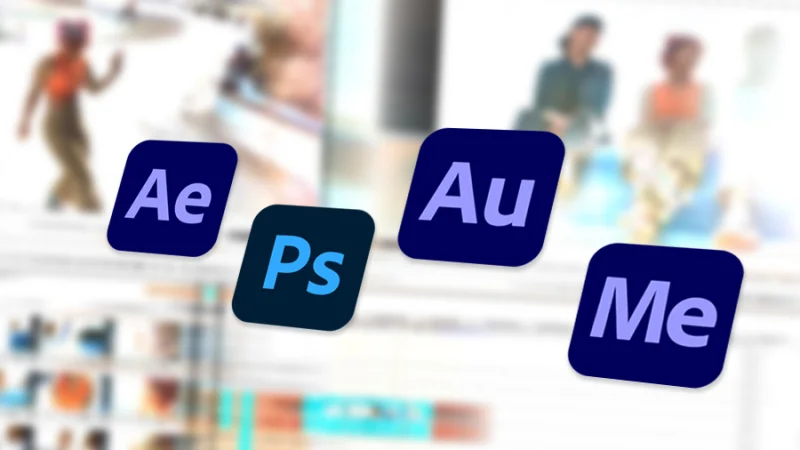
This is a clear Adobe advantage – and what makes many of their apps solid industry standards: It is easy and seamless to combine Premiere Pro with other Adobe design solutions like After Effects, Audition, or Photoshop.
If you are a Creative Cloud subscriber, you are never limited to a single program. You can connect your video editing work to motion graphics, visual design, audio engineering, and rendering inside one vast ecosystem of solutions and users. Here are some examples of how these worlds combine with your Premiere Pro timeline!
After Effects is used to bring animations, impactful titles, and stunning visual effects into your video masterpieces. With the Dynamic Link feature, you can send your sequences directly to After Effects, edit them, and see all the changes reflected in Premiere Pro in a single step and without any rendering required! How awesome is that?
Photoshop can do so much more than your YouTube thumbnails! Did you know that you can import Photoshop’s PSD files directly into Premiere Pro and add still and animated titles and overlays, fully customized and on-brand visual elements, lower thirds, etc…
Premiere Pro is great for audio mixing, but if you really want to make it incredible, you should add Audition to your workflow. Like in After Effects, you can send your sequences directly to Audition, engineer the audio like a pro, and have the changes reflected in your timeline, stress-free! There’s a lot you can do, from background noise reduction to voice enhancement, level equalizing or adjusting space and depth with reverb options.
Working on a tight schedule? You can use Media Encoder to render your finished sequence as you tackle your next footage – some powerful hardware is required for this multitasking, but it will save you precious time, for sure!
A quick example of how these things connect into a dynamic workflow: let’s say you are editing the video capture of a couple of episodes from a well-known podcast. It’s your first big job! You need to set them up for YouTube and Social Media platforms and they must look and sound amazing!
1. Cut, trim, and edit the content of the first episode in Premiere Pro.
2. Import a Photoshop PSD with animated lower thirds that introduce the host and guests.
3. Build an animated intro in After Effects and link it directly into Premiere Pro.
4. Send audio to Audition to remove noise and equalize adjustments.
5. Render and export 4K Widescreen YouTube and social media-oriented vertical versions in Media Encoder as you move straight away to the next episode.
Isn’t this amazing? You can now look at Premiere Pro as the central hub of your creative workflow! Saving time, resources, and keeping everything consistent and under control!
Workflow within the Creative Cloud ecosystem makes Premiere Pro a winning solution!
Premiere Pro vs Competition

Time to check out the Competition and see if Premiere Pro comes out a winner!
Let’s have a quick look at how Premiere Pro compares with some of the competitors used by creatives and experts all across the different platforms and media.
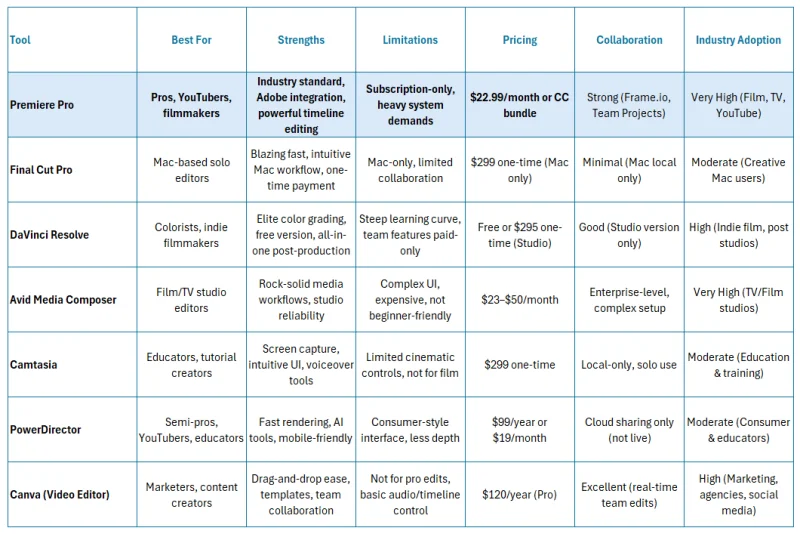
These are only some of Premiere Pro competitors, of course, but I believe this information can help you define your needs, budget, and resources to kickstart your video editing career. Explore other options, make a smart decision, and go for it!
Premiere Pro – Strengths and Weaknesses
Ok, I’ll finish this quick tour with a recap of Premiere Pro’s best features. Here we go!
Pros
Industry Standard App – If you are looking for widespread compatibility, solid learning resources, job relevance, and versatility across the media industry , Premiere Pro is your best choice.
Powerful timeline-based and non-linear editing features – It all happens here. This non-destructive, non-lineal, multi-layered timeline is your best friend to streamline professional and creative video editing.
Adobe Integration – It comes with a price (see Cons), but the fluid dynamic between Premiere Pro and Adobe Apps like After Effects, Audition, Photoshop, and Media Encoder is both simplified and epic!
Customizable Interface and Workspaces – Premiere Pro’s interface can shift its tools and panels to fit the editing stage you are working on at each moment. You will only see what you need to see, keeping things clear, easy, and maximizing productivity!
Cross-Platform and Format Flexibility – Premiere Pro is available for both Mac and Windows, supports a vast array of video, audio, and image formats, making it suited for all edit styles and projects.
Cons
Subscription Pricing – Unlike some of the competitors, Premiere Pro requires a monthly or year subscription plan. It has clear advantages, if you consider integration with other Adobe apps, but it does come at a cost.
Angled Learning Curve for Beginners – It’s like Ben Parker said once: “with great power, comes a steep learning curve”. Or something like that! First impressions can feel a bit overwhelming for beginners and learning how to properly use all the depth of tools and features requires courses, tutorials, and lots of practice. Thinking ahead, Premiere Pro users are ready to edit anything, from Instagram stories to an Oscar-nominated documentary, but it is important to be aware that it takes time to get there.
Hardware Performance – Yes, Premiere Pro is a professional-level program, so it will demand lots of RAM memory and GPU and storage capacity, especially when you are working with large sequences, 4K definition, or lots of effects.
Occasional Stability Problems – This is connected to the previous topic. Check system and hardware requirements before tackling complex projects and working long sessions. Autosave features are not a new thing to any designer or editor, so save and backup often to avoid stress or frustration.
Too Rich for Quick and Basic Edits – do you know the expression “using a sledgehammer to crack a nut”? That’s how Premiere Pro may feel to social media content managers and creators who want to produce 10 videos in an afternoon for the next round of Instagram posts.
I’m sure that AI features will steadily grow into Premiere Pro’s strengths list in no time!
And there you have it!
Alright, this was, hopefully, a quick and easy introduction to Premiere Pro and all the wonders you can edit and direct with its amazing features. Have fun with it, take the time to learn and grow your skills, share your work, and rise to video editing awesomeness! I’ll be cheering for you!
What 's Next?
To start your journey, check out my Essentials and Advanced Premiere Pro courses! Join BYOL and you will also gain access to 30+ additional courses on After Effects, Photoshop, Lightroom, and more. As a BYOL member you will also enjoy personalized support, earn certificates, and tackle exciting community challenges. Get started here.
See you in class! – Dan
Popular posts
Adobe MAX 2025 - File Download
Daniel Scott
-1750161634.webp)
Modeling Shortcuts in Blender
Daniel Scott
Plugins in Illustrator
Daniel Scott
-1748277302.webp)
How to Straighten the Horizon in Photoshop
Daniel Scott
Go from zero to design hero with our awesome courses!


- Powered by Marvin
- Terms of use
- Privacy policy
- Cookie policy
-
- © Bring your Own Laptop Ltd 2026