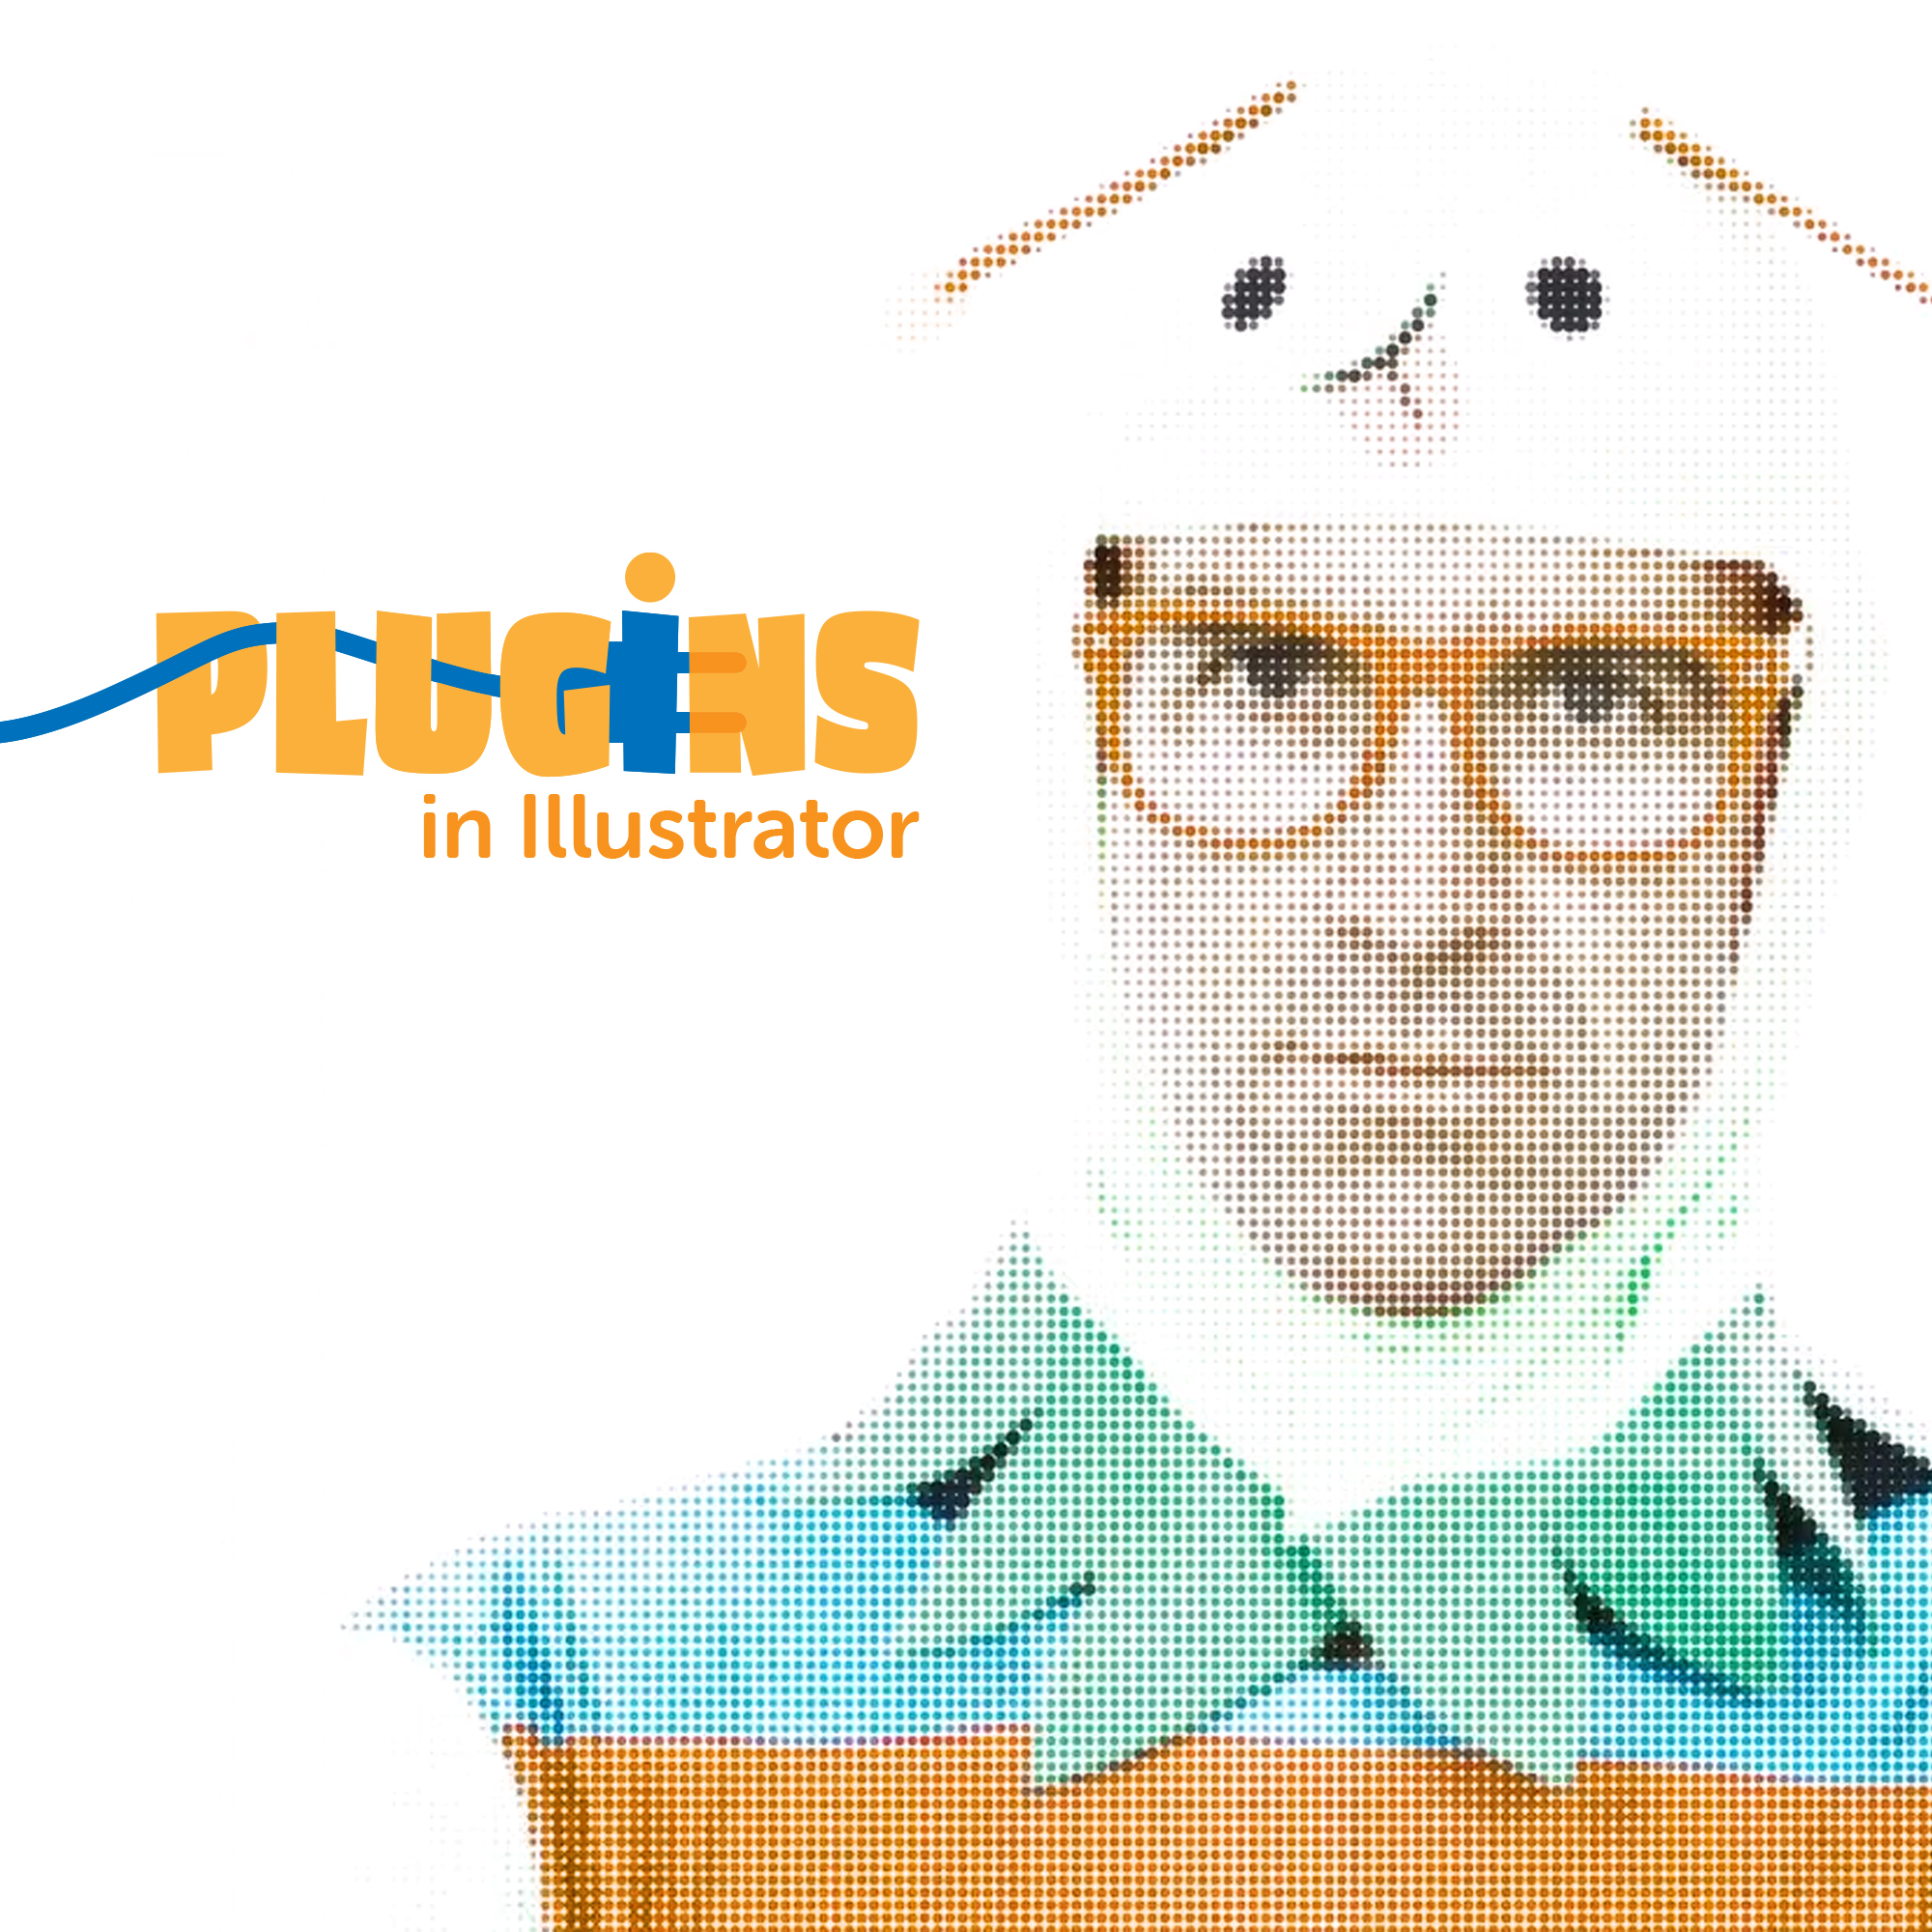
Plugins in Illustrator

Daniel Scott
@dan
In this post, I am going to introduce you to Plugins in Illustrator! Plugins are these precious productivity gems, usually created by third-party developers, that we can install in Illustrator and use to bring new life to our designs, by adding some awesome and fully customizable effects! Quick and easy! There are hundreds of plugins available and in this post I’ll focus on a few effects developed by Astute.
This post is based on my Illustrator Essentials and Advanced courses, make sure to sign up at Bring Your Own Laptop! When you become a BYOL member, you gain access to this course as well as my 30+ additional courses on Photoshop, Lightroom, InDesign, Figma, and more. As a BYOL member you will also enjoy personalized support, earn certificates, and tackle exciting community challenges. Head here to sign-up!
Alright, let’s dive into plugins! Have fun!
What are Plugins for Illustrator?
If you are a first-time explorer to Illustrator, you may be feeling a bit overwhelmed with all the available tools, settings and effects that you can access and manipulate to create the most amazing vector designs! I’ve been there! But trust me when I say that as your skills evolve – and your client list, as well – you will need to speed up your workflow or to find a quick and easy way to bring a unique look into your vector designs. Plugins will help you with both these goals!
Plugins are add-ons that we install in our computers to add effects, enhance specific tasks in Illustrator, and give us extra control over our creative work. Some of these tasks can be time-consuming or repetitive, others may have limited customization settings, or sometimes the required tools are simply not included in Illustrator’s massive toolbox – yes, that is possible!
How do we install plugins in Illustrator?
Most plugins are easily installed and set up. Developers now offer install files or plugin management apps that make the whole process very simple. Some of these apps, like Astute Manager, will automatically detect your Illustrator version, install the plugins directly into the right folder, and keep them updated! Cool, huh?
Plugins are frequently installed into these folders:
Mac: /Applications/Adobe Illustrator (version)/Plug-ins
PC: C:\Program Files\Adobe\Adobe Illustrator (version)\Plug-ins
Notice that plugins are third-party products, some of them downloaded as executable .exe files, so they may be flagged by security and antivirus programs. Download these resources from trustworthy companies and websites as often as possible.
Once they are installed, Plugins are smoothly blended into Illustrator’s workspace and workflow. You can usually find them under the Effects and Window tabs in the top menu bar, and you will see that interface elements like windows, panels, and sliders are familiar and intuitive from the start.
One of my favourite sources for Adobe plugins is Adobe Exchange. Check it out, take some time to explore the available options, install the ones that best fit the projects you are currently working on and I’m sure you will be amazed with all the visual and workflow magic you can add!
Quick tips:
You will usually need to restart Illustrator for installed plugins to appear on your workspace.
You may need to have your toolbar display set to Advanced. To do this, go to Window > Toolbars > Advanced
Do not forget to check version compatibility before installing your plugins
Some updates to Illustrator may impact installed plugins, these may need to be reinstalled.
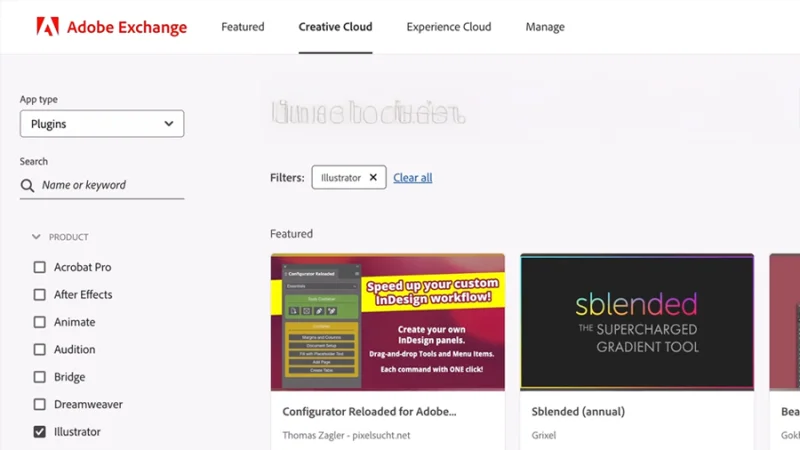
Adobe Exchange is a safe option for you to look for plugins.
Astute Graphics Plugins
For this post, we will be covering Astute Graphics’ plugins. Keep in mind that, although there are a considerable number of free plugins, highly customizable options may need a paid subscription. Always make sure that any investment in programs and plugins meet your needs and budget. You can follow along this blog post with the Astute plugin collection using the 7-day free trial.
Let’s push on! Providing just your name and an email address, you will be able to download the Astute Manager, which allows you to browse, add or remove plugins from your Adobe Illustrator. As you can see below, the interface is easy to navigate, and, with a single-click, your plugins are installed in seconds! Don’t forget to restart Illustrator and set your toolbars to Advanced!
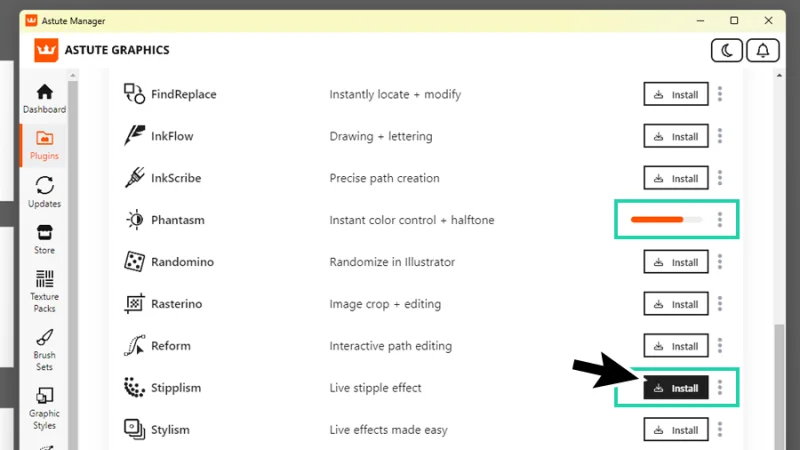
Astute Graphics plugins offer a complete and beginner-friendly collection of plugins.
How to apply the Phantasm Halftone Effect to images in Illustrator
Let’s start with this absolute masterpiece!
Funny? Creepy? I’ll let you decide!
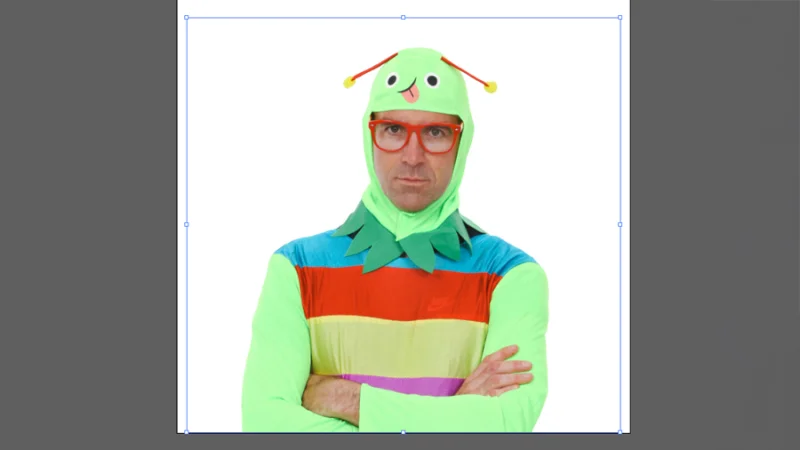
This is a normal raster image (pixel-based). I’ve decided to start with a photo – even though Illustrator is a vector-based software, as you may know – because many times, out in the real world, our clients will provide us with little less than an old, pixelated photo as a starting point.
One of the cool things about Phantasm is that, once you apply the halftone effect to the photo, it is converted to vectors, can be edited, and fully scalable without losing any detail! Awesome! Let’s see how that happens in Illustrator!
With the photo selected, go to Effect in your top menu bar, scroll down to the Additional Effects section, hover over Phantasm (nothing spooky about it, don’t worry) and finally select Halftone…
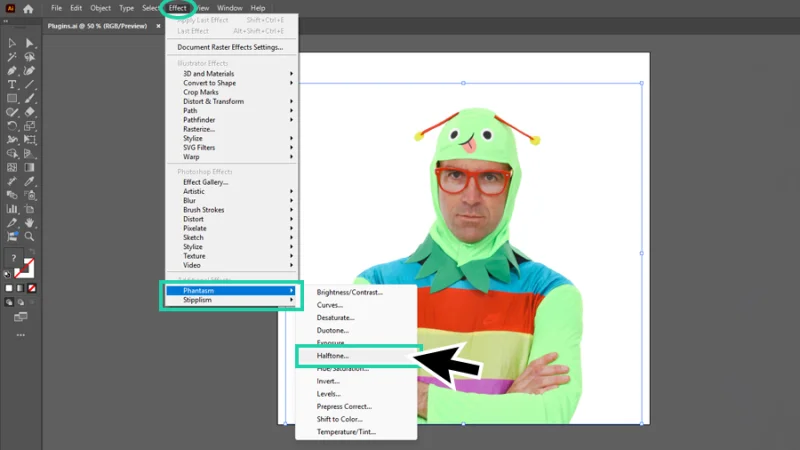
The Phantasm Plugin effects can be accessed in the Effect menu.
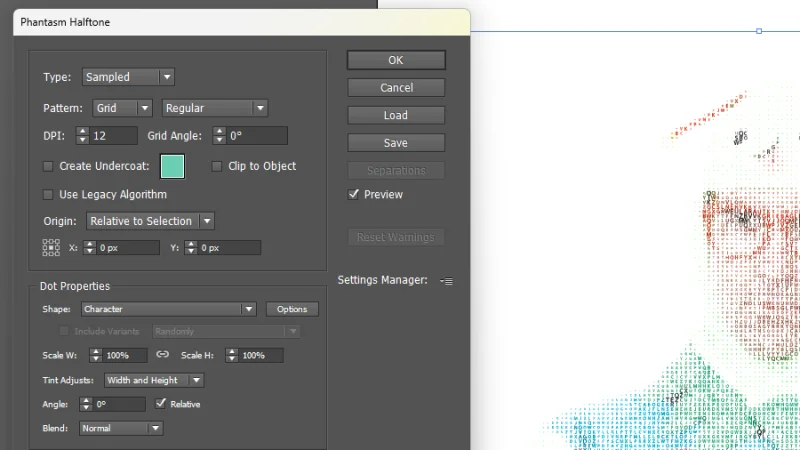
Now we are looking at the Phantasm Halftone settings panel, which is flooded with cool options to fully customize our Halftone effect. We will have a quick look at some, feel free to explore across all kinds of photos, it will be worth it, trust me!
I’ll keep the basic settings for now but know that there are tons of combinations that you can try for each effect. Remember, as you manipulate these settings keep an eye on how your computer reacts, you don’t want Illustrator to crash before saving! As an example, increasing the number of DPI (dots-per-inch) will demand more memory and graphics resources.
Before clicking OK to apply the effect, I’ll set Type to Monochrome, keep Pattern as Grid, and play with the DPI value to balance the effect. We’ll see more cool stuff in the next examples, so sit tight!
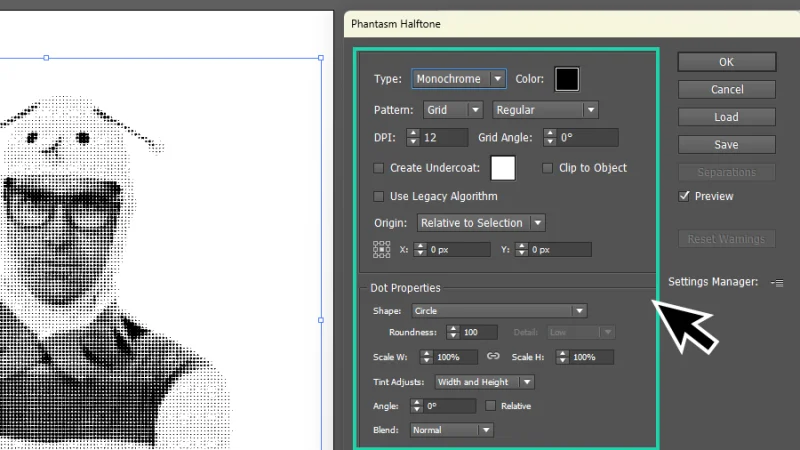
This is a basic monochrome halftone effect, but take a look at all the settings you can explore!
If you are familiar with Illustrator, you may be thinking: “wait a minute, Illustrator already has a Halftone effect. Why do I need a paid plugin like Phantasm for this?” and that’s a great point! Here’s why I recommend Phantasm, follow along:
If we go to Effect on our top menu bar, hover over Pixelate and select Halftone… we open the Color Halftone settings panel and set things up to apply the effect to our photo. That’s pretty much the same. Or is it?
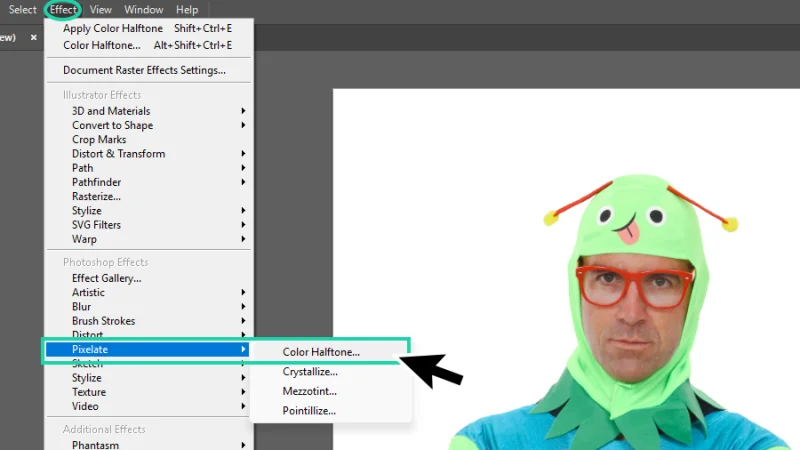
There is a built-in halftone effect in Illustrator.
No, it isn’t! With the built-in Halftone effect, you can only control two options: Max Radius and Screen Angles, which hugely limits the effect’s customization. And, above all, this is a raster effect, which means the image doesn’t get converted to vectors, losing further editability and scalability!
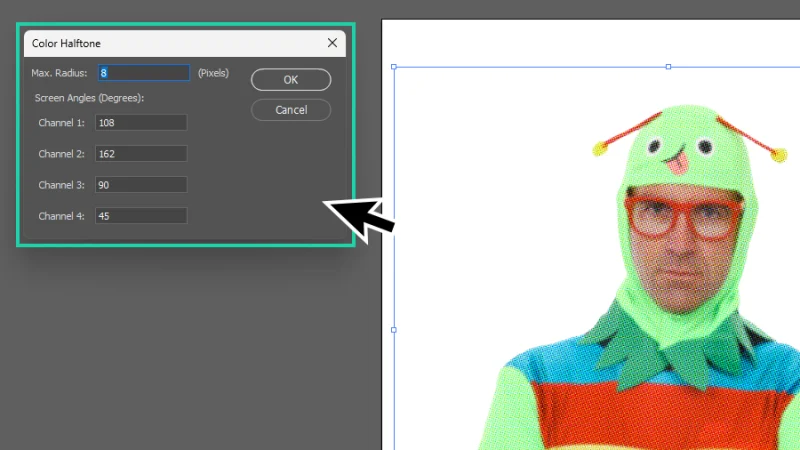
As you can see, Phantasm offers so much more creative freedom!
You’re still not convinced? What if I told you that we can replace the dots in the halftone pattern with letters? Let’s go back to the Phantasm Halftone settings panel. In the Dot Properties section, we click the Shape drop-down menu and select the Character option.
Halftone with text characters! Cool, huh?
Boom! Let’s zoom in a little for you to see how incredibly cool this looks!
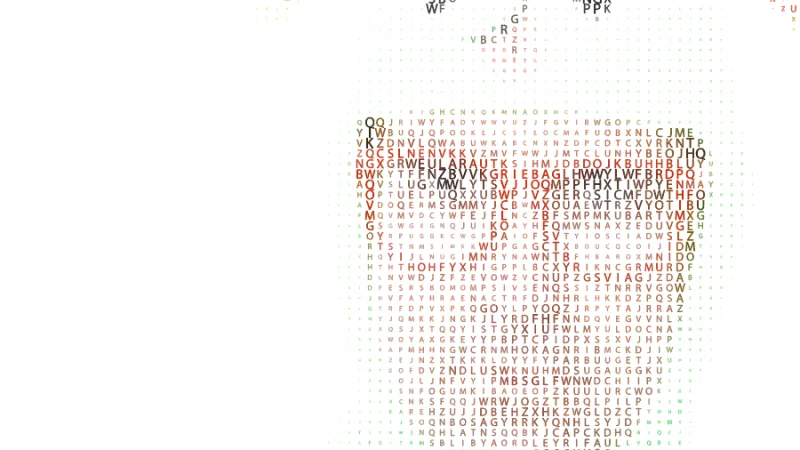
Isn’t this unique? Can you imagine all the cool designs you can create using this effect?
Still not sure it’s worth it? Wow, you’re tough! What if I told you that we can customize the effect by typing the text we need to display on the halftone?
After we select Character from the drop-down menu, click Options to access some more settings. You can pick a specific font for the effect and ask Phantasm to repeat a specific line of text. How cool is that? Here’s my rather unexpected variation, applied to an alternative photo. Recognize the model?
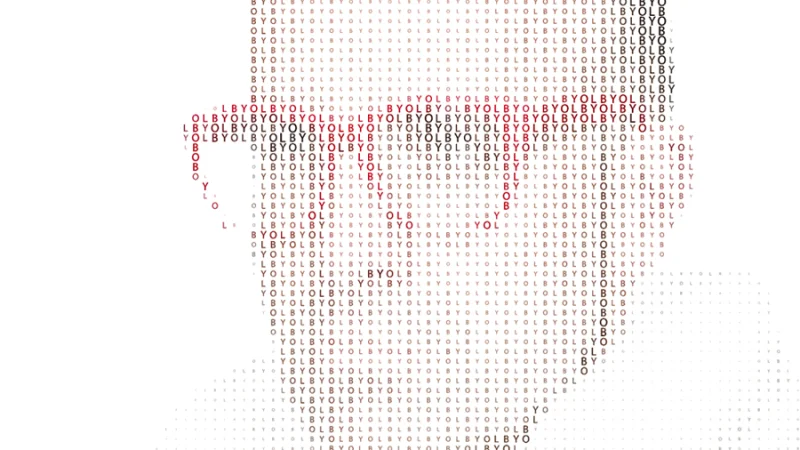
Now I’m sure you are convinced of how awesome Phantasm Halftone is!
How to edit an existing Phantasm Halftone Effect in Illustrator
One-click wonder! We select our object, look at the Properties panel to the right of our workspace and, under Appearance, we find the link to the Phantasm Halftone effect, next to the ‘fx’ icon. Click on that link to jump back to the settings panel and make all the updates you need. Quick and easy!
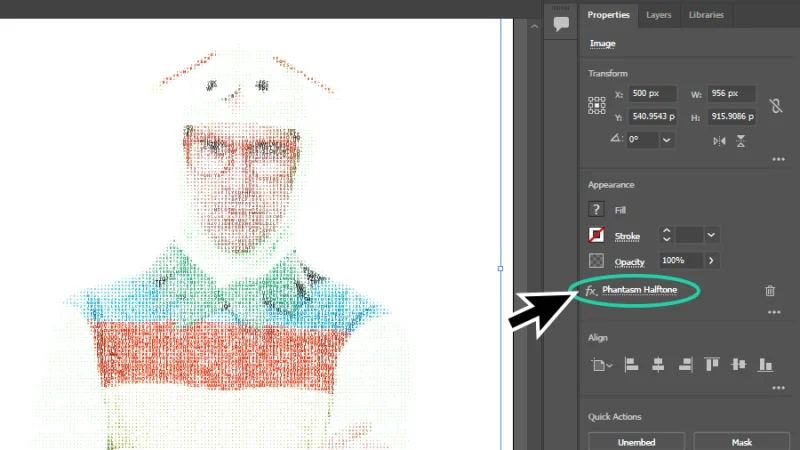
If you need to update the effect, the link is right there, in the Properties Panel!
How to apply the Phantasm Halftone effect to a vector object
Yes, we’ve covered raster images, let’s move on to vectors! I’ll show you a quick way to add impact and style to an illustration, giving it a unique vibe or a vintage, pop-art vibe?
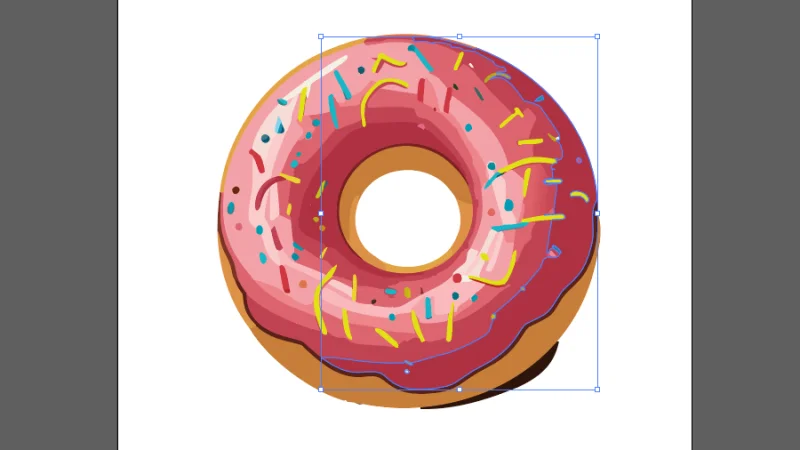
Here is a generated illustration of a donut. It does have that basic AI look to it, right? How can we make it a bit more special? You got it! We can use Phantasm to give it more texture and a distinctive colorful detail. How? Here we go!
Let’s start by selecting a detail from our donut’s frosting. To keep the original color underneath and add a brighter halftone layer, let’s duplicate it.
Quickest way to do it? Copy and Paste in Front! There are shortcuts for these: Command + C (Mac) or Control + C (PC) to copy the detail and Command + F (Mac) and Control + F (PC) to place it aligned with the original.
Yummy! But can we make this donut look more pop-art yummy?
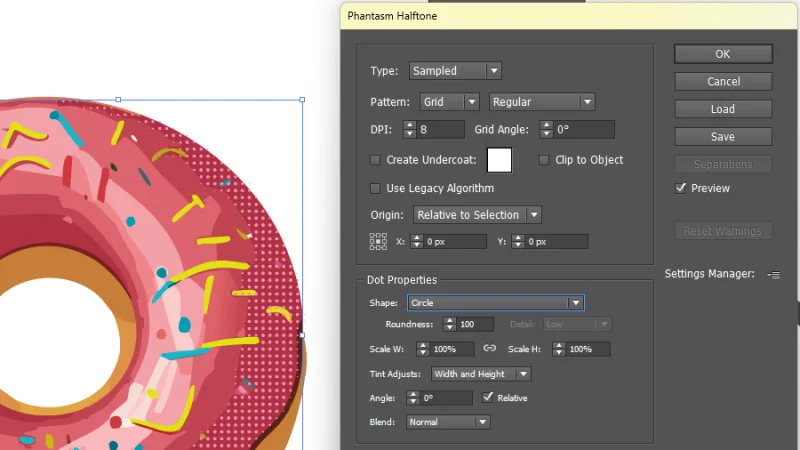
Next, we give it a brighter and less saturated color for contrast, and we go back to the Phantasm Halftone panel. If we set Type to Sampled, Phantasm will use the object’s color to create the effect! So cool! Again, feel free to explore the different options to create a fully personal effect for your donut! Hit OK to apply the Halftone.
Next, we give it a brighter and less saturated color for contrast, and we go back to the Phantasm Halftone panel. If we set Type to Sampled, Phantasm will use the object’s color to create the effect! So cool! Again, feel free to explore the different options to create a fully personal effect for your donut! Hit OK to apply the Halftone.
How to apply the Phantasm Halftone effect to a Gradient?
And there is more! We can also apply this cool halftone effect to objects holding a Gradient Fill. Is there a difference? Yes, there is! The effect adapts to the gradient’s color intensity, creating more unique textures!
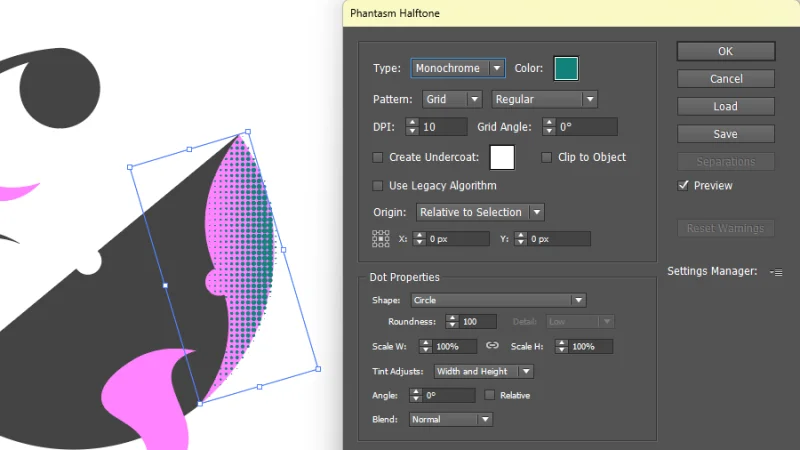
Let’s try it on our friendly whale. As before, we copy a part of the design and apply a gradient to the duplicate place on top of the original. A contrasting gradient will allow for a more interesting halftone effect.

Phantasm Halftone and gradients are perfect partners!
With the gradient object selected, we jump back to the Phantasm Halftone panel. For this example, I’ll change Type to Monochrome and pick a specific Color for the awesome dot grid, as a bonus! Once again, play around with the options until you preview the cool effect you are looking for. Smash the OK button to apply the halftone!
Look at that! The Halftone effect matches the color change in the gradient!
Because this is a live and editable effect, we can grab the Gradient tool and adjust all of the initial gradient’s settings, orientation, and position to fully blend the halftone with the Illustration. That’s brilliant!
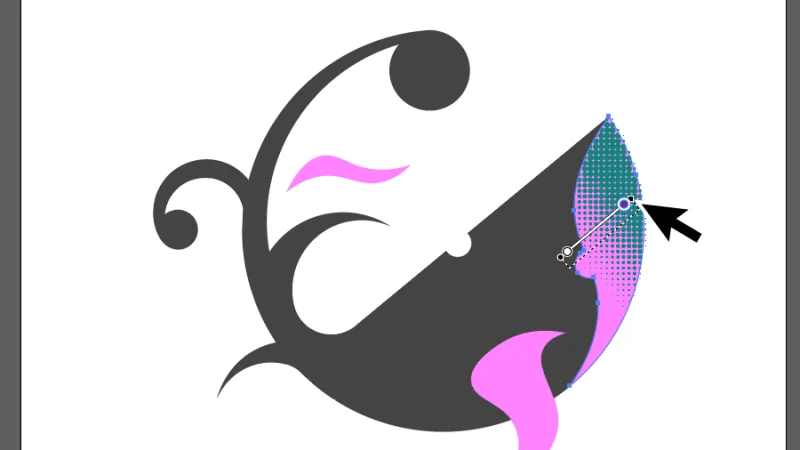
This is a live effect, so if we update the gradient, the Halftone dot grid will follow!
How to Apply the Texturino Texture Effect in Illustrator
A special bonus for being a dedicated reader: I’ll quickly show you two more awesome effects from Astute Graphics. Let’s transform the vector generated image of a donut-plane into something full of creative personality! I’ll start with the cloudy background and Texturino!
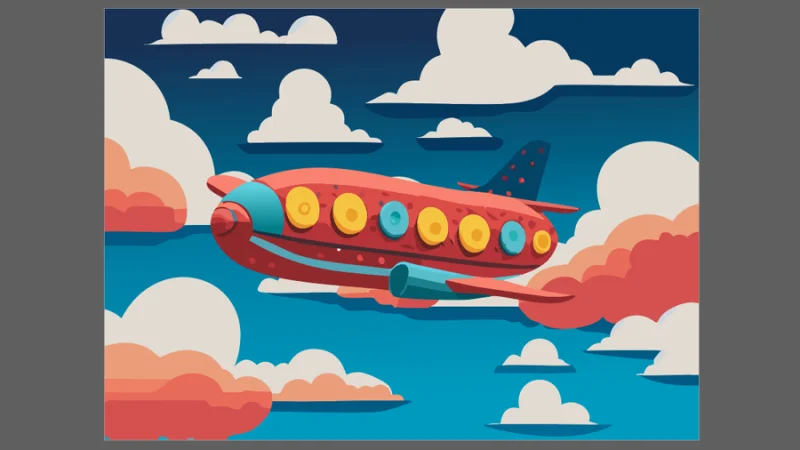
Cool illustration, but looking too AI-generated to me. Can we use plugins to give a more “human-made” look?
This is quick and easy. We select the background, move our mouse cursor to Effect on the top menu bar, hover over Texturino and click on Texture… Inside the Texturino’s Texture panel, I’ll set Category to Noise to add a grainy, richer look to our Illustration. The cool thing about Texturino is that part of the settings are adjusted over the image, as you can see in the image below.
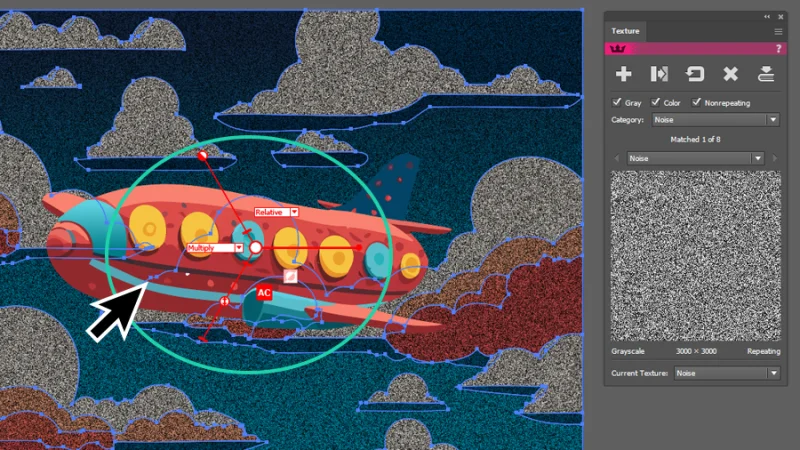
Applying some cool textures to vector illustrations is a one minute effort with Texturino.
I’ll adjust the texture’s blending mode to Multiply, to make it a bit more subtle – that’s the drop-down menu on the left and adjust Scale on the slider beneath it. The top slider controls Opacity and the right handle sets rotation angle. Play around with all the options until you feel the effect feels natural and not too distracting. Hit Enter to enter the Preferences panel for final adjustments and hit OK to finish!
How to Apply the Stipplism Stipple Effect in Illustrator
Last but not least, let’s add a Stipple texture to the donut-plane! Stipple is somehow similar to halftone, but it looks more organic, as if the dots are drawn by hand, with a pen. The steps to apply the effect are similar, so there’s no challenge here!
With the donut-plane selected, we move our mouse to Effect, hover over Stipplism, and click Stipple… to open the effect’s settings panel. Inside the panel, we can set dot Density, Quality, and Size. We can also sample colors from the object or set our own choice to keep the illustration on-brand, for example. There is a Preview option to follow changes as we adjust the settings and, once we are ready, we just need to hit OK to apply the effect to our illustration.
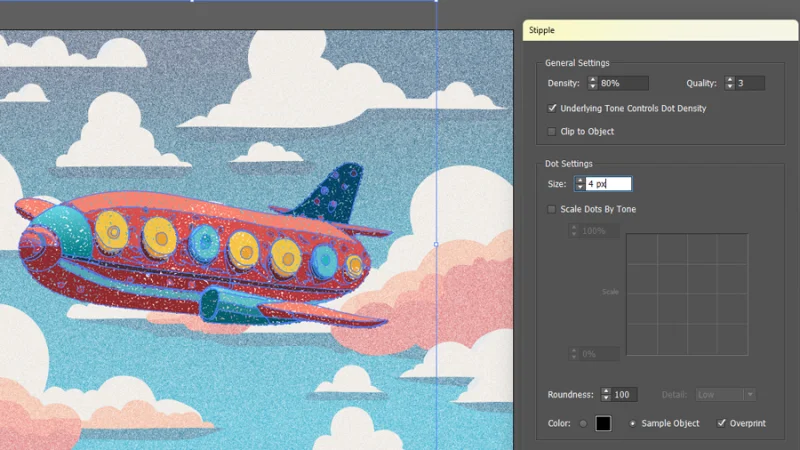
After customizing the cloudy background, we can use the Stipplism plugin to add a new look to the plane.
And There We Have It!
Wow, this was exciting – and just a quick glimpse at plugins and how they will change your creative life! Now that you know what plugins are, where to find some of the best and install them on your computer, and saw Astute Graphics’ Phantasm, Texturino, and Stipplism add-ons in action, go put on your explorer’s hat and dive deep into the amazing world of plugins in Illustrator! It is so worth it! Have a great time!
What 's Next?
To go deeper with Illustrator, join BYOL and you will gain access to my Illustrator Essentials and Advanced courses as well as my 30+ additional courses on Figma, Photoshop, Lightroom, Premiere Pro, Webflow, and more. As a BYOL member you will also enjoy personalized support, earn certificates, and tackle exciting community challenges. Get started here.
See you in class! – Dan
Popular posts
Adobe MAX 2025 - File Download
Daniel Scott
-1750161634.webp)
Modeling Shortcuts in Blender
Daniel Scott
Plugins in Illustrator
Daniel Scott
-1748277302.webp)
How to Straighten the Horizon in Photoshop
Daniel Scott
Go from zero to design hero with our awesome courses!


- Powered by Marvin
- Terms of use
- Privacy policy
- Cookie policy
-
- © Bring your Own Laptop Ltd 2026