
Guide to Creating Curved Text in Figma

Daniel Scott
@dan
Are you looking to jazz up your Figma prototypes? Curving text in Figma requires the use of plugins and in this post, I walk you through the process step by step. Curving text is a great way of adding personality to your design and is an indispensable technique when creating logos and badges.
What are the first steps to creating curved text in Figma?
To start, you need some text and a path.
Get the Type tool and make your line of text.
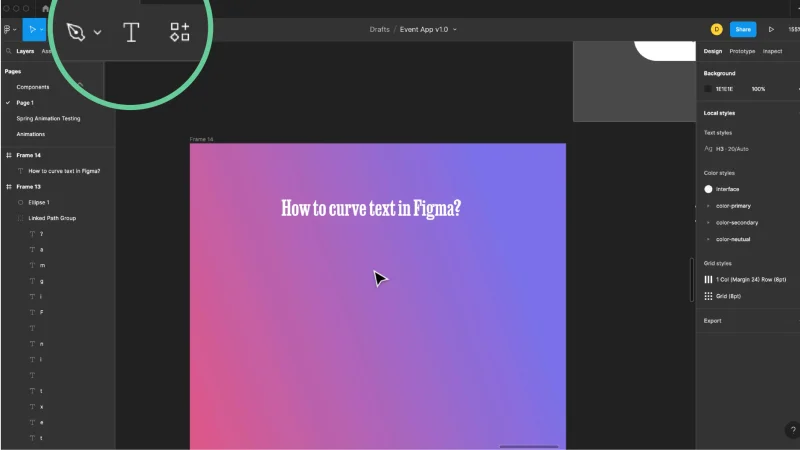
To make curved text in Figma start by using the Type tool to create a line of text.
To use the Pen tool to draw a curved path tap the shortcut P. Then click and drag up with the pen tool to make a wavy line.

Step 2 - use the Pen tool to create a wavy line .
How to find a plugin in Figma
To create our curved and circle text we’ll look at two different plugins. Plugins are constantly being updated and new ones are being added so I always recommend doing a bit of research before starting out. Below I will share two I currently like.
Head up to the top and click the Plugin button.
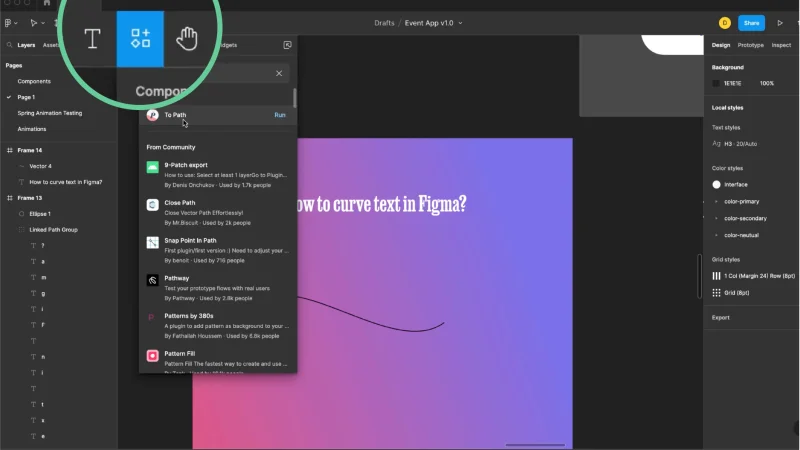
You’ll find the Plugin feature at the top of Figma – simply click and then type into the search field.
Type ‘path’ into the search field and you’ll see a bunch of options.
Click on the ‘To Path’ plugin.
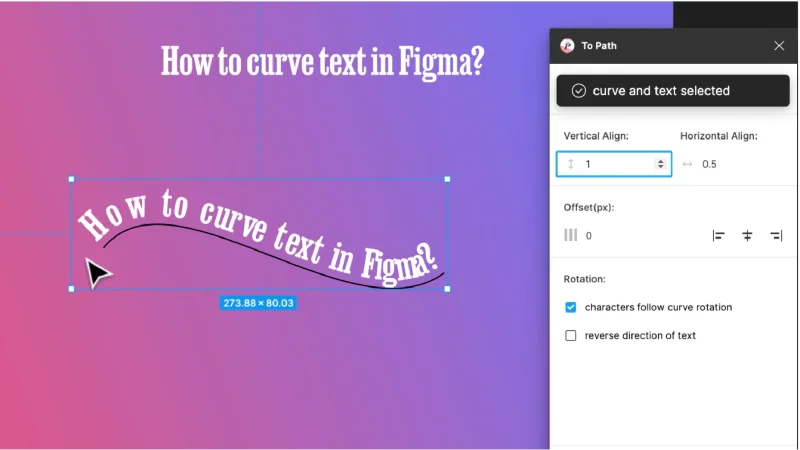
How to use the ‘To Path’ plugin in Figma
Select both the text and the path and press ‘Link’.
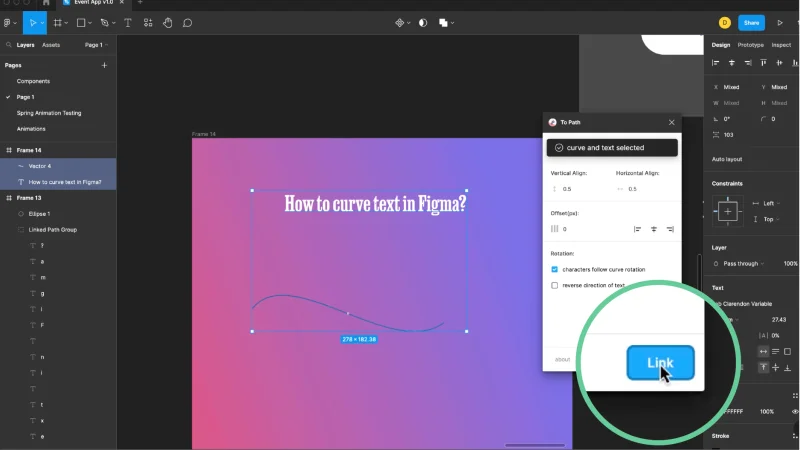
To make the text curve select both the text and the path and click Link.
To adjust the text placement, go back into the Plugin and play around with the settings – you can push it below and above the line with the Vertical Align or start further along with the Offset.
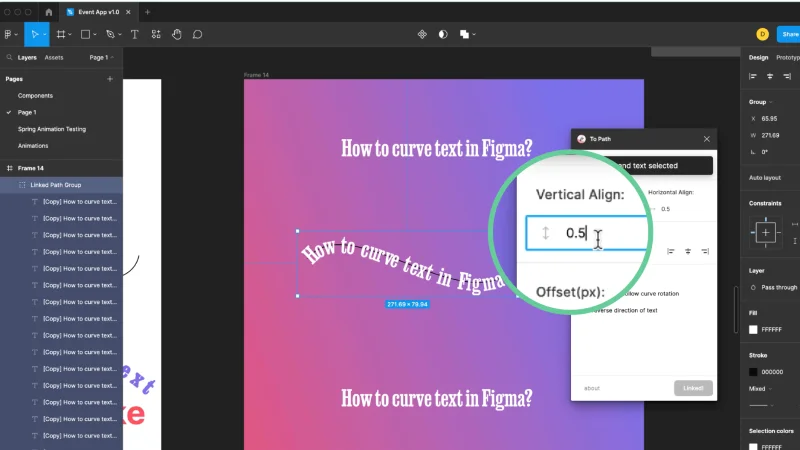
To adjust the text go back into the To Path plugin.
You’ll see the results are fine but the spacing between the letters is a bit off.
Sometimes the results are a bit dodgy!
To tweak the spacing (also called tracking) go back to the original straight piece of text. Highlight the text to adjust and use shortcut Option < > (Mac) or Alt <> (PC).
This piece of text is linked to your curved piece so to apply these changes open the Plugin.
Quick Tip: the shortcut to open the plugin is Command Option P (Mac) or Alt Control P (PC)
How to make text go around a circle with the ‘ARC’ plugin in Figma
Use the steps above to open the ARC plugin.
Make another straight piece of text and select it.
Adjust the Bend Strength to make the text curve around.
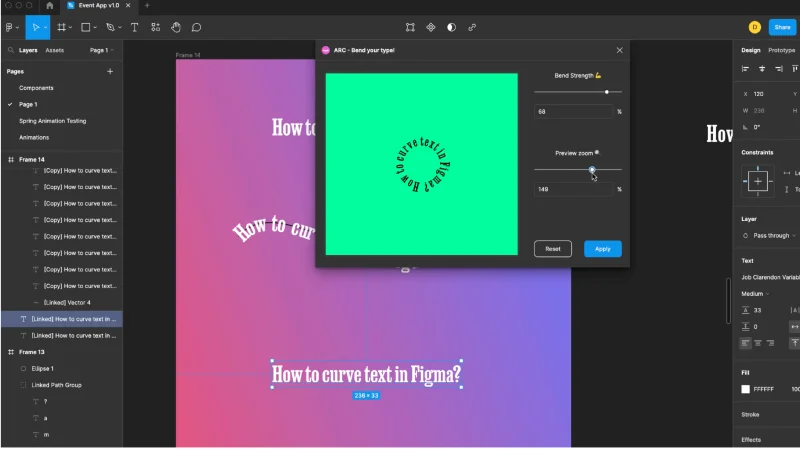
Use the Bend Strength in the ARC plugin to make the type go around in a circle.
The disadvantage of using this Plugin is that it is not editable after you have clicked Apply.
If you’re interested in discovering additional great plugins for Figma check out this list.
What if I want more control over my curved text?
If you are looking to have more control over the subtleties of your text spacing, then you might want to look at creating your curved or circle text in another application. You can then import it into Figma. Adobe Illustrator is a good way to go, although it is not a free app.
How to make curved text in Illustrator to use in Figma
Start by tapping P to choose the Pen tool.
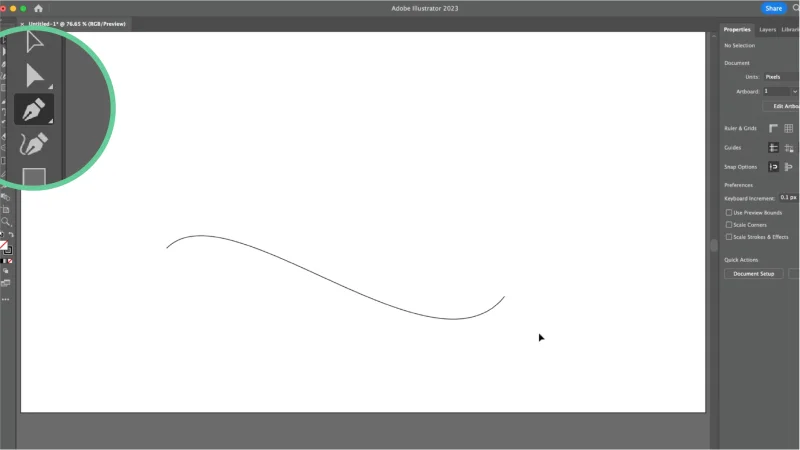
The process in Illustrator starts with using the Pen Tool to draw a wavy line.
Next, choose the Type tool (or tap T for the shortcut)
Hover over the line with the Type Tool and it will automatically change to the Type on a Path icon

Next hover over the line.
Just click and then start typing – easy!
To create Type on a circle first draw a circle with the Circle tool
Then click and hold on the Type Tool in the toolbar on the left and change to the ‘Type on a Path’ option

Click and hold on the Type Tool and switch to Type on a Path Tool.
Click on the circle and start typing.
To make any adjustments to your type on a path in Illustrator go to the menu along the top and choose Type > Type on a Path > Type on a Path Options.
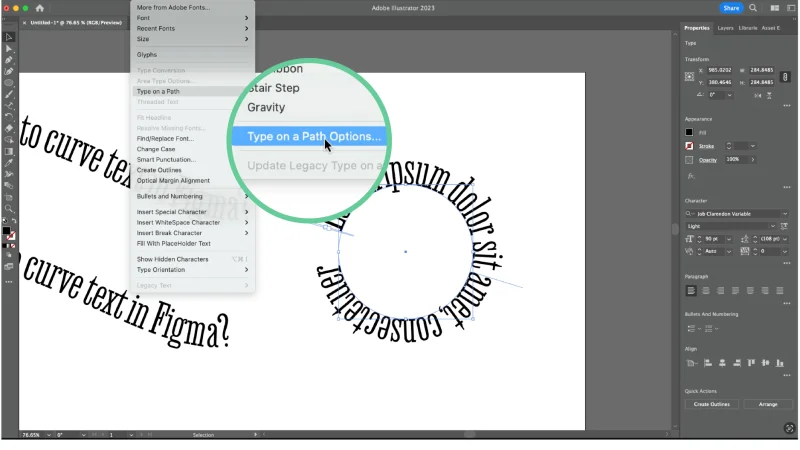
In Illustrator you have much more ability to edit the finer details of the type once it is following the path.
If you copy and paste this directly into Figma it will appear all pixelated.
Instead make a duplicate then Command Shift O (Mac) or Control Shift O (PC) to outline type.
Then copy and paste to figma. This will paste as a vector, so it will remain sharp and scalable, but your type will not be editable.
If you need to know more about creating type on a path in Illustrator I have both an intro and advanced illustrator course – so you can master type on a path and much more.
For some inspiration on using type on a path head over to Pinterest and search for “circular typography” or “badge logo”.

A vintage badge is the perfect use for type on a path – check out these examples from Pinterest.
If you’re planning on using type on a path to create a circular logo you might want to check out this blog post with tips on designing circular logos
So, there you have it. Although not done natively these options allow you to create curved or circular text in Figma. Either working with a plugin in Figma or using another application such as Illustrator, you can jazz up your Figma designs with curved text.
What 's Next?
To go deeper with Figma, join BYOL and you will gain access to my Figma UI UX Design Essentials course and my Figma Advanced Tutorial as well as my 30+ additional courses on Photoshop, Lightroom, Premiere Pro, Webflow, and more. As a BYOL member you will also enjoy personalized support, earn certificates, and tackle exciting community challenges. Get started here.
See you in class! – Dan
Popular posts

Adobe MAX 2025 - File Download
Daniel Scott
-1750161634.webp)
Modeling Shortcuts in Blender
Daniel Scott
Plugins in Illustrator
Daniel Scott
-1748277302.webp)
How to Straighten the Horizon in Photoshop
Daniel Scott
Go from zero to design hero with our awesome courses!


- Powered by Marvin
- Terms of use
- Privacy policy
- Cookie policy
-
- © Bring your Own Laptop Ltd 2026