How to Animate Text in Canva

Daniel Scott
@dan
In this post, we are going to set our focus on one of Canva’s most awesome features: Animate! At a time when motion graphics are replacing static elements on apps, websites and across social media platforms, the ability to create animations in seconds makes Canva an even more powerful all-in-one solution for graphic designers. I’ll show how we can add motion and personality to text elements for our animated images, presentations, and video projects. Stress-free, quick and easy!
This post is based on my brand new Canva Essentials course! I’m excited to share it with you and help you get started with this awesome design tool! When you become a BYOL member, you gain access to this course as well as my 30+ additional courses on Illustrator, Photoshop, Lightroom, InDesign, Figma, and more. As a BYOL member you will also enjoy personalized support, earn certificates, and tackle exciting community challenges. Head here to sign-up!
Let’s get started!
Why do we use Animation in Graphic Design?
Graphic designers work with visual communication. From the moment we discovered moving pictures, the way we communicate with the world changed forever. Static images can be appealing, dramatic, and even tell a story—but moving elements immediately catch our attention, lock us in, and make the message more memorable.
A quick example, and then we move on to the learning part. People used to be amazed when sci-fi movies showed animated ads in subway stations and video billboards on the sides and tops of skyscrapers—all filled with vivid colors, hypnotizing motion, and sexy visuals. Older folks like me saw those visions of the future—our present—and felt stunned, because we were surrounded by static advertising images at the time. We couldn’t take our eyes off those animated windows of information. Why? Because our brains are attracted to movement. That’s how we identify threats and opportunities!
So, let’s get things animated!
How to Add and Edit Text Elements to a Video in Canva
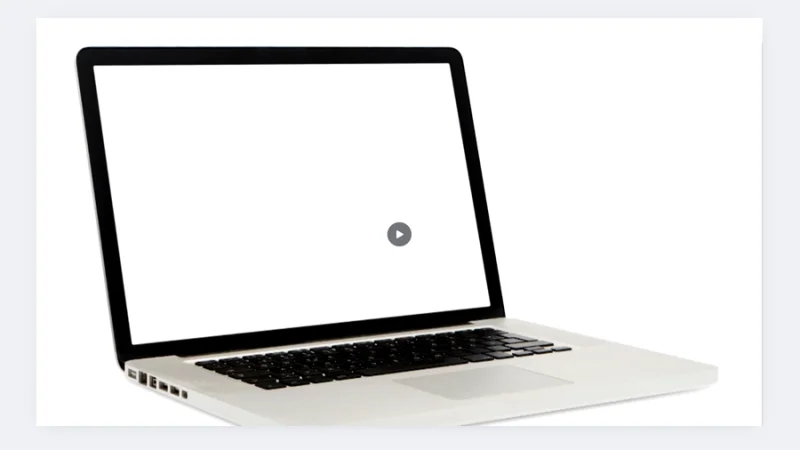
Like I mentioned earlier, animated text works great on moving images (like GIFs), dynamic presentations (for business), and video content like product ads, YouTube tutorials, social media stories, and reels. I’ll be working on a short video I found in Canva’s Elements collection—I hope you enjoy it! Feel free to follow along with your own Canva project to double the fun!
Canva’s all-in-one graphic design solutions include video editing! How awesome is that?
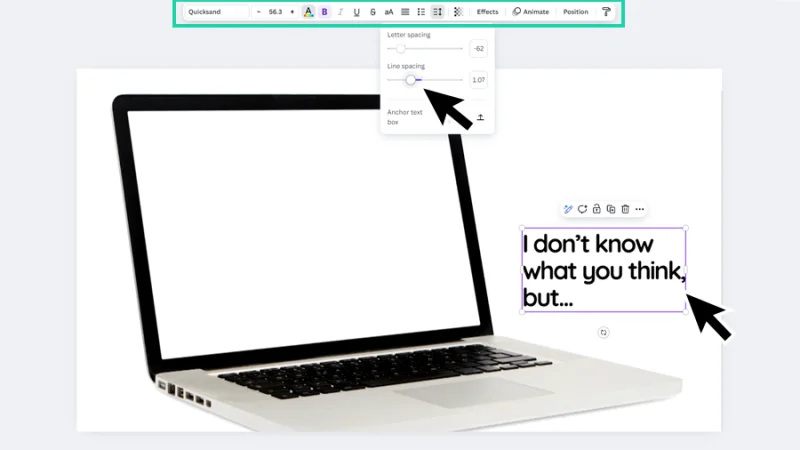
Adding a text element to a video project works the same way as in any other project you can create in Canva. Hit the shortcut key ‘T’ on both Mac and PC to bring a new text box onto the screen and start writing!
Once your message is written, you can edit the text attributes to give it brand identity, a fun or unique look, make it stand out as a header, or complement the video’s subject as a subtle caption. It all depends on what you need—and how freely your imagination flows.
As you’ve probably seen before, customizing text attributes includes playing around with fonts, font size, colors, character weight, text alignment, letter and line spacing, and more. You can easily access all these options from the contextual toolbar that floats above your project page.
Before animating our text, we want to give it some personality and have it fit brand guidelines, for example.
How to Animate Text Elements in a Video in Canva
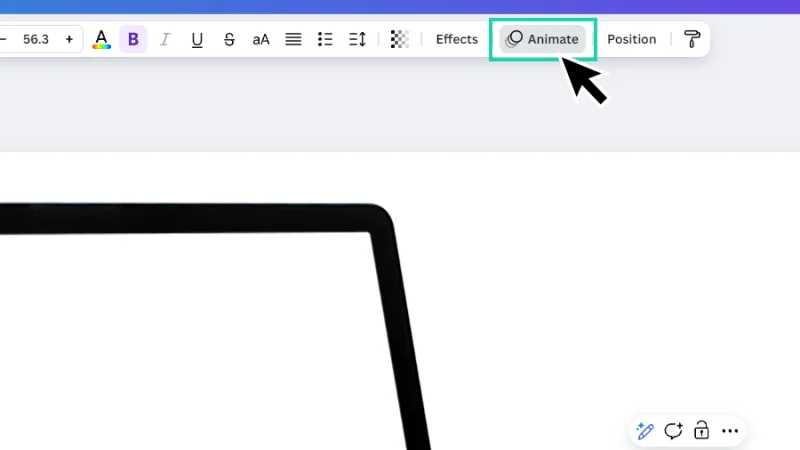
Once our text looks all cool and eye-catching, we start making it awesome! To start animating our message, we click the Animate button in the contextual toolbar.
Lights, camera… animate!
The Animate panel is divided into two main sections: Page and Text. For this tutorial, let’s pick Text. Page would set up some animated effects to the video clips in the project – Canva calls each video a page. Let’s move on!
Text Animate settings include these animation groups:
Custom – We drag text elements across the page to define its animated motion and then adjust some additional settings for extra layers of fun: motion speed and some add-on effects, like a funny wiggle!
Suggested – Canva displays a set of animations designed to make text elements stand out or appear on a screen through motion, like Typewriter, Burst, Bounce, or Roll. Our message will be animated in sequence and one character or word at a time (in this last case, if you have a Pro subscription).
General animations – This collection of effects is more suited for shapes. These will add movement to text elements, of course, but they consider the whole text as a single object, so they affect the textbox and not each individual character or word.
Add-on Effects – These are more frequently applied to text elements than shapes and can be added on top of the suggested or general animations to add more personality to the content we are designing. Like in General animations, Add-on effects influence the textbox and not the characters or words inside.
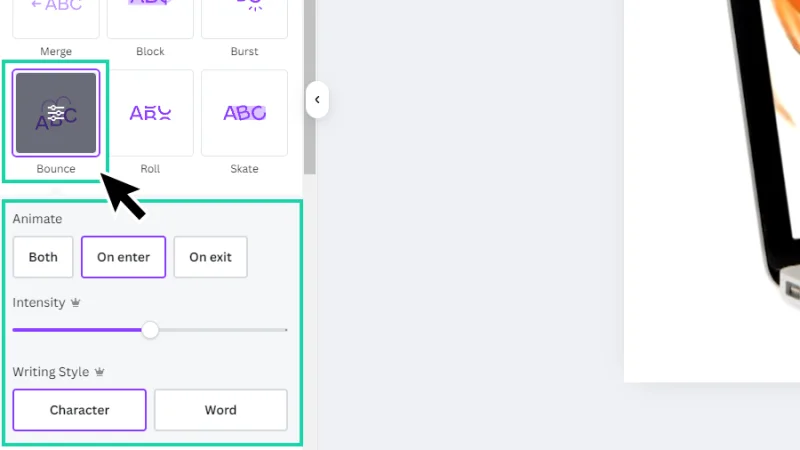
For this tutorial, I’ll pick Bounce from the Suggested animations group, because of its wavy movement effect. Let’s see if it works in the end!
We can also set up if we want the animation to happen On Enter (when the text appears on the screen), On Exit (when the text disappears from the screen), or Both. Pro features, exclusive to paying users, also allow adjustment of animation Intensity and Writing Style.
Animations are tricky. In the right context, they look great! If they feel off, they will ruin the viewer’s experience.
How to Set Text Animation Timings in Canva
I’ll add a second text box to our video to show you how animation timings work. I’ll complete the message for the video, add a different color to one of the words – to underline the pun, not sure why – and we’ll move to the Timeline.
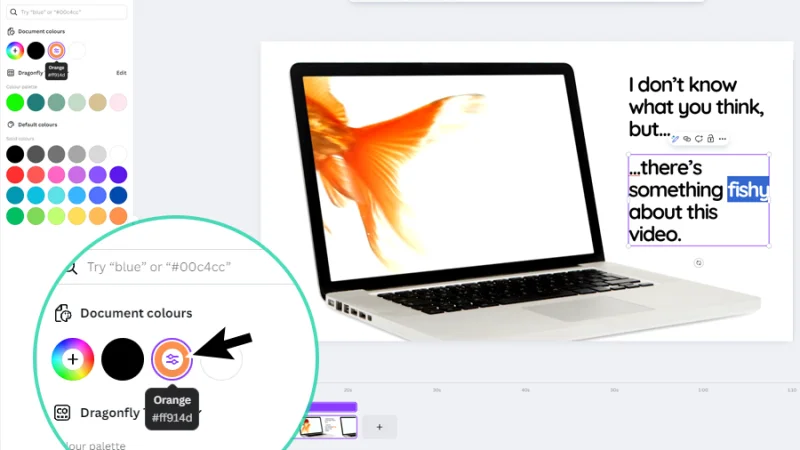
It’s quick and easy to add and edit text colors in Canva to add a more personal touch to our message.
Let’s have a look at the Video Timeline and set up animation timings. I won’t go too deep into how the Timeline works and all its different features, you can have a look at this in our previous Video Editing blog post.
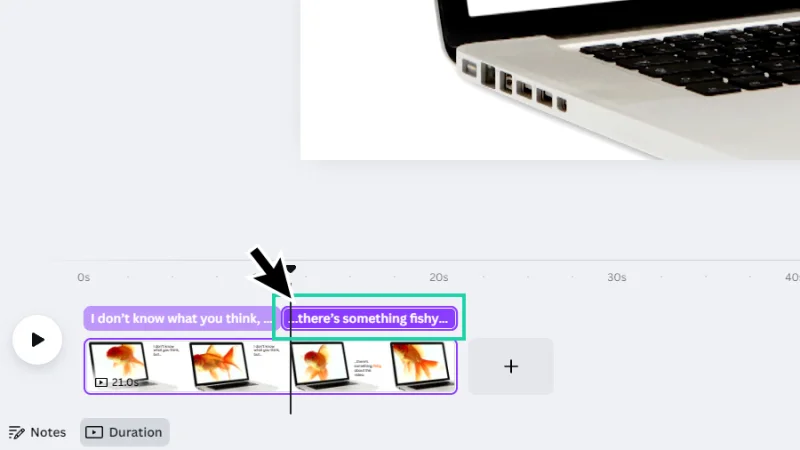
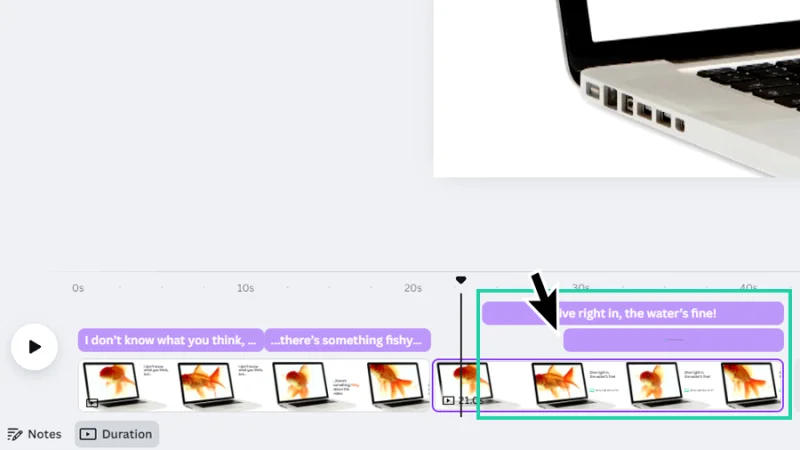
Have a look at the image below. We can see the video’s page – that’s the clip with the laptop and the cute goldfish I imported from Elements – and, above it, the first text element we’ve added to the project. ‘Where’s the second textbox?’ you ask.
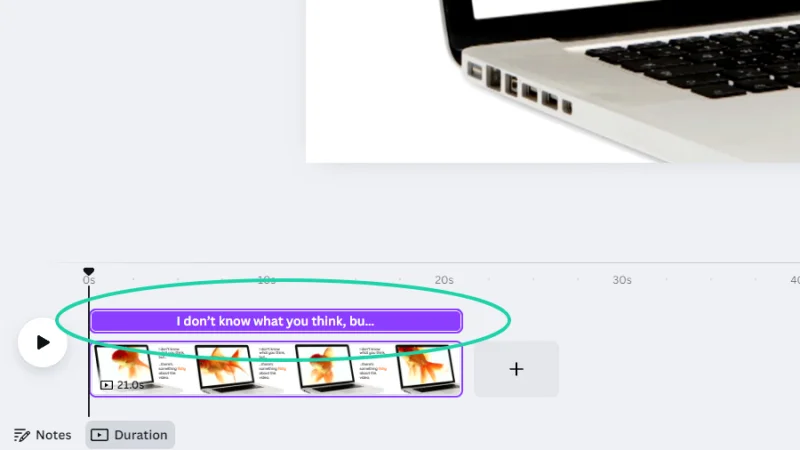
Our text element is displayed on the video timeline above it’s page.
Right now, both text boxes exist on the same page (that’s fine) and have the same time duration (not so fine, I want them to appear in a specific order). If I make a timing adjustment to one of these text elements, by clicking and dragging from one of the sides (that’s called trimming), the second will pop up so we can easily tell them apart.
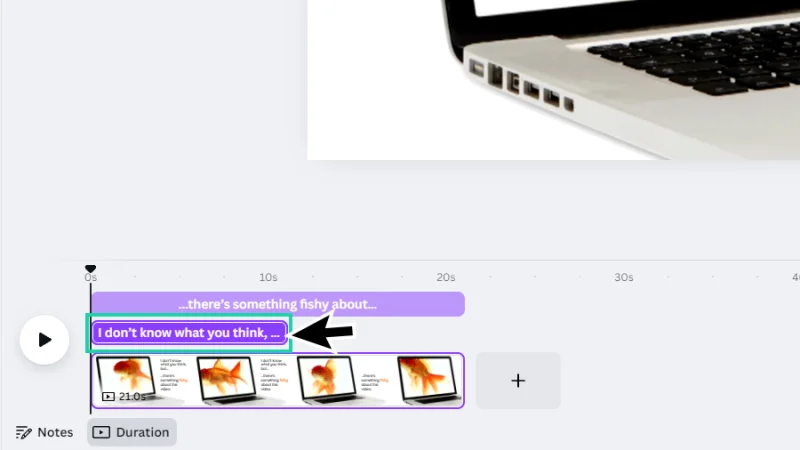
I want my text elements to appear on screen in a specific order, so I need to adjust their timing.
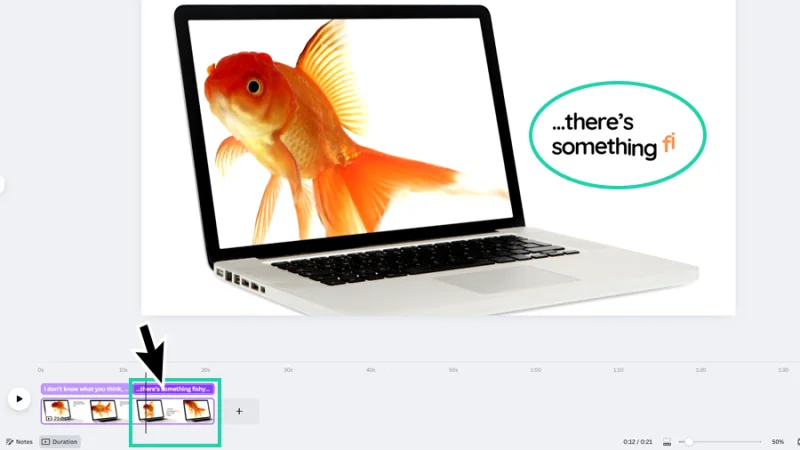
Next, we adjust the second textbox’s timing, so it appears on screen after the first animation is complete and that first half of the text is gone. As I trim the second part of the message, both layers will eventually fit the same track, because they are now placed in sequence inside the page and don’t overlap.
Timing is vital to keep our video flowing with proper pacing and creating a compelling story.
If I play the video preview right now, I’ll see the fish moving around the screen, then the first line of text will animate into the screen, fade away, then the second line of text is also animated into the screen and will remain visible until the clip ends. Cool, huh?
We are making a video and animating text in Canva! How cool is that?
Now for the second half of the video. Let’s right-click the page thumbnail on the timeline and pick Duplicate page from the pop-up menu. There’s a handy shortcut for that: Command + D on a Mac or Control + D on a PC.
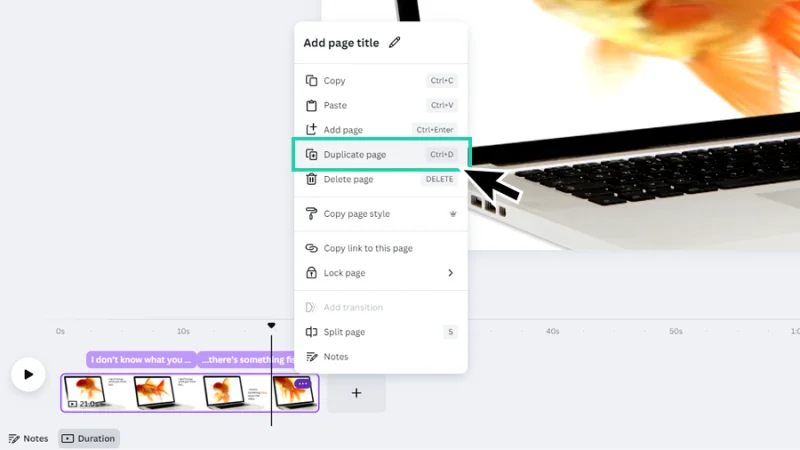
I’ll duplicate the first page to create a loop and add some new elements to our video.
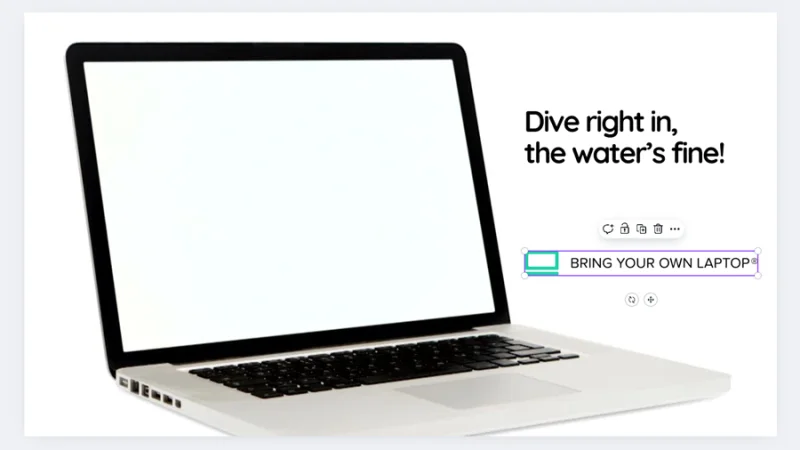
I’ll add a new text element to our video, and a logo as well, to make it look a bit more institutional and serious. You may recognize the logo, so I’ll skip further details. I have uploaded the logo’s image file to Canva Uploads and I just click once on the thumbnail to place it on the video project’s active page – that’s the second clip, right there.
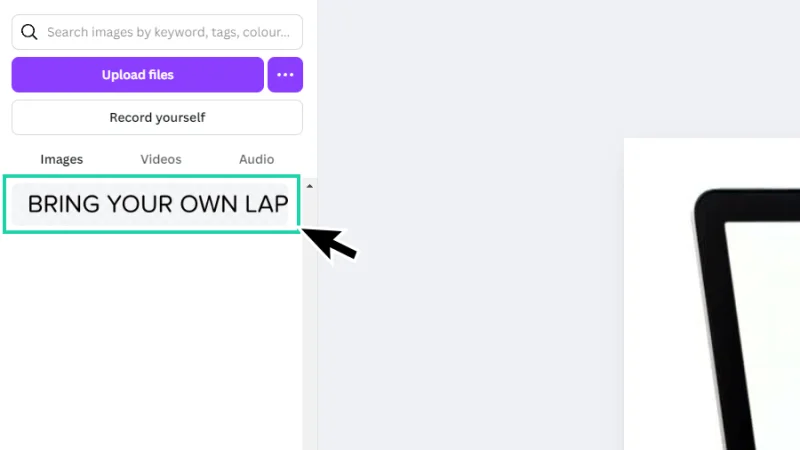
Hmmm. Bring your own lap? That sounds a bit weird! Preview thumbnails can be tricky, sometimes!
Ok, now I’ll type the third part of the message and adjust everything on screen, aligning the text and logo with the laptop in the background. I like keeping things tidy – well, I try!
A balanced layout makes every detail more accessible for all viewers.
Next, we adjust the timings for the second group of animations in our video. I’ll be overlapping elements, this time. We can see the difference in the timeline below.
We’re almost there!
How cool is this? I’m previewing the whole video project, right now. The goldfish is curious and cute inside that laptop screen, the white background makes everything clear and so easy to read, and the text and logo animations are spot on and fun!
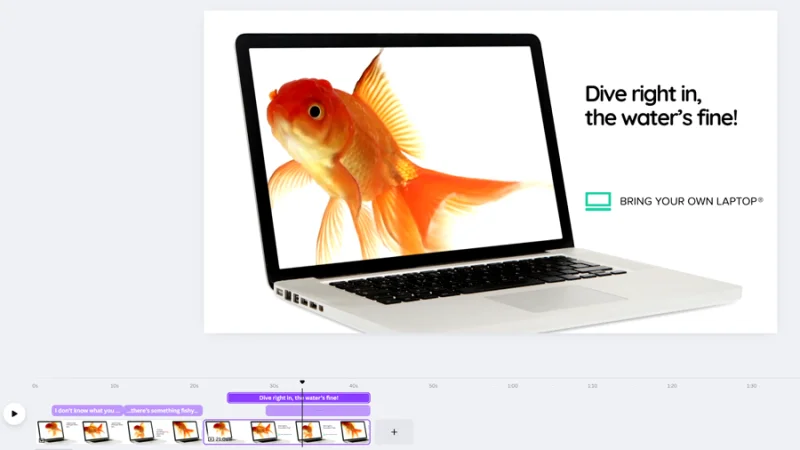
This is one (hopefully) funny video, introducing the BYOL relaxed vibe to the world!
Now all we need is to export this gem of a video production and share it with the world! I’ll show you how to download it to your hard drive, as an example.
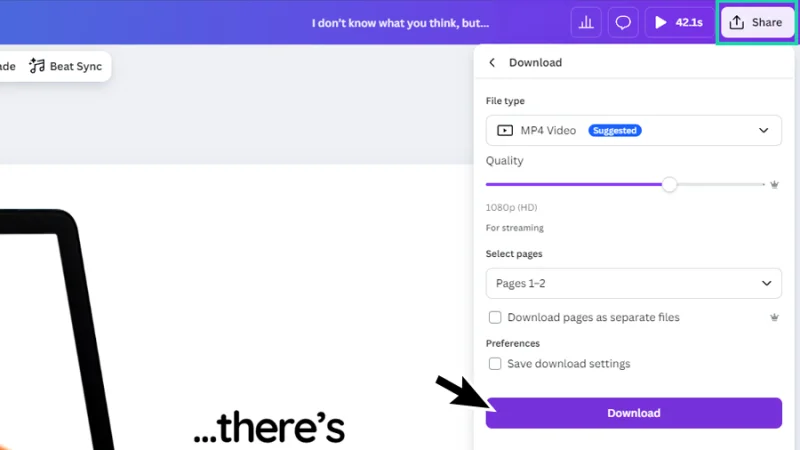
First, we click the Share button in the top right corner of our workspace and pick Download from the available options. Next, we set the video output format to MP4 Video, and set quality to one of the following resolutions:
480p – Standard Definition - 720 x 480 - Draft version
720p – HD – High Definition – 1280 x 720 - Mobile screens
1080p – Full HD – 1920 x 1080 – YouTube, social media, streaming, presentations
4K – Ultra HD – 3840 x 2160 – Large screens
Please note that some of these settings may be available only on Canva’s Pro version.
Finally, hit that Download button like you mean it and… wait a few minutes while Canva renders the video.
Sharing with the world is a designer’s happiest moment!
And There We Have It!
Wait a minute, why do I have the feeling I’m forgetting something…?
Oh, I know! Here’s a special bonus just for you!
Alright! We’ve finished our first video with animated text! High fives all around! We can now share our lovely goldfish and wonderfully crafted joke ahem with our friends, family, colleagues, enemies, pets, everyone we can remember! Now that you know how to animate text, unleash your creativity and start designing some incredible animated images, presentations, and videos! You are clearly on a path to Canva Hero level! Thank you for reading this post! See you soon!
What’s Next?
Join BYOL and have fun learning Canva or go beyond and access my courses on Illustrator, Photoshop, Lightroom, InDesign, Figma, and more. As a BYOL member you will also enjoy personalized support, earn certificates, and tackle exciting community challenges. Head here to sign-up!
See you in class! – Dan
Popular posts
Adobe MAX 2025 - File Download
Daniel Scott
-1750161634.webp)
Modeling Shortcuts in Blender
Daniel Scott
Plugins in Illustrator
Daniel Scott
-1748277302.webp)
How to Straighten the Horizon in Photoshop
Daniel Scott
Go from zero to design hero with our awesome courses!


- Powered by Marvin
- Terms of use
- Privacy policy
- Cookie policy
-
- © Bring your Own Laptop Ltd 2026