Unlocking the Power of the Smooth Tool in Illustrator

Daniel Scott
@dan
Hi, everyone!
In this post, I’ll show you how the Smooth tool can help you refine vector designs in Illustrator, making them clean and fluid. Learning to effectively utilize this tool will help you upgrade your portfolio to a professional level!
The Smooth tool is the best way to approach hand-drawn paths or traced images with sharp edges or irregular curves, by simplifying those paths, reducing the number of anchor points that make them look rough or uneven.
This post is based on my Illustrator Advanced course. When you become a BYOL member, you gain access to this course as well as my 30+ additional courses on After Effects, Photoshop,Figma, Lightroom, and more. As a BYOL member you will also enjoy personalized support, earn certificates, and tackle exciting community challenges. Head here to sign-up!
Ready for more? Become a BYOL member!
Explore 30+ Essentials and Advanced courses in Figma, Photoshop, Illustrator, Lightroom, Premiere Pro, Webflow, and more. Enjoy personalized support, earn certificates, connect with other creators and tackle exciting community challenges.
START YOUR LEARNING JOURNEYUnlimited access to ALL content
Instant access to all of our courses and exclusive content while you're a member.
Priority advice and support
Ask us anything! Our amazing Teaching Assistants are here to support you
Certificates of achievement!
Celebrate and share the milestones in your learning journey
Follow me for two different ways to make the best use of the Smooth tool, quick and easy!
Smoothing vector shapes and paths in Illustrator
The Smooth tool is perfect to fine-tune any irregular curve or sharp edge in a vector design.
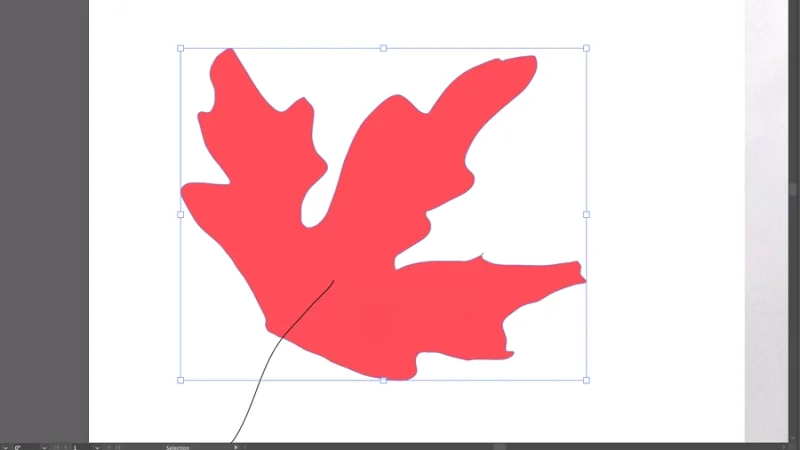
Let’s start with this hand-drawn illustration. I used the Pencil tool to draw it and create a free hand sketched look. You can also use the Brush tool for this, see which is best for what you are drawing. When we use Pencil or Brush to draw shapes, we often create a path with a high number of anchor points – this is why we may end up with jagged edges or odd curves.
Technique 1 – Smoothing an entire Path
The first technique will adjust edges and curves across the whole path we’ve drawn. Let’s take this step by step.
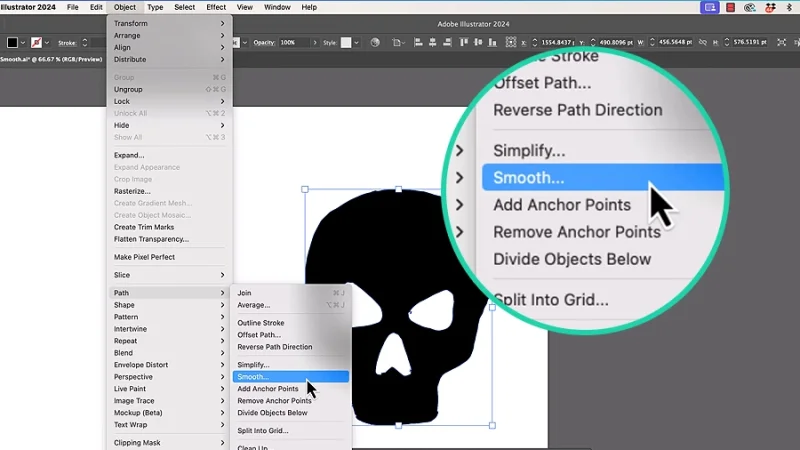
First, making sure our illustration is selected, we move our mouse to “Object” in the top menu bar, then we hover the cursor over “Path” and click on the “Smooth…” option.
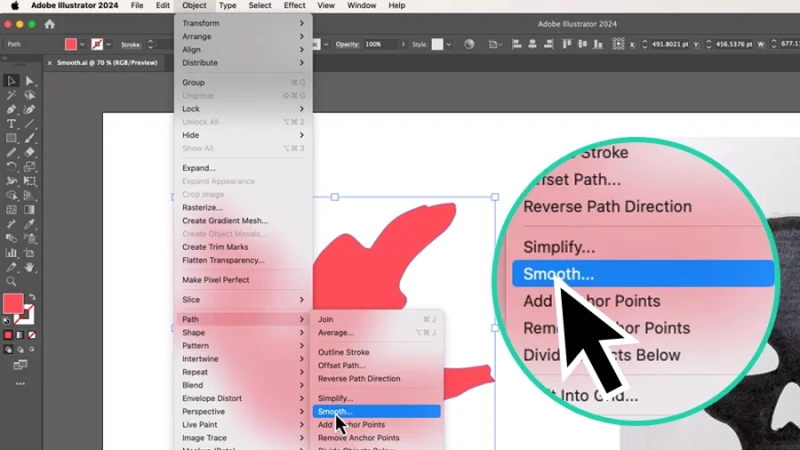
Select the Smooth tool from the top menu bar and start enhancing your vector graphics to top level.
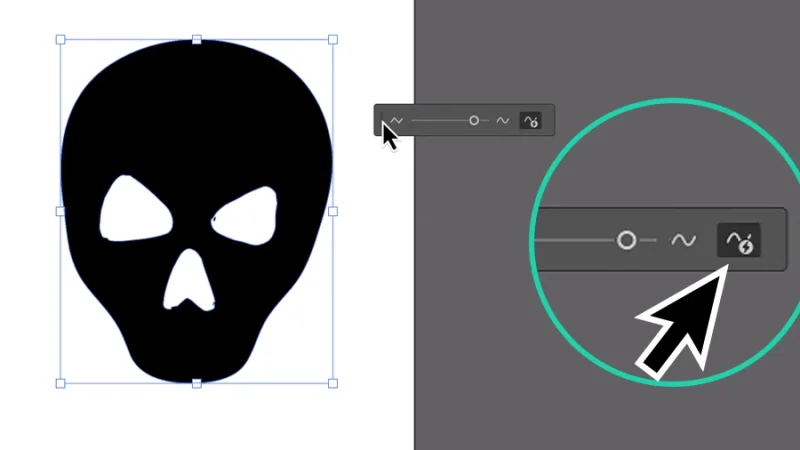
An adjustment panel will pop up on our workspace, allowing us to manually adjust how much we want our path simplified, from 0 to 100%.
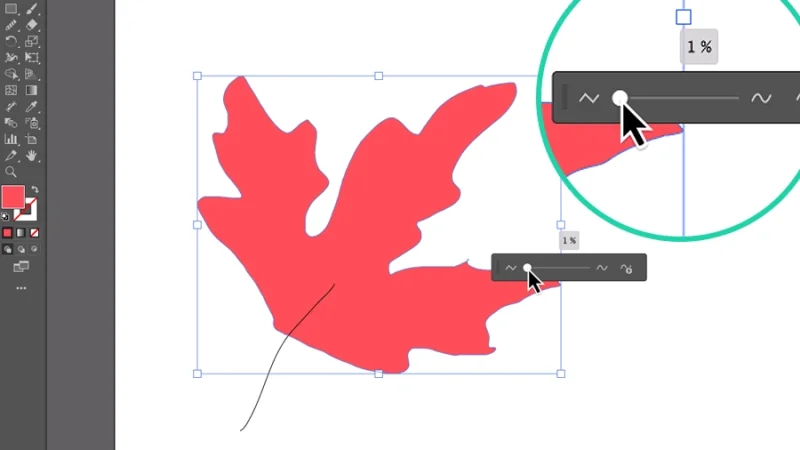
You can adjust the smoothing rate by manually dragging the slider from 0 to 100%.
There is also an “auto-smooth” option in this panel from which we let Illustrator decide what is best for our design. Depending on what we are working on, the auto-smooth response can be perfect and timesaving or it may go a bit too far and oversimplify the whole object.
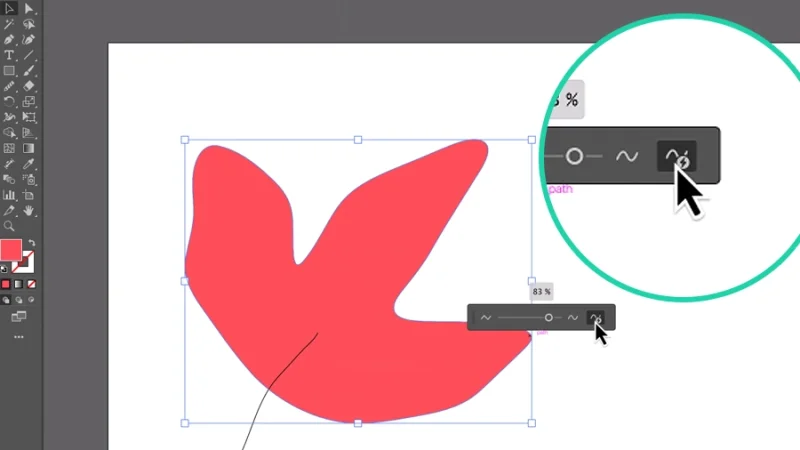
There is an auto-smooth option that assists you in setting the best smoothing rate for your path.
What we want is to make our drawing feel more natural and smoother, without any awkward or jagged edges, so the best way to achieve this is carefully adjusting the smoothing rate with the manual click and drag setting. For this use case, I’m happy at 20%.
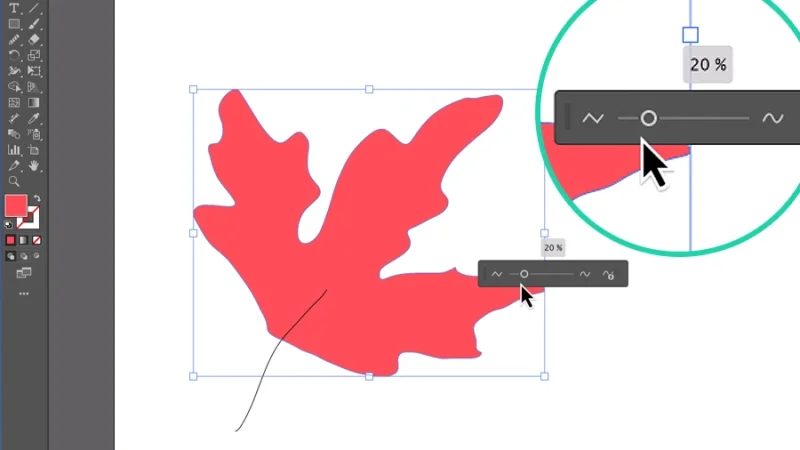
I have manually set the smoothing rate to 20%. You can always come back and define other rate values.
We can see that there are still some details that can be fixed, but we’ll be looking at them a bit down the road, so stick around!
Pro tip:
The Smooth tool doesn’t work only with closed paths. We can use it to smooth hand-drawn lines as well.
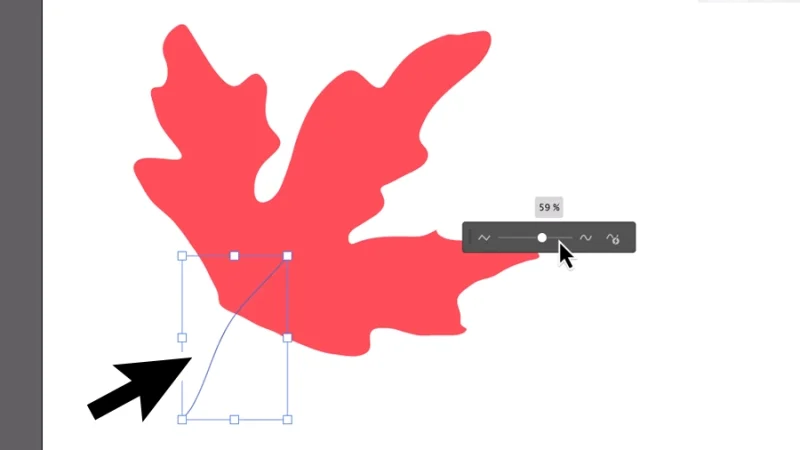
The Smooth Tool is also a valuable asset for refining open paths.
Technique 1 – Traced Vectors
Let’s have a look at the same technique but working with a sketch I’ve drawn on a sketchbook, then scanned to pixel format, and imported to Illustrator to change into vector, using the absolutely awesome Image Trace feature.
We´re looking at a sketch I have converted into a vector shape, meaning that it can be upscaled to any size without losing resolution. Can you guess what we will do next? That’s right! We go back to our top menu bar and hit Object, Path, and Smooth… to open our adjustment panel! Nice!
We can fine-tune a traced vector shape using the Smooth tool.
Once again, we can try the auto-smooth option, and it works pretty well! Our sketch feels really balanced and even around the edges.
The Auto-smooth option achieves great results on a single click!
We can always check if it may look better with a manual adjustment. For this object, I’m happy with a 47% smoothing rate. What do you think?
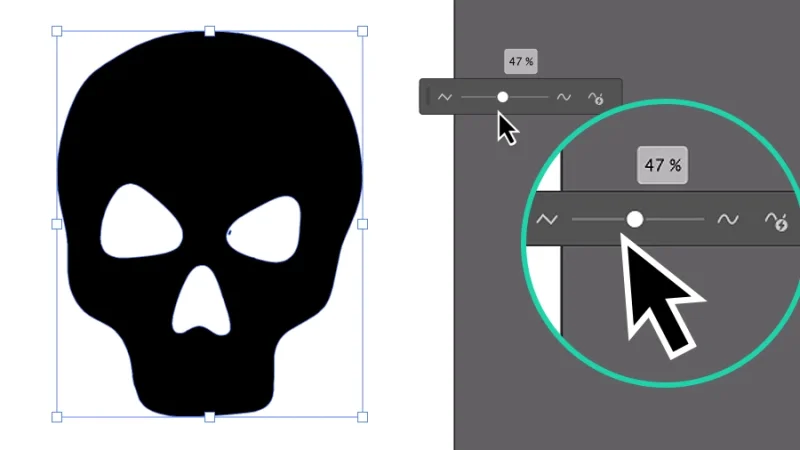
You can use the automatic option to set a smoothing rate value and then manually adjust it for best results.
Timeout #1
The Smooth tool is amazing for customizing typography. Check out this article on how to avoid some common mistakes inexperienced designers fall into.
Technique 2 – Smoothing Specific Parts of a Path
The second technique we’ll learn allows us to smooth a specific curve or edge on a path. Remember that the first technique affects the whole path. For this, we will pick the Smooth tool from our toolbox and use it like a brush, directly on the details we need to simplify.
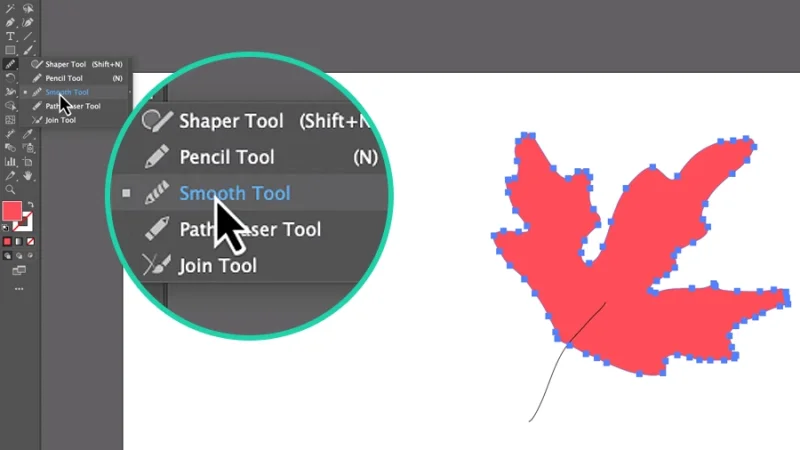
You can also use the Smooth tool to clean parts of a closed path by selecting it from the left toolbox.
Let’s go back to our first design and use the Smooth tool to fix those details that still needed some work. Once again, making sure the object is selected, all we need to do is click and drag along the path for the Smooth tool to do its magic!
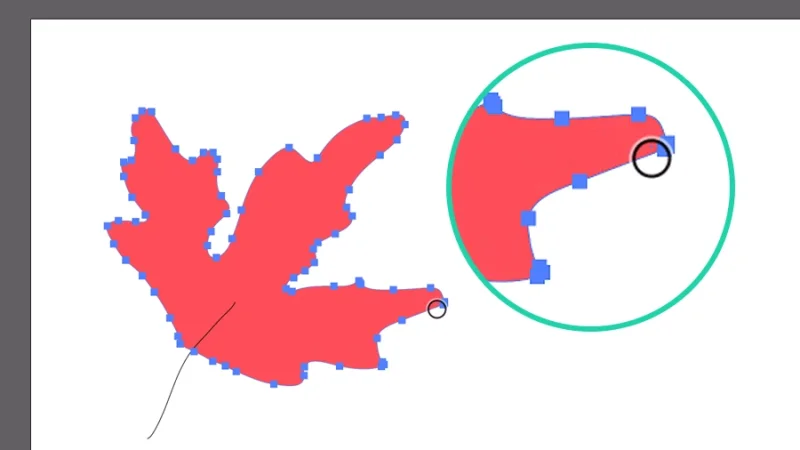
Click and drag with the Smooth tool like using a brush to change parts of a path.
Customizing the Smooth tool
If we double-click the Smooth tool button in our toolbox, we access the Smooth Tool Options dialog box. This gives us additional control over the changes we make to our path.
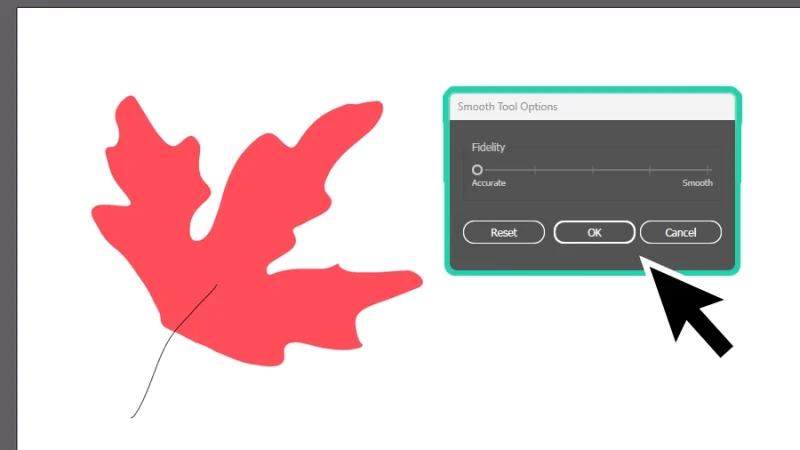
You can set precision and smoothing intensities in the Smooth Tool Options dialog box.
If we move the slider to the left, towards “Accurate”, Illustrator will keep the new path as close as possible to its original form. By moving the slider to the right, towards “Smooth”, Illustrator will use higher smoothing rates to do its magic. Decide what’s best according to the object you are editing.
Timeout #2
Check out this comprehensive article on Logo and Vector Design theory. It gives a great overview of planning and bringing to life your projects in Illustrator!
Pro Tips:
Don’t spend too much time trying to achieve perfection on your first path. Start with a rough sketch and refine it to Ace level with the Smooth tool.
Combine the Smooth tool with the Direct Selection tool to adjust anchor points and handles with higher precision.
And there you have it!
You are ready to design logos, customize typography, and create awesome illustrations with that professional finish that will amaze everyone! The more you use the Smooth tool the better you will understand how it affects paths and which are the best settings for each project!
What 's Next?
To further your Illustrator skills, join BYOL and you will gain access to my Illustrator Essentials and Advanced courses as well as my 30+ additional courses on Figma, Photoshop, Lightroom, Premiere Pro, Webflow, and more. As a BYOL member you will also enjoy personalized support, earn certificates, and tackle exciting community challenges. Get started here.
See you in class! – Dan
Ready for more? Become a BYOL member!
Explore 30+ Essentials and Advanced courses in Figma, Photoshop, Illustrator, Lightroom, Premiere Pro, Webflow, and more. Enjoy personalized support, earn certificates, connect with other creators and tackle exciting community challenges.
START YOUR LEARNING JOURNEYUnlimited access to ALL content
Instant access to all of our courses and exclusive content while you're a member.
Priority advice and support
Ask us anything! Our amazing Teaching Assistants are here to support you
Certificates of achievement!
Celebrate and share the milestones in your learning journey
Popular posts

Adobe MAX 2025 - File Download
Daniel Scott
-1750161634.webp)
Modeling Shortcuts in Blender
Daniel Scott
Plugins in Illustrator
Daniel Scott
-1748277302.webp)
How to Straighten the Horizon in Photoshop
Daniel Scott
Go from zero to design hero with our awesome courses!


- Powered by Marvin
- Terms of use
- Privacy policy
- Cookie policy
-
- © Bring your Own Laptop Ltd 2026