Advanced Keyboard Shortcuts in Illustrator
Questions


Student Gallery
Course info
Overview
- - How to use artificial intelligence to boost your creativity in ideation.
- - The quick way to take hand-drawn sketches and vectorize and color them.
- - The building blocks needed to set you loose on a huge variety of beautiful effects and techniques.
- - To make beautiful charts and graphs for your documents.
- - Color mastery to make quick color adjustments, Pantones, and blend it all together beautifully.
- - How to master images inside of your illustrator workflow.
- - To harness all the secret gems that'll help you level up your typography skills.
- - All the tricks of the trade for drawing complex shapes easily.
- - To double your creativity with the Transform and Distort section.
- - To speed up your personal workflow to get the most out of your creative day.
- The Curvature Tool
- How to master corners with corner widget effects
- How to work with Compound Paths
- The difference between Expand & Expand Appearance
- How to create Graphic Styles
- How to make Symbols
- How to use the Smooth Tool
- Advanced use of Simplify Path
- What Live Shape Effects are for
- How to make Repeating Grids & Concentric Circles
- How to make Random Objects
- Advanced Keyboard Shortcuts in Illustrator
- How to add a Gradient on a Stroke
- How to add a Gradient in Text
- How to use the Freeform Gradient tool
- How to use Advanced Color Swatches
- How to use Global Color Swatches
- What is the difference between RGB vs CMYK color modes?
- How to proof colors
- How to use Pantone Spot Colors
- Recolor Artwork & Changing all colors at once
- How to use Blending Modes
- How to work with Images & Blending Modes
- How to make Black & White Images
- Learn Advanced Workflow Tricks
- All the Super Selection Mastery
- How to use the History Panel
- Advanced Fonts Tricks & Tips
- Use Retype to know what Font is being used
- How to put Text Inside a Letter or Shape
- How to use the Touch Type Tool
- How to add a Connected Stroke Around Multiple Shapes
- How to Offset a Stroke with Text
- How to make a Bar Chart in Illustrator
- How to make a Pie Chart in Illustrator
- Layer Power Moves
- Advanced Artboard & Pages Tricks
- How to Unlink vs Embedded Images
- How to Crop Images Rather than Mask
- How to Mask Inside Text & Multiple Shapes
- How to you use the Puppet Warp Tool
- How to use the Distort Envelope Shape & Type
- How to use the Envelope Mesh
- How to blend lines together
- How to make a Linocut Effect
- How to make 3D Gradient Lettering Blends
- How to spin text into a ring
- How to turn text into a 3D donut shape
- How to make a Duotone image effect
- How to make a Roughen Stamp Vector Effect
- How to make a Neon Sign Glow Effect
- How to use a Halftone Effect using Plugins
- Advanced Exporting Assets Tricks in Illustrator
- How to use the Dimension Tool
So what're you waiting for? Let's start the course now!

Daniel Scott
Founder of Bring Your Own Laptop & Chief Instructor
instructorI discovered the world of design as an art student when I stumbled upon a lab full of green & blue iMac G3’s. My initial curiosity around using the computer to create ‘art’ developed into a full-blown passion, eventually leading me to become a digital designer and founder of Bring Your Own Laptop.
Sharing and teaching are a huge part of who I am. As a certified Adobe instructor, I've had the honor of winning multiple Adobe teaching awards at their annual MAX conference. I see Bring Your Own Laptop as the supportive community I wished for when I was first starting out and intimidated by design. Through teaching, I hope to bring others along for the ride and empower my students to bring their stories, labors of love, and art into the world.
True to my Kiwi roots, I've lived in many places, and currently, I reside in Ireland with my wife and kids.
Certificates
We’re awarding certificates for this course!
Check out the How to earn your certificate video for instructions on how to earn yours and click the available certificate levels below for more information.
Downloads & Exercise files
What are the most useful Adobe Illustrator keyboard shortcuts to learn first?
The best Illustrator shortcuts are the ones that remove tiny bits of friction you hit all day. Start with fill and stroke shortcuts, text spacing shortcuts, zoom and display toggles, and a handful of navigation tricks. A few of these will save more time than memorising fifty flashy ones you never use.
Adobe Illustrator Advanced Keyboard Shortcuts That Actually Speed Up Your Workflow
It is time to get fancy with shortcuts.
Not fancy for the sake of it, either. Proper useful fancy. The kind that stops you rummaging through panels, clicking tiny icons, opening menus, and generally doing things the long way when Illustrator already has a quicker option waiting for you.
You do not need to remember every shortcut going. You just need a tight set of good ones that match how you actually work. These are the shortcuts worth keeping close.
Fill, gradient, none, and the fill stroke dance
Start with the three keys sitting together near the M key on most keyboards. They are ridiculously handy because they control the selected object's appearance fast.
Full stop or period adds a solid fill.
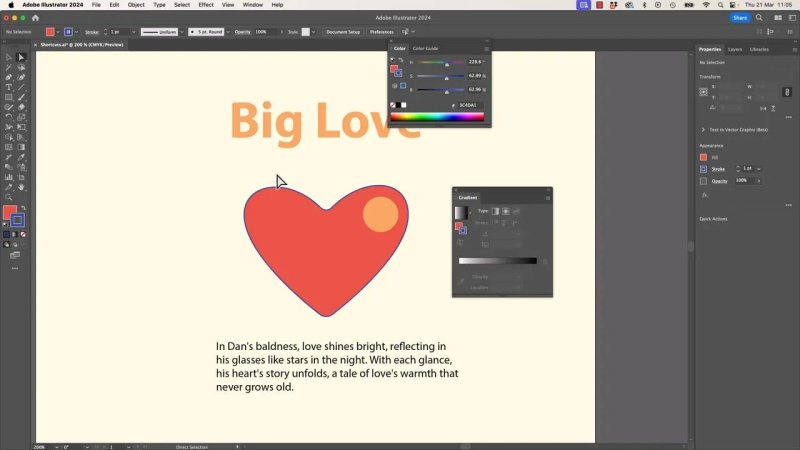
Comma adds a gradient.
Forward slash clears the active fill or stroke.
The important bit is that Illustrator applies the shortcut to whatever is currently in front: the fill or the stroke. So if the fill is active and you tap forward slash, the fill gets cleared. If the stroke is active, the stroke gets cleared instead.
That makes forward slash one of those tiny brilliant shortcuts. Want rid of a fill? Gone. Want rid of a stroke? Gone. No panel hunting.
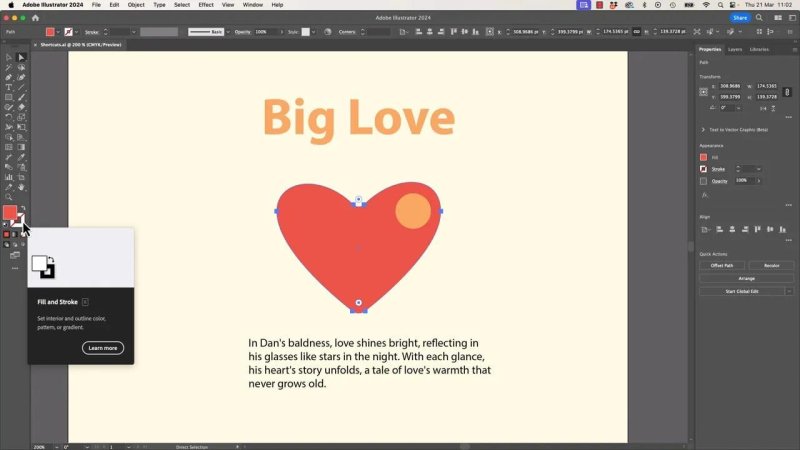
When fill and stroke are active, these shortcuts let you swap, clear, or apply appearance changes without digging through panels.
Swap fill and stroke instantly
If you have ever styled the wrong one and thought, no, that was meant to be the fill, use Shift + X.
That swaps the fill and stroke values. It is the keyboard version of clicking the little double arrow icon in the toolbar, and it is much faster.
Bring the fill or stroke to the front
Tap X on its own to toggle which one is active. That means if you are about to choose a colour, you can decide whether it applies to the fill or the stroke first.
Very small shortcut. Very big difference over time.
Reset everything to default
Tap D to reset the selected object to Illustrator's default appearance: white fill, black stroke.
It is the emergency reset for when things have gone a bit weird and you want a known starting point again.
Two display shortcuts that make editing much easier
Some shortcuts are less about styling and more about clearing visual clutter so you can actually see what you are doing.
Outline mode
Command + Y on Mac or Control + Y on PC switches to Outline Mode.
This is the x ray view. No fills, no distractions, just paths. It is brilliant when you are dealing with overlapping shapes, hidden edges, or complicated artwork.
Hide edges but keep the object selected
Command + H on Mac or Control + H on PC hides the selection edges, anchor points, and all the blue dot chaos, while keeping the object selected.
That is useful when you want to work cleanly without all the interface clutter getting in the way. Just remember to turn it back on, because it can be slightly confusing if you forget you hid everything.
Hiding edges is one of the easiest ways to make fiddly artwork feel less messy while you work.
Text shortcuts for size, kerning, and leading
If you work with type at all, these are worth committing to memory early.
Change font size from the keyboard
Select some text and use:
Command + Shift + greater than or less than on Mac
Control + Shift + greater than or less than on PC
On many keyboards, those are the same keys as full stop and comma. This lets you bump text up or down without clicking into the font size field.
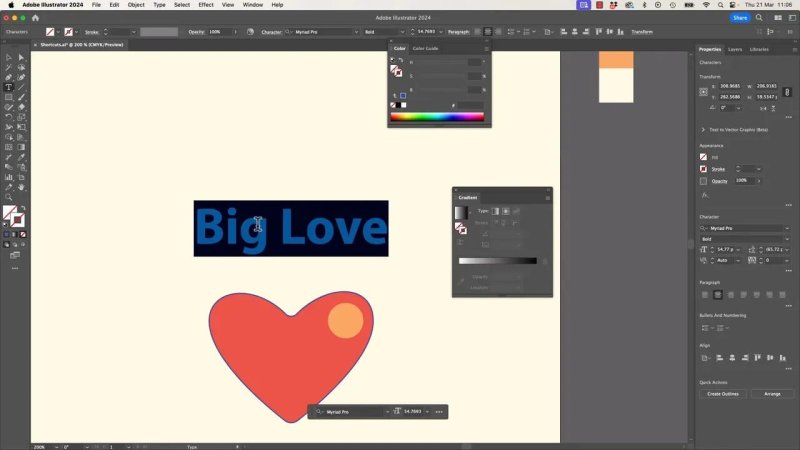
Font size shortcuts are quickest when the text is already selected and ready to nudge up or down.
Tighten or loosen kerning
For spacing between letters, hold:
Option + left or right arrow on Mac
Alt + left or right arrow on PC
You can apply that to a text selection, or place the text cursor between two letters and adjust a specific gap.
This is especially useful in logos, headlines, and any word where awkward letter spacing jumps out. Some fonts are beautifully spaced. Some free fonts clearly have not had enough love. This shortcut helps you fix the rough ones quickly.
Adjust leading with the keyboard
For line spacing, select the text and use:
Option + up or down arrow on Mac
Alt + up or down arrow on PC
Left and right for kerning, up and down for leading. Easy to remember, and very useful when you want to tighten up or open out a paragraph.
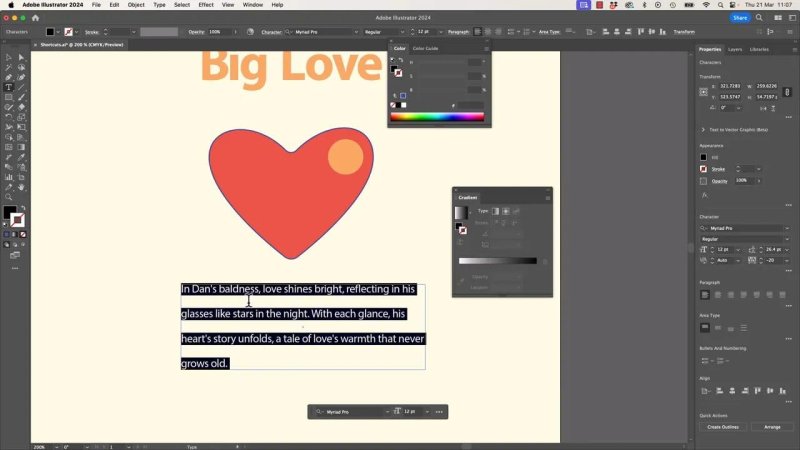
Once a text block is selected, the arrow key shortcuts make kerning and leading adjustments much quicker than panel controls.
Preferences worth changing for a faster Illustrator setup
Not every speed improvement is a shortcut. A couple of preference tweaks can make Illustrator feel a lot less annoying.
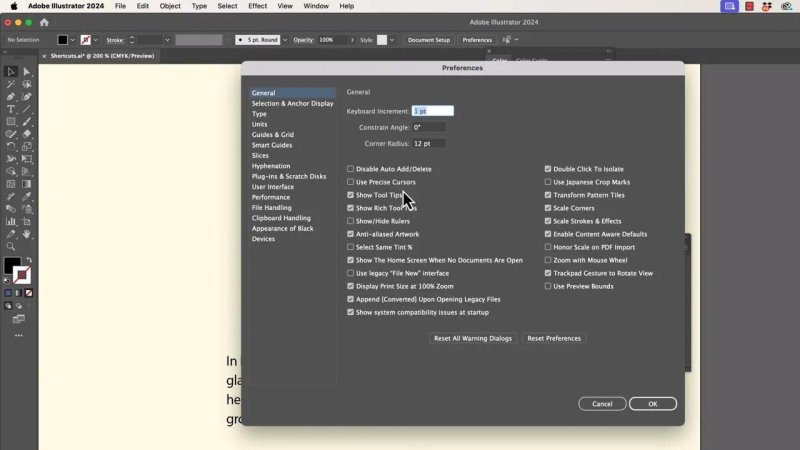
Turn off save prompts you do not need
When opening older files, Illustrator can keep warning you that the file has been converted when you try to save it. Some people like that reminder. Some people absolutely do not.
If it slows you down, turn it off in Settings under General.
Enable zoom with the mouse wheel
If your mouse has a scroll wheel, turning on zoom with mouse wheel is well worth it. It gives you a really quick way to move in and out of artwork without changing tools.
Disable rich tooltips if they drive you mad
Those oversized popups that appear when you hover over tools can be helpful if you are new. If they are constantly getting in the way, turn off Show Rich Tooltips.
A few small preference changes can make Illustrator feel much calmer and quicker to use.
Choose whether zoom follows your selection
Illustrator can zoom toward the selected object rather than the centre of the screen. Some people love that. Some people hate it with deep passion.
If Illustrator keeps jumping to whatever is selected when you zoom, head to Selection and Anchor Point Display and toggle Zoom to Selection.
That way your zoom behaviour matches how you like to navigate.
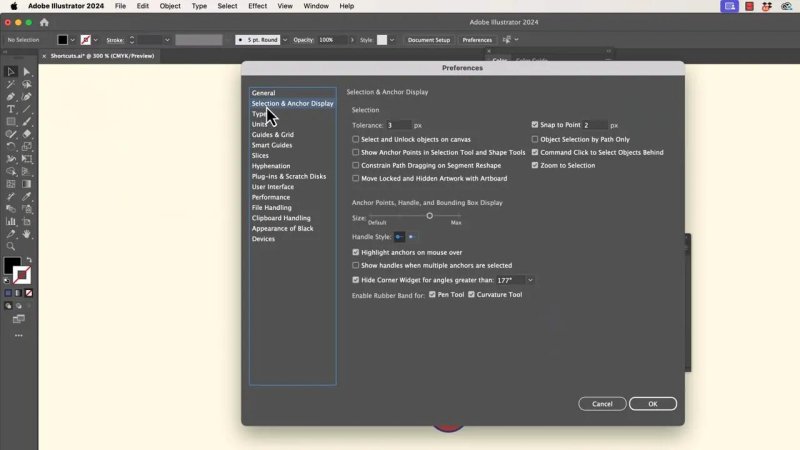
If zooming keeps leaping to the selected object, this is the setting to change.
Shape Builder, duplication, and selecting through objects
Now for the shortcuts that help when artwork gets layered, repeated, or slightly chaotic.
Unite multiple shapes quickly with Shape Builder
With the Shape Builder tool, you do not need to click each overlapping bit one by one if the goal is simply to merge them. Hold Shift and drag across the shapes to combine them in one move.
It is basically a quick, draggy version of a Pathfinder unite.
Repeat your last duplication
If you duplicate an object by dragging with:
Option on Mac
Alt on PC
then tap Command + D on Mac or Control + D on PC to repeat that duplication again and again.
That is how you get evenly repeated copies fast.
Select an object underneath another one
When something transparent or overlapping is blocking what you want, hold:
Command on Mac
Control on PC
Then click to cycle through objects underneath the cursor.
Instead of accidentally diving into isolation mode or constantly moving the top object out of the way, you can target what sits underneath directly.
The Shift key does more than keep things straight
Everyone knows Shift for constraining proportions or movement, but it also boosts increments all over Illustrator.
Move objects in bigger jumps
Tap the arrow keys to nudge an object by the current keyboard increment. Hold Shift while nudging and Illustrator multiplies that movement by ten.
Same idea with fields such as:
Font size
Stroke weight
Width and height
Rotation
Any other numeric field with arrows
Normal arrow keys make small changes. Shift plus arrow keys make larger ones.
Set a better keyboard increment
If nudging feels too chunky, change the Keyboard Increment value when nothing is selected.
By default it might be set to 1 point, but dropping it to 0.1 gives you much finer control. Then, when you need a bigger move, hold Shift and Illustrator turns that 0.1 into 1 point jumps.
That combination is brilliant: tiny moves by default, larger moves on demand.
Use arrow keys inside numeric fields
Instead of deleting a number and typing a new one, click inside a field and use the up and down arrows.
That works for dimensions, rotation, and plenty of other controls. Add Shift and you get bigger jumps there too.
Switch between apps and documents faster
If you jump between Illustrator and other apps all day, these are lifesavers.
Toggle between open applications
Use:
Command + Tab on Mac
Control + Tab on PC
This cycles through open programs, so if you are bouncing between Illustrator and Photoshop, you can move back and forth without touching the mouse.
That makes tasks like copying artwork from Illustrator and pasting it into Photoshop much quicker.
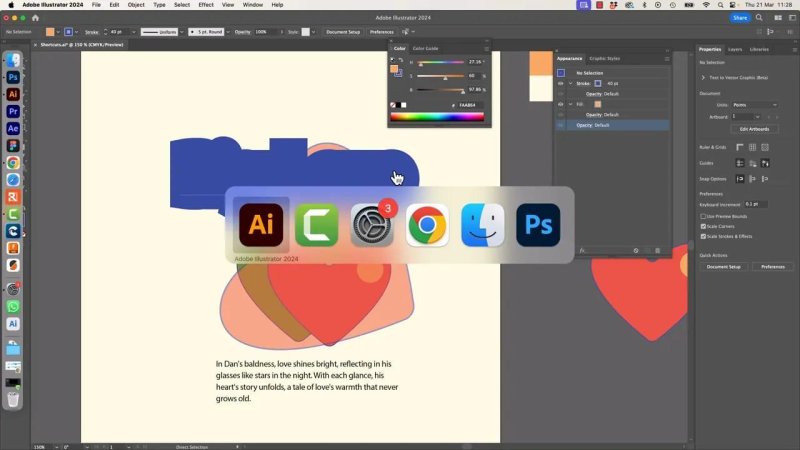
If you jump between Illustrator and Photoshop a lot, app switching from the keyboard saves a surprising amount of time.
Cycle through open documents or tabs
If you have multiple Illustrator documents open, use:
Command + tilde on Mac
Control + tilde on PC
This can be awkward on international keyboards because the tilde or grave key is not always in the same place, but if your keyboard supports it, it is a very handy way to cycle through tabs.
And it is not just for Illustrator. It works nicely in other Adobe apps with tabbed documents too.
Full screen modes and scroll wheel tricks
These are less glamorous than they sound, but they are useful if you want more canvas space.
Cycle screen modes with F
Tap F to move through Illustrator's screen modes.
One tap removes a bit of interface. Another tap strips back even more. Keep cycling and you come back around again.
It is useful when you want a cleaner presentation, or when you are working on a smaller screen and need more room for the artboard.
Use the scroll wheel for zoom and panning
If zoom with scroll wheel is enabled:
Scroll normally to zoom in and out
Hold Shift while scrolling to pan left and right
Hold Option on Mac or Alt on PC while scrolling to pan up and down
It depends a bit on your mouse and how smooth its wheel is, but once you get used to this, it becomes one of those things you miss immediately on another machine.
The weird one: the tilde key spirograph trick
This last one is random, slightly ridiculous, and honestly a bit showy, but it is fun.
Grab a drawing tool such as the Line tool, hold down the tilde or grave key, and drag. Illustrator repeats the shape in a wild, layered pattern that feels very spirograph.
You can do it with more than just lines, and it creates those strange generative bursts that look far more complicated than the gesture used to make them.
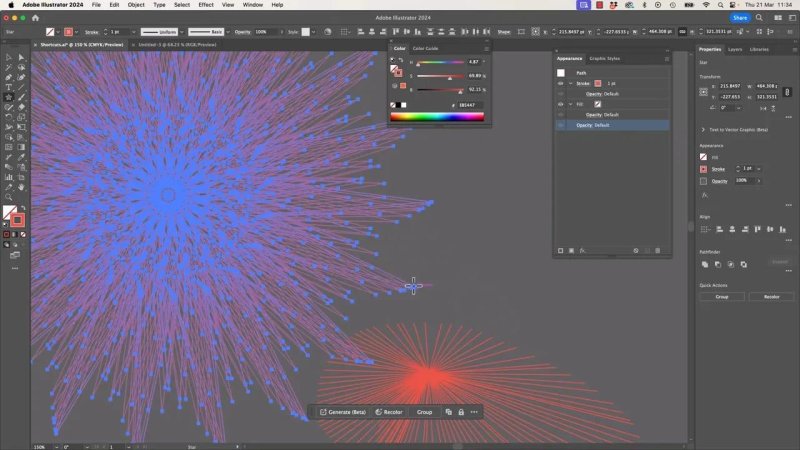
Holding the tilde key while dragging turns a simple drawing gesture into glorious chaotic nonsense.
Do I use it every day? Absolutely not. Is it still delightful? Yes.
The best way to remember these shortcuts
Do not try to memorise all of them in one go.
Pick the ones that match your work. If you spend loads of time adjusting type, learn the text shortcuts first. If you build icons and logos, focus on fill, stroke, Shape Builder, and hidden selection tricks. If you work between apps all day, prioritise app switching and tab switching.
A good rule is this:
Pick one shortcut
Use it for a week or a month
Let it become automatic
Then add the next one
That is how they actually start saving time.
FAQ
What does the forward slash key do in Illustrator?
It clears the active fill or stroke on the selected object. Which one gets cleared depends on whether the fill or stroke is currently in front.
How do I swap fill and stroke in Illustrator?
Press Shift + X. That swaps the current fill and stroke values instantly.
How do I change font size with a shortcut in Illustrator?
Select the text, then use Command + Shift + greater than or less than on Mac, or Control + Shift + greater than or less than on PC, to increase or decrease the size.
How do I kern text with the keyboard in Illustrator?
Use Option + left or right arrow on Mac, or Alt + left or right arrow on PC. Place the text cursor between letters for precise pair kerning.
How do I hide anchor points and selection edges in Illustrator?
Press Command + H on Mac or Control + H on PC. The object stays selected, but Illustrator hides the visual clutter.
What is the shortcut for Outline Mode in Illustrator?
Use Command + Y on Mac or Control + Y on PC. It switches between normal preview and Outline Mode.
How do I repeat a duplication in Illustrator?
After duplicating an object, press Command + D on Mac or Control + D on PC to repeat the last transformation and create additional copies.
How do I switch between Illustrator and Photoshop quickly?
Use Command + Tab on Mac or Control + Tab on PC to cycle between open applications.
- Powered by Marvin
- Terms of use
- Privacy policy
- Cookie policy
-
- © Bring your Own Laptop Ltd 2026