How do you use the Puppet Warp Tool in Illustrator?
Questions
Student Gallery
Course info
Overview
- - How to use artificial intelligence to boost your creativity in ideation.
- - The quick way to take hand-drawn sketches and vectorize and color them.
- - The building blocks needed to set you loose on a huge variety of beautiful effects and techniques.
- - To make beautiful charts and graphs for your documents.
- - Color mastery to make quick color adjustments, Pantones, and blend it all together beautifully.
- - How to master images inside of your illustrator workflow.
- - To harness all the secret gems that'll help you level up your typography skills.
- - All the tricks of the trade for drawing complex shapes easily.
- - To double your creativity with the Transform and Distort section.
- - To speed up your personal workflow to get the most out of your creative day.
- The Curvature Tool
- How to master corners with corner widget effects
- How to work with Compound Paths
- The difference between Expand & Expand Appearance
- How to create Graphic Styles
- How to make Symbols
- How to use the Smooth Tool
- Advanced use of Simplify Path
- What Live Shape Effects are for
- How to make Repeating Grids & Concentric Circles
- How to make Random Objects
- Advanced Keyboard Shortcuts in Illustrator
- How to add a Gradient on a Stroke
- How to add a Gradient in Text
- How to use the Freeform Gradient tool
- How to use Advanced Color Swatches
- How to use Global Color Swatches
- What is the difference between RGB vs CMYK color modes?
- How to proof colors
- How to use Pantone Spot Colors
- Recolor Artwork & Changing all colors at once
- How to use Blending Modes
- How to work with Images & Blending Modes
- How to make Black & White Images
- Learn Advanced Workflow Tricks
- All the Super Selection Mastery
- How to use the History Panel
- Advanced Fonts Tricks & Tips
- Use Retype to know what Font is being used
- How to put Text Inside a Letter or Shape
- How to use the Touch Type Tool
- How to add a Connected Stroke Around Multiple Shapes
- How to Offset a Stroke with Text
- How to make a Bar Chart in Illustrator
- How to make a Pie Chart in Illustrator
- Layer Power Moves
- Advanced Artboard & Pages Tricks
- How to Unlink vs Embedded Images
- How to Crop Images Rather than Mask
- How to Mask Inside Text & Multiple Shapes
- How to you use the Puppet Warp Tool
- How to use the Distort Envelope Shape & Type
- How to use the Envelope Mesh
- How to blend lines together
- How to make a Linocut Effect
- How to make 3D Gradient Lettering Blends
- How to spin text into a ring
- How to turn text into a 3D donut shape
- How to make a Duotone image effect
- How to make a Roughen Stamp Vector Effect
- How to make a Neon Sign Glow Effect
- How to use a Halftone Effect using Plugins
- Advanced Exporting Assets Tricks in Illustrator
- How to use the Dimension Tool
So what're you waiting for? Let's start the course now!

Daniel Scott
Founder of Bring Your Own Laptop & Chief Instructor
instructorI discovered the world of design as an art student when I stumbled upon a lab full of green & blue iMac G3’s. My initial curiosity around using the computer to create ‘art’ developed into a full-blown passion, eventually leading me to become a digital designer and founder of Bring Your Own Laptop.
Sharing and teaching are a huge part of who I am. As a certified Adobe instructor, I've had the honor of winning multiple Adobe teaching awards at their annual MAX conference. I see Bring Your Own Laptop as the supportive community I wished for when I was first starting out and intimidated by design. Through teaching, I hope to bring others along for the ride and empower my students to bring their stories, labors of love, and art into the world.
True to my Kiwi roots, I've lived in many places, and currently, I reside in Ireland with my wife and kids.
Certificates
We’re awarding certificates for this course!
Check out the How to earn your certificate video for instructions on how to earn yours and click the available certificate levels below for more information.
Downloads & Exercise files
How do you change the pose of an illustration in Adobe Illustrator without drawing it again?
You can use Illustrator’s Puppet Warp Tool to pin parts of a grouped vector object and bend or reposition them naturally. It is a fast way to create alternate poses, tweak limbs, tails, fins, or other organic shapes, and get more mileage out of a single illustration.
Illustrator Puppet Warp Tool: How to Repose Vector Artwork Without Redrawing It
The Puppet Warp Tool is one of those features that feels a bit magical the first time it works properly. You take an existing illustration, drop pins into it, and start pulling parts into a new pose.
That means you do not have to redraw the same character over and over just to get a raised arm, a twisted tail, or a slightly different stance. If you create characters, creatures, or anything with soft organic shapes, this can save a lot of time.
A simple example is a whale floating through a cyberpunk city. One illustration. Different tail positions. Different fin positions. Slight changes in attitude. Suddenly the same artwork feels much more alive.
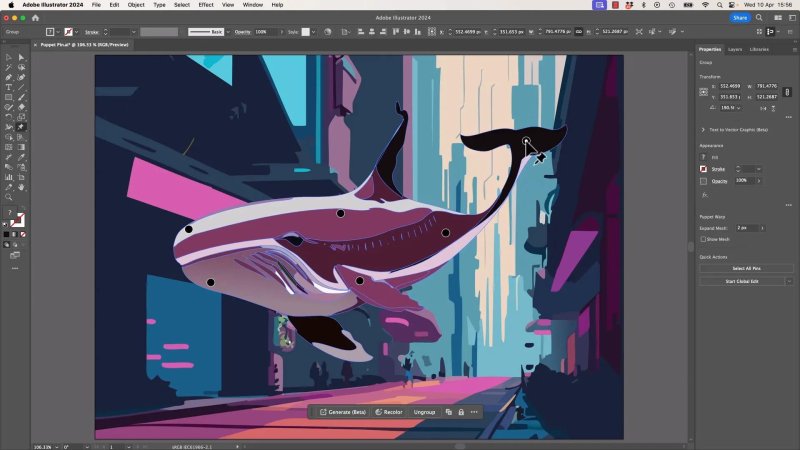
This kind of organic vector illustration is exactly where Puppet Warp starts to shine.
Before you start: one requirement matters
If you want the artwork to distort together, the parts you are manipulating need to be grouped.
That is the big setup step. Select the artwork you want to bend, make sure it is in a group, and then apply the tool to that grouped object. If the parts are not grouped, the behaviour will not make much sense because Illustrator will not treat the artwork as one deformable piece.
There is also another important limitation. This works with vector artwork, not pixel images. So if you are trying to use it on raster graphics, you are going to hit a wall pretty quickly.
Where to find the Puppet Warp Tool in Illustrator
Depending on your toolbar setup, the tool may not be obvious at first.
Check under the Free Transform tool by clicking and holding.
If it is not there, use the three dots near the bottom of the toolbar to find extra tools.
Once selected, Illustrator will usually place some pins automatically.
Those default pins are often surprisingly decent. Not always perfect, but usually close enough to get started quickly.
How the pins work
Think of each pin as an anchor point that controls how the artwork bends.
Once the pins are in place, you can click a pin and drag it to move that part of the illustration. If the initial pin placement is good, you can start posing immediately. If not, remove the pins you do not want and add your own.
For example, if the tail of your whale is not moving the way you want, you can delete the existing tail pin and place a new one in a better spot. A small change in pin placement can make the motion feel much more natural.
A well-placed pin in the tail makes it easy to create a more convincing flap.
Use fewer pins for flexibility, more pins for control
This is the main balancing act with Puppet Warp.
If you use only a few pins, the artwork becomes more fluid. It bends more freely, which can be brilliant for soft movement. The downside is that parts you did not mean to move may come along for the ride.
If you add more pins, you start locking areas down. That gives you more control, but it also makes the shape stiffer and a bit more fiddly to manage.
So the rule is simple:
Fewer pins for looser, more flexible distortion
More pins for better restraint and cleaner local movement
How to stop one part from dragging the whole body
Say you want to move a flipper, but dragging it also pulls the entire body around. That usually means the surrounding area is not pinned down enough.
The fix is to add stabilising pins around the area you want to keep still. Those extra pins tell Illustrator, in effect, "this part stays put." Then you can move the flipper with much better isolation.
If another section still shifts unexpectedly, add another pin there too. It can feel a bit like pinning a butterfly to a board, but that is more or less the idea. You are telling the tool exactly what is allowed to move and what is not.
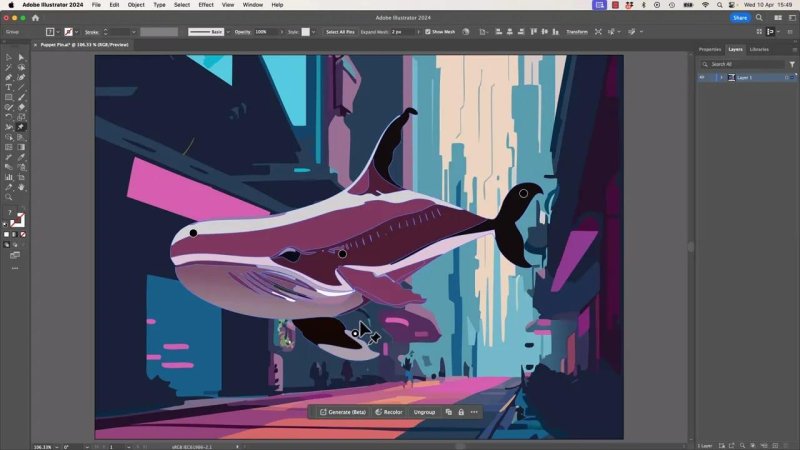
Extra pins around the body help isolate the movement so one fin does not drag everything else with it.
Rotating pins for a more natural twist
Dragging a pin is only part of the story. You can also rotate a selected pin to introduce a twist in the artwork.
This is particularly useful in places like tails and fins where the shape should not just move up or down, but also feel like it is turning through space.
For example, if a tail starts in a downward position and you want it raised, you can:
Add a pin near the tail end
Add another somewhere along the middle of the tail
Drag the tail into the new position
Adjust rotation on the pins to make the bend feel less flat
That extra twist can make a big difference. Without it, the pose may look like a simple bend. With it, the shape feels more alive.
What you can and cannot do with animation
You can create different poses in Illustrator, but Illustrator is not really where this tool becomes a full animation system.
You can fake motion by recording changes or exporting multiple poses, but if you want the pose to shift over time inside a timeline, the stronger option is After Effects, which has a related Puppet Pin workflow built for animation.
So think of Illustrator’s version as a posing tool first. It is excellent for generating variations from a base illustration. It is not the best place for true timeline-based character animation.
A common annoyance: front and back layer order
One of the trickier issues comes up when a part should appear in front of the body but ends up visually behind it after you pose the artwork.
A classic example is a fin or tail section that needs to overlap the body correctly. The Puppet Warp pins do not control that stacking order. That is a layer order problem, not a pin problem.
The workaround is straightforward:
Switch to the Direct Selection tool
Select the specific shape that should appear above or below
Find that object in the Layers panel
Move it higher or lower in the stacking order
Return to the full grouped object and continue using Puppet Warp
The nice part is that changing the stacking order does not remove your pins. They stay in place, so you can keep working after the layer fix.
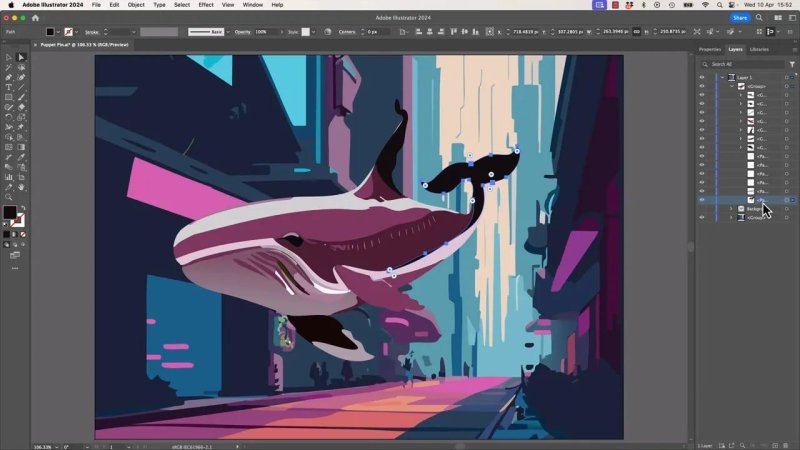
If a fin should sit above the body, fix it in the Layers panel rather than fighting the pins.
Advanced reality check: the tool is powerful, but can get messy
Puppet Warp is brilliant, but it is also easy to overdo.
If you keep adding pins everywhere, the artwork can become difficult to manage. You may solve one problem and create three more. That does not mean the tool is bad. It just means it responds best when you are intentional.
A good approach is:
Start with the automatic pins
Test the movement first
Delete only the pins that are not helping
Add new pins only where you need more control
Use rotation when a pose needs twist, not just displacement
That keeps the setup cleaner and the results easier to predict.
Properties options worth knowing about
There are a couple of useful controls in the Properties panel once you are working with Puppet Warp.
Delete all pins
If the whole setup has gone sideways, you can remove all the pins and start over. Sometimes that is faster than trying to rescue a tangled mess.
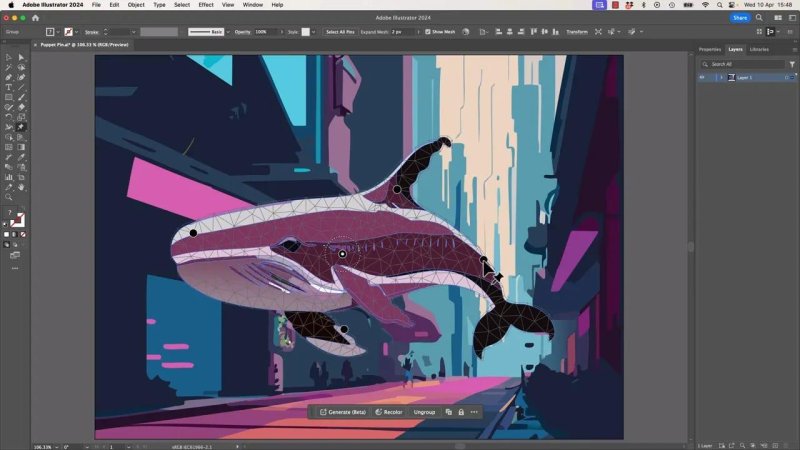
Show or hide the mesh
You can also toggle the mesh display. The mesh gives you a visual sense of how tightly Illustrator is subdividing the artwork for deformation.
In practice, it is one of those features that some people find helpful and others completely ignore. It can be mildly useful for understanding why certain areas bend the way they do, but it is not essential for basic posing.
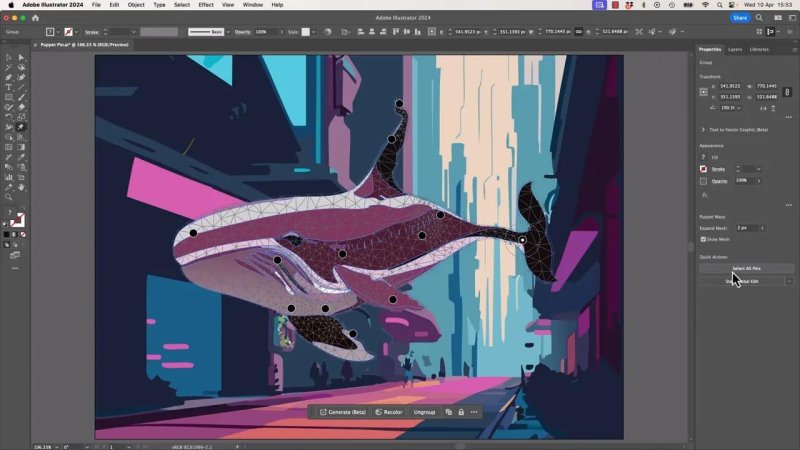
The Properties panel gives you a quick way to reset pins or inspect the warp setup.
When Puppet Warp makes the most sense
This tool is especially handy when you have a character or creature drawn in a fairly open pose and want to produce a range of variations from it.
It works well for things like:
Arms and hands in different positions
Fins, tails, wings, and other tapered shapes
Body posture changes
Organic illustrations that need subtle movement
The more your artwork behaves like a flexible form rather than a rigid machine, the more useful Puppet Warp tends to be.
A simple workflow for better results
Group the vector artwork you want to distort.
Select the Puppet Warp Tool.
Try the default pins first.
Drag a pin to test how the artwork responds.
Delete badly placed pins and add better ones.
Add stabilising pins where unwanted movement happens.
Rotate pins when a bend needs twist.
Fix overlap issues in the Layers panel, not with more pins.
Use the Properties panel to clear pins if needed.
FAQ
Can I use the Puppet Warp Tool on photos or pixel images in Illustrator?
No. This workflow is for vector artwork. If the object is pixel-based, the tool will not behave the way it does with grouped vector shapes.
Why is the whole illustration moving when I drag one part?
You probably need more pins to hold nearby areas in place. Add pins around the section that should stay fixed so Illustrator has clearer constraints.
Do I need to group my artwork first?
Yes, if you want the selected artwork to distort together as one unit. Grouping is a key part of making the tool work properly.
Can the Puppet Warp Tool animate over time in Illustrator?
Not in the same way as a timeline-based animation tool. It is great for creating different poses, but for true animation over time, After Effects is the better fit.
What should I do if a fin or tail appears behind the body when it should be in front?
Change the stacking order in the Layers panel using Direct Selection. That overlap issue is controlled by layer order, not by the puppet pins themselves.
Should I use lots of pins or just a few?
Start with fewer pins and add more only when you need control. Too few makes the artwork floppy, but too many can make the setup stiff and hard to manage.
- Powered by Marvin
- Terms of use
- Privacy policy
- Cookie policy
-
- © Bring your Own Laptop Ltd 2026