How to Recolor Artwork & Changing all colors at once in Illustrator
Questions


Student Gallery
Course info
Overview
- - How to use artificial intelligence to boost your creativity in ideation.
- - The quick way to take hand-drawn sketches and vectorize and color them.
- - The building blocks needed to set you loose on a huge variety of beautiful effects and techniques.
- - To make beautiful charts and graphs for your documents.
- - Color mastery to make quick color adjustments, Pantones, and blend it all together beautifully.
- - How to master images inside of your illustrator workflow.
- - To harness all the secret gems that'll help you level up your typography skills.
- - All the tricks of the trade for drawing complex shapes easily.
- - To double your creativity with the Transform and Distort section.
- - To speed up your personal workflow to get the most out of your creative day.
- The Curvature Tool
- How to master corners with corner widget effects
- How to work with Compound Paths
- The difference between Expand & Expand Appearance
- How to create Graphic Styles
- How to make Symbols
- How to use the Smooth Tool
- Advanced use of Simplify Path
- What Live Shape Effects are for
- How to make Repeating Grids & Concentric Circles
- How to make Random Objects
- Advanced Keyboard Shortcuts in Illustrator
- How to add a Gradient on a Stroke
- How to add a Gradient in Text
- How to use the Freeform Gradient tool
- How to use Advanced Color Swatches
- How to use Global Color Swatches
- What is the difference between RGB vs CMYK color modes?
- How to proof colors
- How to use Pantone Spot Colors
- Recolor Artwork & Changing all colors at once
- How to use Blending Modes
- How to work with Images & Blending Modes
- How to make Black & White Images
- Learn Advanced Workflow Tricks
- All the Super Selection Mastery
- How to use the History Panel
- Advanced Fonts Tricks & Tips
- Use Retype to know what Font is being used
- How to put Text Inside a Letter or Shape
- How to use the Touch Type Tool
- How to add a Connected Stroke Around Multiple Shapes
- How to Offset a Stroke with Text
- How to make a Bar Chart in Illustrator
- How to make a Pie Chart in Illustrator
- Layer Power Moves
- Advanced Artboard & Pages Tricks
- How to Unlink vs Embedded Images
- How to Crop Images Rather than Mask
- How to Mask Inside Text & Multiple Shapes
- How to you use the Puppet Warp Tool
- How to use the Distort Envelope Shape & Type
- How to use the Envelope Mesh
- How to blend lines together
- How to make a Linocut Effect
- How to make 3D Gradient Lettering Blends
- How to spin text into a ring
- How to turn text into a 3D donut shape
- How to make a Duotone image effect
- How to make a Roughen Stamp Vector Effect
- How to make a Neon Sign Glow Effect
- How to use a Halftone Effect using Plugins
- Advanced Exporting Assets Tricks in Illustrator
- How to use the Dimension Tool
So what're you waiting for? Let's start the course now!

Daniel Scott
Founder of Bring Your Own Laptop & Chief Instructor
instructorI discovered the world of design as an art student when I stumbled upon a lab full of green & blue iMac G3’s. My initial curiosity around using the computer to create ‘art’ developed into a full-blown passion, eventually leading me to become a digital designer and founder of Bring Your Own Laptop.
Sharing and teaching are a huge part of who I am. As a certified Adobe instructor, I've had the honor of winning multiple Adobe teaching awards at their annual MAX conference. I see Bring Your Own Laptop as the supportive community I wished for when I was first starting out and intimidated by design. Through teaching, I hope to bring others along for the ride and empower my students to bring their stories, labors of love, and art into the world.
True to my Kiwi roots, I've lived in many places, and currently, I reside in Ireland with my wife and kids.
Certificates
We’re awarding certificates for this course!
Check out the How to earn your certificate video for instructions on how to earn yours and click the available certificate levels below for more information.
Downloads & Exercise files
How do you quickly try new colour schemes in Adobe Illustrator?
The fastest way is to use Illustrator’s Recolor panel. It lets you shift an entire palette at once, swap colour assignments, pull colours from built in libraries, and even borrow a theme from a photo so your artwork feels instantly more cohesive.
How to Recolour Artwork in Illustrator Using the Recolor Panel
If you keep reaching for the same colours over and over, the Recolor panel is a bit of a lifesaver.
It is one of the easiest ways to experiment without manually changing every fill and stroke one by one. You can nudge a whole palette around the colour wheel, try preset colour groups, randomise the assignment of colours, reduce a design down to just a couple of tones, or grab a palette straight from an image.
That makes it useful in two very different situations:
When colour feels difficult and you want Illustrator to help you discover combinations you would not have picked yourself.
When colour feels too familiar and you need a fast way to break out of your usual habits.
Open the Recolor panel and set yourself up to experiment
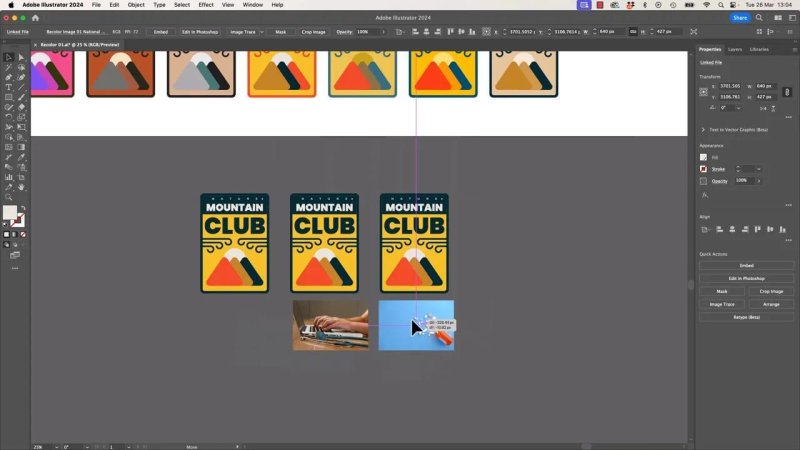
The easiest way to work is to duplicate your artwork a few times before changing anything. Keep one original untouched, then use the copies to test different directions side by side.
Once your artwork is selected, open Recolor from Edit > Edit Colors > Recolor Artwork, or use any of the other entry points Illustrator gives you.
When the panel opens, drag it somewhere you can still see the artboard underneath. That makes comparisons much easier while you adjust things.
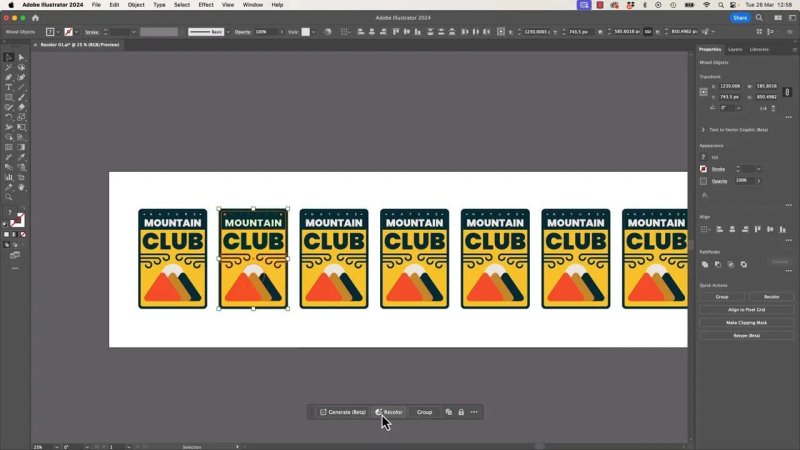
Working on duplicates makes it much easier to compare colour directions without losing the original.
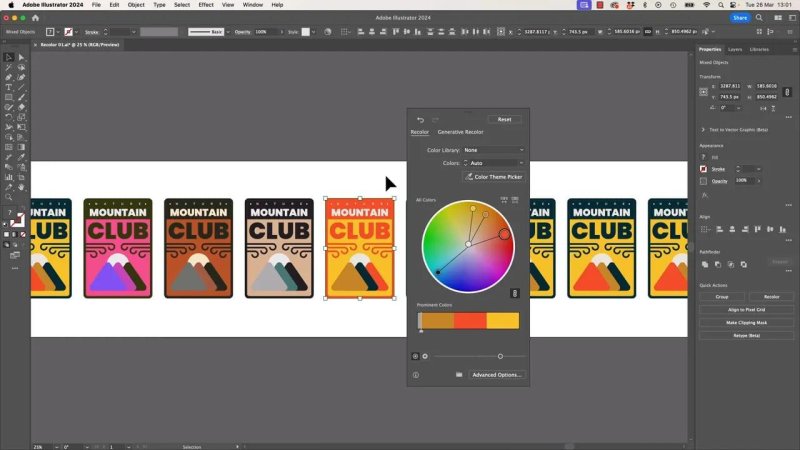
Start with the simplest trick: drag linked colours around the wheel
The quickest way to get results is to keep the colours linked.
When the link is on, you can grab one of the colour points on the wheel and rotate the entire palette together. Instead of editing each swatch individually, you shift the whole relationship between colours in one move.
This is brilliant for fast exploration. You are not rebuilding the palette from scratch. You are testing variations of the same palette structure.
There is one important catch though. If the starting colours are weak, rotating them around the wheel usually just gives you more versions of a weak palette.
So if nothing is getting better, that does not mean the panel is failing. It usually means the base colours need replacing.
Use colour libraries when you need completely new palette ideas
If rotating the current colours is not enough, jump into the built in colour libraries. This is where Recolor becomes far more than a hue shifter.
You can swap the existing artwork colours for a fresh palette from one of Illustrator’s libraries. Some of these are broad and practical, while others are more themed or stylised.
For example, an art history palette gives you a tightly limited set of colours inspired by a particular style. A metallic set pushes the work toward bronzes, greys, and similar finishes.
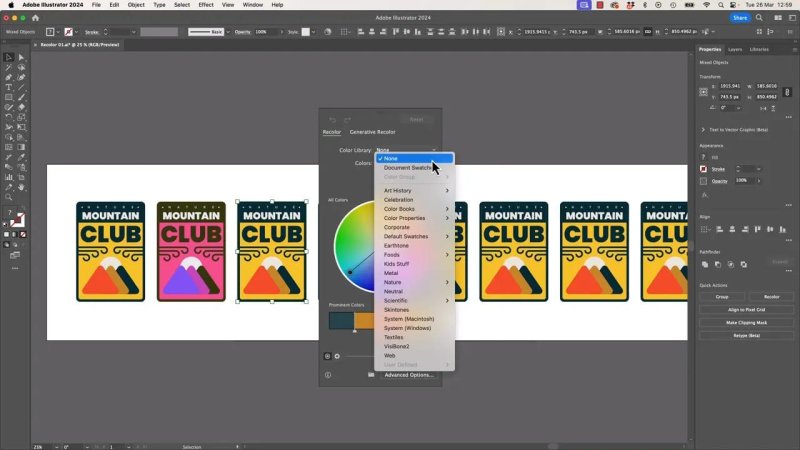
The built in libraries are great when your current palette is the problem, not just the colour assignment.
This is a different kind of change from simply rotating colours. You are reducing the design to a new set of available colours, which can dramatically alter the mood of the artwork.
After choosing a library, you can still move the colours around on the wheel to fine tune the result.
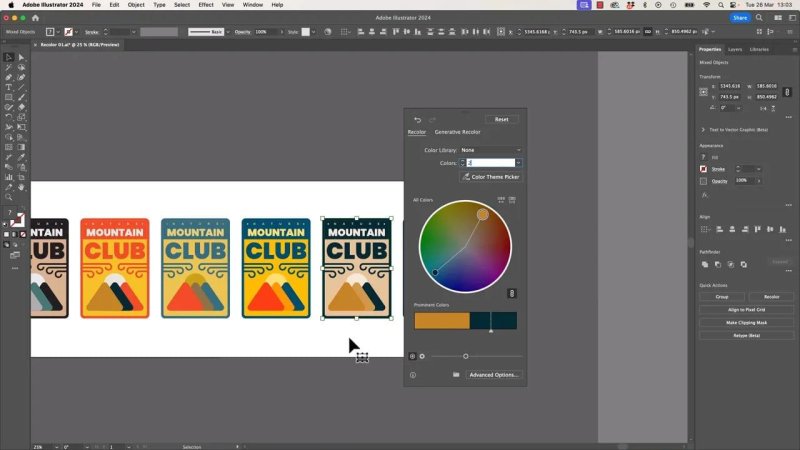
Break the link when one colour needs special treatment
Linked movement is handy until one colour refuses to behave.
If one grey is too dark, or one accent is too dull, break the link and move that colour on its own. That gives you independent control over individual swatches while keeping the rest of the palette intact.
This works especially well with limited palettes where only a few colours are doing all the work. In those cases, even a small nudge can noticeably improve contrast or emphasis.
Shuffle the same colours into different jobs
Sometimes the issue is not the palette itself. It is where those colours are being used.
The randomly change colour order option keeps the same swatches but reassigns them to different areas of the artwork. So the colours stay familiar, but the design can feel completely different because the dark, light, warm, or accent tones swap roles.
This is one of those features that seems simple until you use it. It can instantly surface combinations you would never have thought to try manually.
Reassigning the same colours can create a surprisingly different hierarchy without changing the palette itself.
Randomise brightness and saturation for more variation
There is another random option that is useful when you like the general hue family but want more movement.
Instead of spinning colours around the wheel, Illustrator can randomly adjust their brightness and saturation. That means the colours stay in roughly the same family, but they become lighter, darker, muted, or richer.
This is useful when a palette feels too flat or too predictable. A deep near black might become a softer dark tone. A strong colour might become more pastel or more vivid. The whole set gains variety without losing its basic character.
Use global sliders for brighter, darker, richer, or softer palettes
If you do not want randomness, you can control the overall direction with the global sliders.
These give you two very practical adjustments:
Brightness and hue for pushing the set lighter or darker while shifting colour.
Saturation and hue for making the set more muted or more intense.
In plain English, this means you can quickly test questions like:
What if this design felt more washed out?
What if it was bolder and more vibrant?
What if everything leaned lighter?
What if the whole thing became moodier and darker?
Those broad adjustments are often enough to take a design from acceptable to interesting.
Limit the artwork to fewer colours
One of the most useful controls in Recolor is the ability to reduce the number of colours Illustrator uses.
If your illustration has loads of colours, you can tell Illustrator to collapse them down to a much smaller set. For example, reducing a design to just two colours does not necessarily mean it becomes flat and boring.
Illustrator can use lighter and darker versions of those two core colours across the artwork, so you still get variation. You just get it with a much cleaner palette.
This is especially helpful when:
You want a stronger poster style look.
You need a simpler brand friendly palette.
Your illustration feels too busy.
You want to force visual consistency.
Cutting an illustration down to fewer colours is a quick way to make it feel more intentional.
Pull colours from an image to make everything feel cohesive
This is probably the most fun part.
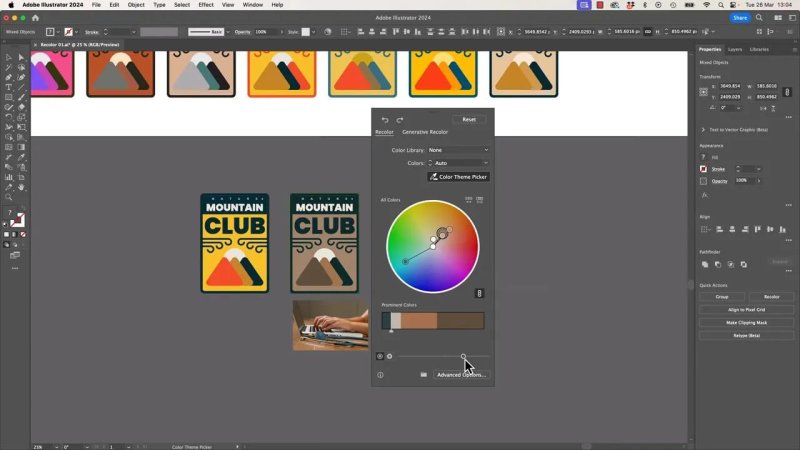
If you have a photo, hero image, or any raster image that needs to sit alongside your vector artwork, Recolor can sample colours from that image and turn them into a palette for the design.
Select the artwork you want to recolour, open the panel, and use the colour theme picker from image option. Illustrator will analyse the image and generate a palette based on what it finds.
The result is often a much more unified look between the graphic and the image. If the artwork is going to appear over the photo, next to it, or in the same layout, that shared colour language can make everything feel like it belongs together.
Using a photo as the source palette is a simple way to make illustration and imagery feel like part of the same system.
Once the image based palette is applied, you are not stuck with it. You can still use the same controls as before to:
brighten the colours
increase saturation
shift the palette around the wheel
reassign where the sampled colours are used
When the image theme is close but not quite right
Image based palettes do not always nail it on the first try.
Sometimes the source image contains a lot of one colour, so Illustrator leans too heavily into that part of the palette. A sky heavy image, for example, might produce far too much blue.
When that happens, you can manually influence the result by increasing the prominence of the colours you want used more. In the panel, some colours can be given more visual weight so they dominate the final recolouring more strongly.
This takes a bit of fiddling, but it is worth knowing. If one beautiful accent in the image is getting ignored, you can push it harder until it starts doing more of the work.
Sampled image palettes usually get you close, then a few manual tweaks help the best colours take over.
What makes the Recolor panel so useful
The big strength of the Recolor panel is that it removes friction from colour exploration.
Instead of making one cautious colour edit at a time, you can move quickly through dozens of possibilities. That speed changes the way you work. You stop overthinking and start comparing real options.
It is also helpful whether you are:
new to colour and want safer ways to experiment
comfortable with colour but bored of your usual habits
trying to match vector artwork to photography
simplifying a busy illustration into a tighter palette
And that is really the point. Recolor is not just for fixing colours. It is for discovering better ones.
Best ways to use Illustrator Recolor Artwork
Duplicate first. Keep the original and compare versions side by side.
Start linked. Rotate the whole palette together before making individual edits.
Use libraries when the base palette is weak. Better source colours lead to better results.
Try random reassignment. The same colours can work better in different places.
Reduce colour count. Fewer colours often create a stronger design.
Pull from photos for cohesion. This is ideal for mixed image and vector layouts.
Fine tune after sampling. Image palettes often need brightness, saturation, or prominence tweaks.
FAQ
Where is Recolor Artwork in Illustrator?
You can open it from Edit > Edit Colors > Recolor Artwork. Depending on your workspace, Illustrator may also show other shortcuts to the same panel.
What does linking colours in the Recolor panel do?
Linking keeps the palette relationships together. When you drag one colour point on the wheel, the rest move with it, which lets you shift the whole colour scheme at once.
Can Illustrator recolour artwork using a photo?
Yes. If you use a pixel based image, Illustrator can sample colours from it and build a theme for your selected artwork. That is a great way to match vector graphics to photography.
Why does my recoloured artwork still look bad?
If the original palette is not working, rotating it around the wheel usually creates more versions of the same problem. In that case, switch to a colour library or pull a fresh palette from an image instead.
Can I reduce an Illustrator design to only two colours?
Yes. Recolor lets you limit how many colours are used. Illustrator can then build lighter and darker variations from those few colours, which helps keep the design simple without losing depth.
What is the difference between random colour order and random brightness or saturation?
Random colour order keeps the same palette but swaps where those colours are applied. Random brightness and saturation keeps the colours in the same family but changes how light, dark, muted, or intense they are.
- Powered by Marvin
- Terms of use
- Privacy policy
- Cookie policy
-
- © Bring your Own Laptop Ltd 2026