Advanced Artboard & Pages Tricks in Illustrator
Questions


Student Gallery
Course info
Overview
- - How to use artificial intelligence to boost your creativity in ideation.
- - The quick way to take hand-drawn sketches and vectorize and color them.
- - The building blocks needed to set you loose on a huge variety of beautiful effects and techniques.
- - To make beautiful charts and graphs for your documents.
- - Color mastery to make quick color adjustments, Pantones, and blend it all together beautifully.
- - How to master images inside of your illustrator workflow.
- - To harness all the secret gems that'll help you level up your typography skills.
- - All the tricks of the trade for drawing complex shapes easily.
- - To double your creativity with the Transform and Distort section.
- - To speed up your personal workflow to get the most out of your creative day.
- The Curvature Tool
- How to master corners with corner widget effects
- How to work with Compound Paths
- The difference between Expand & Expand Appearance
- How to create Graphic Styles
- How to make Symbols
- How to use the Smooth Tool
- Advanced use of Simplify Path
- What Live Shape Effects are for
- How to make Repeating Grids & Concentric Circles
- How to make Random Objects
- Advanced Keyboard Shortcuts in Illustrator
- How to add a Gradient on a Stroke
- How to add a Gradient in Text
- How to use the Freeform Gradient tool
- How to use Advanced Color Swatches
- How to use Global Color Swatches
- What is the difference between RGB vs CMYK color modes?
- How to proof colors
- How to use Pantone Spot Colors
- Recolor Artwork & Changing all colors at once
- How to use Blending Modes
- How to work with Images & Blending Modes
- How to make Black & White Images
- Learn Advanced Workflow Tricks
- All the Super Selection Mastery
- How to use the History Panel
- Advanced Fonts Tricks & Tips
- Use Retype to know what Font is being used
- How to put Text Inside a Letter or Shape
- How to use the Touch Type Tool
- How to add a Connected Stroke Around Multiple Shapes
- How to Offset a Stroke with Text
- How to make a Bar Chart in Illustrator
- How to make a Pie Chart in Illustrator
- Layer Power Moves
- Advanced Artboard & Pages Tricks
- How to Unlink vs Embedded Images
- How to Crop Images Rather than Mask
- How to Mask Inside Text & Multiple Shapes
- How to you use the Puppet Warp Tool
- How to use the Distort Envelope Shape & Type
- How to use the Envelope Mesh
- How to blend lines together
- How to make a Linocut Effect
- How to make 3D Gradient Lettering Blends
- How to spin text into a ring
- How to turn text into a 3D donut shape
- How to make a Duotone image effect
- How to make a Roughen Stamp Vector Effect
- How to make a Neon Sign Glow Effect
- How to use a Halftone Effect using Plugins
- Advanced Exporting Assets Tricks in Illustrator
- How to use the Dimension Tool
So what're you waiting for? Let's start the course now!

Daniel Scott
Founder of Bring Your Own Laptop & Chief Instructor
instructorI discovered the world of design as an art student when I stumbled upon a lab full of green & blue iMac G3’s. My initial curiosity around using the computer to create ‘art’ developed into a full-blown passion, eventually leading me to become a digital designer and founder of Bring Your Own Laptop.
Sharing and teaching are a huge part of who I am. As a certified Adobe instructor, I've had the honor of winning multiple Adobe teaching awards at their annual MAX conference. I see Bring Your Own Laptop as the supportive community I wished for when I was first starting out and intimidated by design. Through teaching, I hope to bring others along for the ride and empower my students to bring their stories, labors of love, and art into the world.
True to my Kiwi roots, I've lived in many places, and currently, I reside in Ireland with my wife and kids.
Certificates
We’re awarding certificates for this course!
Check out the How to earn your certificate video for instructions on how to earn yours and click the available certificate levels below for more information.
Downloads & Exercise files
How do you work faster with multiple artboards in Illustrator?
Use the Artboard tool properly, not just for resizing boards by hand. Illustrator has a bunch of hidden gems for fitting artboards to artwork, reorganising messy layouts, pasting across every artboard, presenting concepts cleanly, and exporting everything in one go.
Illustrator Advanced Artboard and Page Tricks
Artboards are one of those Illustrator features that seem straightforward until a file gets big, messy, and slightly unhinged. Then suddenly, knowing a few advanced tricks feels like wizardry.
These are the artboard and page tips I use when I want to work faster, keep files tidy, and avoid the whole drag-this-edge-for-five-minutes routine.
Fit an artboard exactly to the artwork
This is easily one of the best little time savers in Illustrator.
If you have an object selected and you want the artboard to match it exactly, do not try to manually resize the artboard by eye. That is the slow, annoying version of the job.
Instead:
Select the artwork.
Choose the Artboard tool with Shift + O.
In the Properties panel, choose the option to fit the artboard to selected art.
That instantly resizes the artboard to the edges of the selected object.
This is brilliant for things like:
icons
stickers
single graphics for export
anything where the page should match the artwork rather than a preset document size
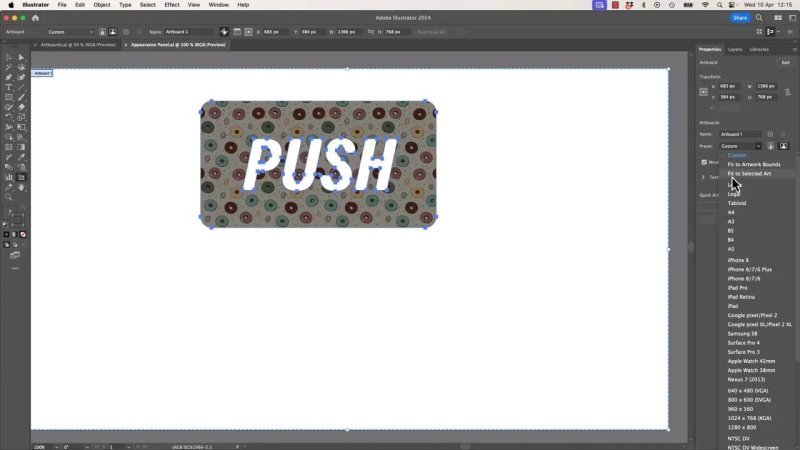
This is the shortcut that saves you from nudging artboard edges around by hand.
If you cannot see the option right away, it may be buried in the artboard preset list. Scroll back up and look for the fit option near the top.
Use the Artboards panel like a grown-up
A lot of people work with multiple artboards and never open the actual Artboards panel. That is a mistake.
Go to Window > Artboards and you get a clean list of every artboard in the document.
From there you can:
rename artboards clearly
tab through the list to rename several quickly
reorder them in a way that makes sense to you
Does changing that order magically redesign your file? No. But it does make navigation and presenting much clearer, especially in bigger jobs with social posts, banners, mobile variants, and random extras scattered everywhere.
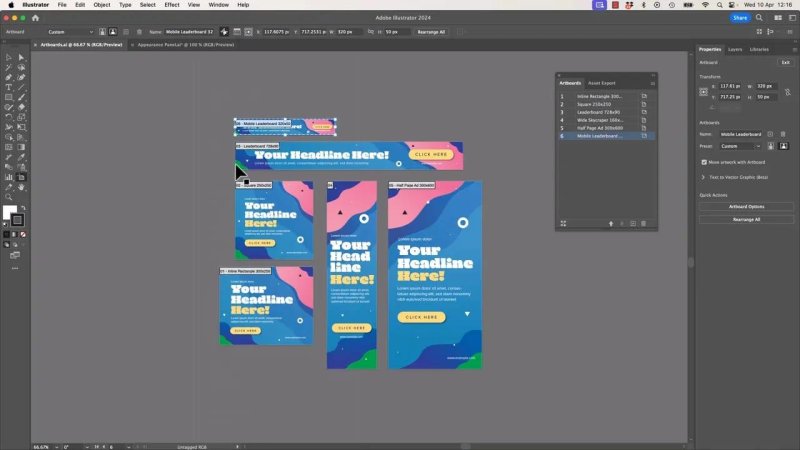
Once the artboards are named properly, the whole document feels a lot less chaotic.
Reorganise messy artboards automatically
If your artboards are all over the place, do not manually drag them into position one by one unless you enjoy unnecessary suffering.
With the Artboard tool active, use the option to Rearrange All Artboards. If the boards are mostly rectangular, Illustrator can lay them out into rows or columns with consistent spacing.
You can choose things like:
number of columns
spacing between artboards
whether they flow left to right or top to bottom
This is especially handy when a document has been through a few rounds of edits and now looks like artboards were dropped from a helicopter.
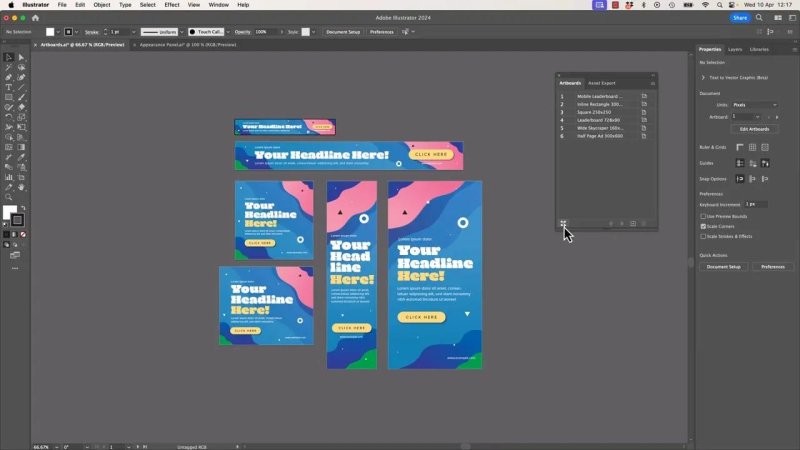
When the layout gets wild, this pulls everything back into a sensible grid in one hit.
Align artboards like regular objects
Here is another useful one. With the Artboard tool active, select all artboards using Command + A on Mac or Control + A on PC.
Once selected, you can align them just like normal shapes. Right align them, top align them, whatever works for the job.
That means you can tidy a document structurally without having to guess whether boards are lined up properly.
You can also change multiple artboards to a new preset size in one go. So if a document started as US Letter and now needs to be A4, you can batch update the boards instead of fixing them one at a time.
Jump around a file by double clicking artboard numbers
When a document gets large, scrolling around it becomes a full-time job.
A faster way to move through a multi-artboard file is to use the Artboards panel or double click the artboard numbers while using the Artboard tool. Illustrator jumps you straight to that board.
That is much better than the classic method of scroll, scroll, scroll, scroll, overshoot, scroll back.
Paste the same object onto every artboard
If you need the same logo, badge, or element across every artboard, there is a command for that.
Select the object.
Copy it.
Go to Edit > Paste on All Artboards.
That places the copied item onto every artboard.
It is especially useful when you need a repeated brand element across a whole set of social formats. The placement is based from the top left, so it is not perfect for every layout, but it gets the object onto every board quickly. From there, you can fine tune placement for different aspect ratios.
One important real-world note: occasionally Illustrator behaves a bit strangely and dumps multiple copies onto one artboard instead. If that happens, it is likely just one of those Illustrator moments rather than you doing something wrong.
Hide the junk outside the artboard with Trim View
Everyone ends up working in the pasteboard area sometimes. You test ideas, park old versions, leave little scraps of shapes and text lying around, and before long the file looks like a design crime scene.
If you want a cleaner view without deleting anything, turn on View > Trim View.
Trim View hides everything outside the artboard from sight. It also hides bleed from the visible view, which is great when you want a neat presentation or just need to think clearly again.
What is nice is that you can still keep working while Trim View is on. It is a bit like that cleaner preview mode in InDesign where the clutter disappears and the actual design takes centre stage.

Trim View is perfect when the file is messy but you need the design to look tidy right now.
Use Presentation Mode for concept reviews
If you need to show different design concepts cleanly, Illustrator has a built in Presentation Mode.
Press F or go to View > Presentation Mode. That puts the current artboard on screen cleanly, and you can use the arrow keys to move through the artboards one by one.
This is ideal for:
concept reviews
client presentations
creative director check-ins
any time you want something that feels more like slides than a messy design workspace
This is also where your artboard order matters. The sequence in the Artboards panel becomes the flow of the presentation.
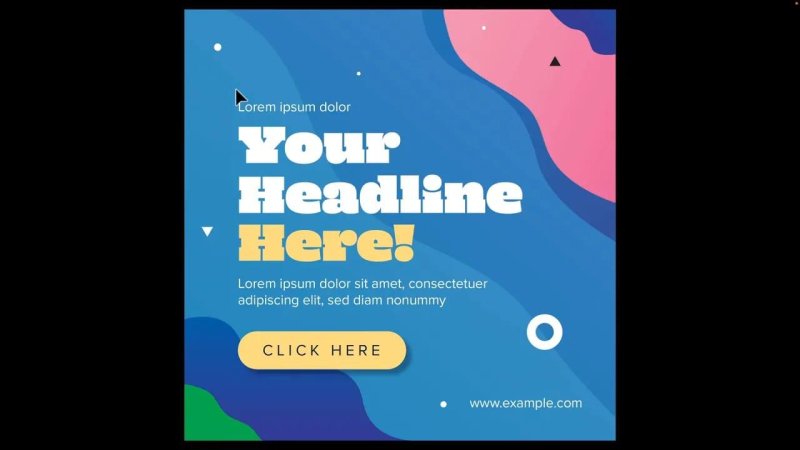
Presentation Mode turns a scrappy working file into something you can step through like a deck.
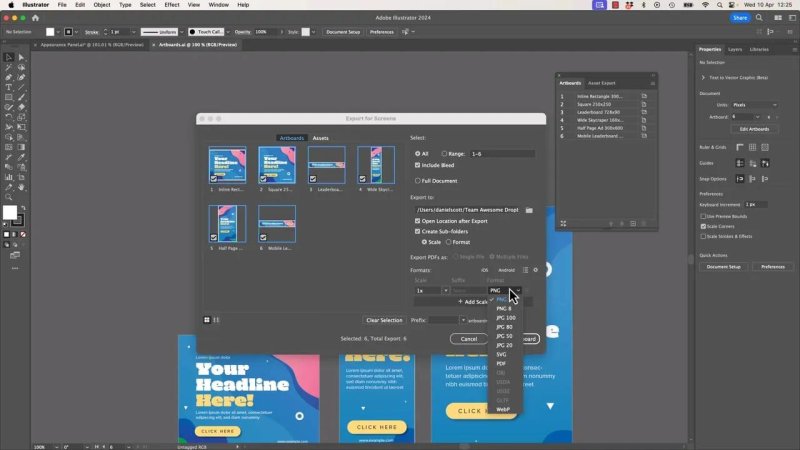
Export every artboard at once
When you have built a whole family of assets, export them all together instead of saving them one by one.
Go to File > Export > Export for Screens. Illustrator calls them screens, which is a bit odd, but the feature is solid.
From there you can export all artboards in one batch and choose formats such as:
PNG
JPEG
multiple formats at once
This is especially useful for social media design where one campaign might need several sizes and output types. One export job is much better than manually slicing through the same process again and again.
If you are exporting a full set of social graphics, this is the way to do it.
Hide the artboard entirely when you want a limitless canvas
Sometimes you do not want to think inside the box at all.
If you are sketching logo ideas, rough concepts, or anything that does not need page boundaries yet, you can hide the artboard.
Go to View > Hide Artboards, or use Command + Shift + H on Mac.
The artboard still exists. You are not deleting anything. You are just removing the visual boundary so the canvas feels open again.
That makes Illustrator feel a bit more like old school freeform vector space, which can be surprisingly useful during idea generation.
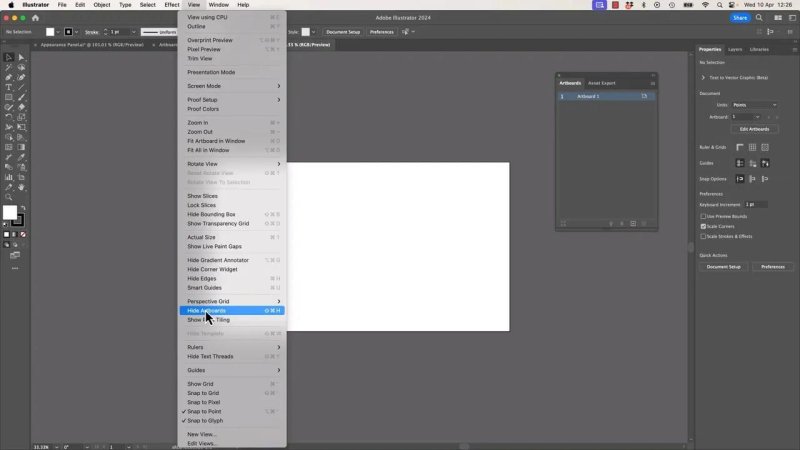
When you are concepting rather than laying out, hiding the artboard can make the canvas feel much less restrictive.
Reorder document tabs when you are comparing files
This one is not strictly an artboard feature, but it sits in the same workflow category.
If you have several documents open, you can drag the document tabs around to change their order. It is a tiny trick, but when you are jumping between files during a demo or a review, it helps keep things flowing instead of hunting for the right tab every time.
Use Actual Size when you need real-world scale
This is the weirdly magical one.
If you want to know what something will look like at its real printed size, go to View > Actual Size, or use Command + 1 on Mac or Control + 1 on PC.
Illustrator displays the document at true physical scale on your screen. Somehow, when everything is behaving properly, an A4 page on screen lines up with an actual A4 sheet held next to the monitor.
That makes it incredibly handy for checking things like:
business card text size
poster elements
label proportions
pattern scale before print
It is much better than guessing whether something feels too small or too big.

Actual Size is brilliant for sanity-checking print scale before you commit to output.
Why Actual Size is so useful for patterns and large print work
A really practical example is pattern work.
On screen, repeated patterns can be deceptive. A tile might feel right at one zoom level and then print far too small in the real world. Switching to Actual Size gives you a much more honest sense of scale.
That is useful when printing something like a large sticker or a repeating decorative surface, where the physical size of the motif matters just as much as the design itself.
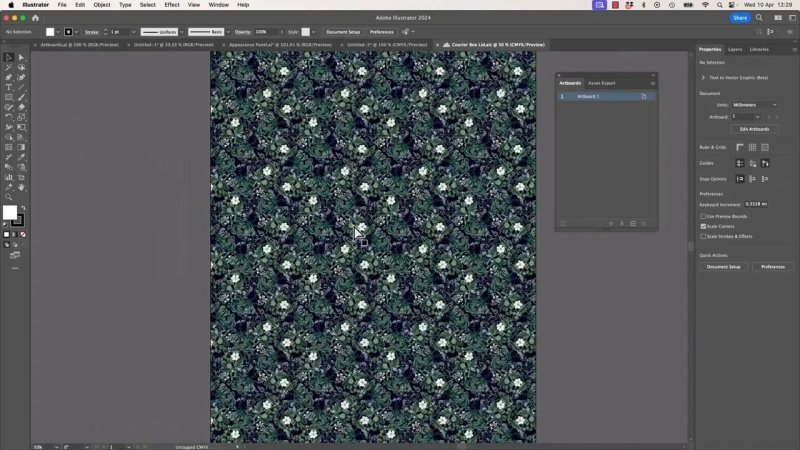
Pattern work is where Actual Size really earns its keep because zoom percentages can be wildly misleading.
A few final workflow takeaways
If you work with Illustrator artboards a lot, these are the upgrades worth remembering:
Fit artboard to selected art when exporting single objects
Use the Artboards panel to name, sort, and navigate properly
Rearrange all artboards when the layout gets messy
Align and resize multiple artboards together instead of one at a time
Paste on all artboards for repeated elements
Turn on Trim View for a cleaner workspace
Use Presentation Mode for showing concepts
Export for Screens for batch output
Hide artboards when you want a freer canvas
Check Actual Size before printing anything scale-sensitive
These are the sort of features that do not look flashy at first, but once they become part of your workflow, you stop wasting time on all the fiddly stuff Illustrator should really be doing for you.
FAQ
How do I resize an artboard to match an object in Illustrator?
Select the object, switch to the Artboard tool with Shift + O, then choose the option to fit the artboard to the selected art in the Properties panel.
Where is the Artboards panel in Illustrator?
Open it from Window > Artboards. It lets you rename, reorder, and navigate through all artboards in the document.
Can Illustrator paste the same object onto every artboard?
Yes. Copy the selected object, then use Edit > Paste on All Artboards to place it across the whole document.
How do I clean up the view without deleting pasteboard artwork?
Turn on View > Trim View. It hides anything outside the artboard so the file looks much cleaner, while leaving all the artwork intact.
What is Presentation Mode in Illustrator?
Presentation Mode shows artboards one at a time on a clean background. Press F to enter it, then use the arrow keys to move through the artboards.
How do I export all artboards at once in Illustrator?
Go to File > Export > Export for Screens. From there you can export every artboard together in formats like PNG or JPEG.
Can I hide artboards without deleting them?
Yes. Use View > Hide Artboards or Command + Shift + H on Mac. The boards remain in the file, but the boundaries disappear from view.
What does Actual Size do in Illustrator?
It displays your document at real physical scale on screen, which is very useful for judging printed size accurately before sending work out.
- Powered by Marvin
- Terms of use
- Privacy policy
- Cookie policy
-
- © Bring your Own Laptop Ltd 2026