Completed - Class Project 02 - Icons Using the Shape Builder
Questions









Student Gallery
Course info
Overview
Get ready to dive into the mesmerizing world of Adobe Illustrator, where we'll craft stunning looking graphics. But we won't stop at just learning the tools; we're about to unleash our creative powers by creating real-world, practical, and portfolio-ready projects. Together we will learn to:
• Master the art of drawing with simple shapes and lines.- • Unleash your creativity by combining and subtracting shapes using the Shape Builder.
- • Create advanced custom logos and graphics.
- • Explore the world of creative brushes, lines, and strokes to elevate your designs to the next level.
- • Use the Width tool to enhance your lines and strokes adding a style.
- • Conquer the pen, pencil, and curvature tools like a pro.
- • Dive into the wonderful world of fonts and the art of mastering type.
- • Use the intertwine feature to create interesting overlapping illustrations.
- • Learn the art of masking images and graphics.
- • Discover the magic of distorting, bending, warping, and liquefying illustrations.
- • Select and use color combinations like a true master of design.
- • Craft your own unique repeating patterns.
- • Transform real drawings into captivating stencil-style images.
- • Export your creations for print, web, social media, and more.
- • Acquire the techniques used by professional graphic designers.
- • Work with your own mini-brief - creating a unique Farmer's Market brand and bringing it to life.
- • Harness the power of Adobe's Generative AI features to push your creative boundaries.
- • Working with mood boards to gather inspiration.
- • Create realistic mockups to enhance your designs even further.
- • Engage in a wealth of class projects to put your skills to the test.
- • Stay ahead with a handy printable PDF cheat sheet.
- • Access downloadable exercise files to help you practice and refine your skills.
- • Benefit from forum support provided by the BYOL Teaching Assistant Team.
- • Discover professional workflows and shortcuts to work more efficiently.
- • Gain access to a treasure trove of additional resources and websites to supercharge your career.
But that's not all! I'll unveil Illustrator's hidden gems that will transform you into a pro at discovering and utilizing breathtaking vector based graphics. We'll dive into the latest Illustrator tools, including the mind-blowing Generative AI features that allow us to craft illustrations that were once thought impossible.
Whether you've never even opened Illustrator or have struggled with it in the past, I'm here to show you the easy way to create breathtaking artwork and portfolio projects to be proud of. Join me as we go from Illustrator zeros, to Illustrator superheroes!
Who this course is for
• Absolutely no previous Adobe Illustrator experience is required.- • This course is designed for newcomers to Illustrator and design in general, so no prior design, drawing, or illustration experience is necessary.
- • This is a relaxed, well-paced introduction, perfect for producing a wide range of drawings, illustrations, logos, and portfolio projects. Only basic computer skills are necessary - if you can send emails and surf the internet, you're more than capable of mastering this course.
What you'll learn
- • Drawing with Shapes & Lines
- • Drawing with the Shape Builder
- • Creating a custom logo
- • Working with Brushes
- • Drawing with the pen, pencil & curvature tool
- • Learn how to work with type & fonts.
- • How to vectorise an image in Illustrator
- • How to curve text in illustrator
- • How to trace an image in illustrator
• How to warp text in illustrator
• How to embed images in illustrator
• How to mask images & graphics.
• How to distort, bend, warp & liquefy illustrations.
• How to make 3D illustrations.
• How to make your own repeating patterns.
• How to create stencil style images from real drawings.
• How to save, print & export for Print, web & social media.
• Lots of real world exercises for you to practice.
• Loads or class projects for you to complete.
• Printable Cheat sheet.
• You will get the finished files so you never fall behind.
• Downloadable exercise files.
• Techniques used by professional graphic designers.
• Professional workflows and shortcuts.
• A wealth of other resources and websites to help accelerate your career.

Daniel Walter Scott
Founder of Bring Your Own Laptop & Chief Instructor
I discovered the world of design as an art student when I stumbled upon a lab full of green & blue iMac G3’s. My initial curiosity around using the computer to create ‘art’ developed into a full-blown passion, eventually leading me to become a digital designer and founder of Bring Your Own Laptop.
Sharing and teaching are a huge part of who I am. As a certified Adobe instructor, I've had the honor of winning multiple Adobe teaching awards at their annual MAX conference. I see Bring Your Own Laptop as the supportive community I wished for when I was first starting out and intimidated by design. Through teaching, I hope to bring others along for the ride and empower my students to bring their stories, labors of love, and art into the world.
True to my Kiwi roots, I've lived in many places, and currently, I reside in Ireland with my wife and kids.
Certificates
We’re awarding certificates for this course!
Check out the How to earn your certificate video for instructions on how to earn yours and click the available certificate levels below for more information.
Downloads & Exercise files
How do you make simple icons in Adobe Illustrator using Shape Builder?
Build each icon from basic shapes, such as rectangles, polygons, ellipses and arcs, then use the Shape Builder tool to merge the pieces you want and remove the rest. It is a wonderfully practical way to turn a rough sketch into clean vector artwork without needing perfection straight away.
How to Create Simple Icons in Adobe Illustrator with the Shape Builder Tool
Icons can look a bit magic when they are finished, but the building blocks are normally very simple. A play button is a rounded rectangle and a triangle. A house is a triangle plus rectangles. A location pin is circles plus a triangle. Even a phone icon can be broken down into rectangles, a large curved shape and a few arcs.
The trick is not trying to draw the final icon in one go. Draw separate pieces, line them up roughly, then use Shape Builder to join, colour and cut away the bits you do not need.
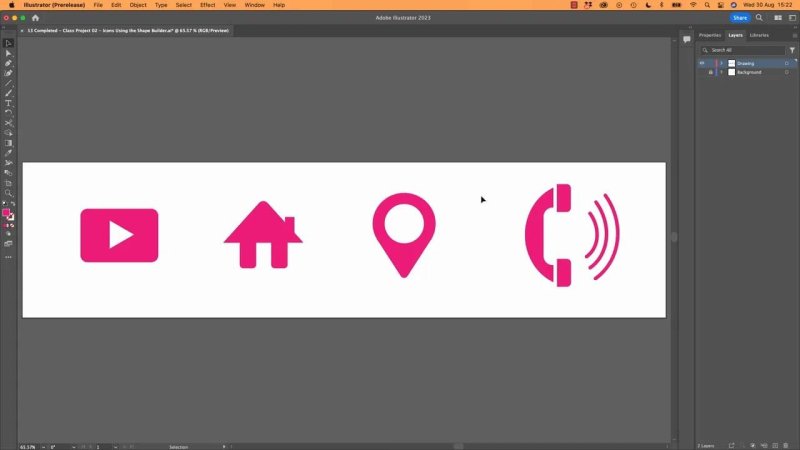
Four simple icons, all built from ordinary Illustrator shapes and cleaned up with Shape Builder.
Set up the file before drawing
A handy icon exercise often starts with a scanned sketch on a locked background layer. Start with a new Illustrator .ai file, then bring the sketch into the artboard, and lock it in the Layers panel. Then make sure the active selection is on the layer above it before trying to draw.
If Illustrator suddenly refuses to make shapes, it is worth checking the Layers panel first. It is surprisingly easy to have the locked background selected rather than the drawing layer.
Zoom in before doing detailed work. Use Command + on a Mac or Control + on a PC. Hold the Spacebar and drag to pan around the artboard.
The useful Illustrator tools and shortcuts
This project keeps returning to a small set of tools. Getting comfortable switching between them makes the whole thing much less painful.
Selection tool, V: select whole objects, move them, scale them and rotate them.
Direct Selection tool, A: select individual anchor points or a specific corner.
Shape Builder tool, Shift + M: merge overlapping regions or remove regions while holding Option on Mac or Alt on PC.
Rectangle tool: make simple rectangular building blocks.
Polygon tool: create triangles by setting the number of sides to three.
Ellipse tool: create circles and oval shapes.
Arc tool: draw the curved signal marks for the telephone icon.
There are a few other shortcuts worth keeping in your back pocket.
Hold Shift while drawing an ellipse to make a perfect circle, while scaling to keep proportions, while rotating to snap through even angle increments, and while dragging an object to keep its movement perfectly horizontal or vertical.
Use the arrow keys to nudge a selected object into place.
Turn on View > Smart Guides, or use Command + U or Control + U, to make alignment much easier.
Use Command + 0 or Control + 0 to fit the artwork in the window.
Smart Guides are especially useful when objects need to meet or line up. If Illustrator seems determined to snap to the wrong thing, move the object closer to the target first. Illustrator gets much better at understanding what you mean when the candidates are nearby.
Icon 1: Build a play button from a rectangle and triangle
This is the gentle warm-up. Start with the Rectangle tool and draw the outer button shape. Turn the fill off temporarily if it helps you see the sketch beneath. Resize the shape by dragging its corner handles until it is roughly in the right place.
For the play symbol, choose the Polygon tool. If it defaults to a pentagon, click once on the artboard and set Sides to 3. That gives you a proper triangle.
Rotate the triangle with the Selection tool. Grab just outside a corner handle to access rotation, then hold Shift to keep the angle snapping neatly. Scale it down proportionally, position it inside the rectangle and nudge it with the arrow keys if needed.
Round the outer corners
The rectangle does not need to stay sharp. Use the corner widgets and drag them inwards to create rounded corners. The reference drawing may be a little wonky, and that is fine. Get it close enough for now.
Use Shape Builder to finish the icon
Select the rectangle and triangle together, then switch to Shape Builder with Shift + M. Choose a fill colour and click the regions you want to colour.
Once the shapes are complete, switch back to the black Selection tool and remove the stroke if you do not want an outline. This is worth noting because stroke controls can behave a bit differently while Shape Builder is active. If the stroke refuses to disappear, go back to the Selection tool, select the artwork and set Stroke to none there.
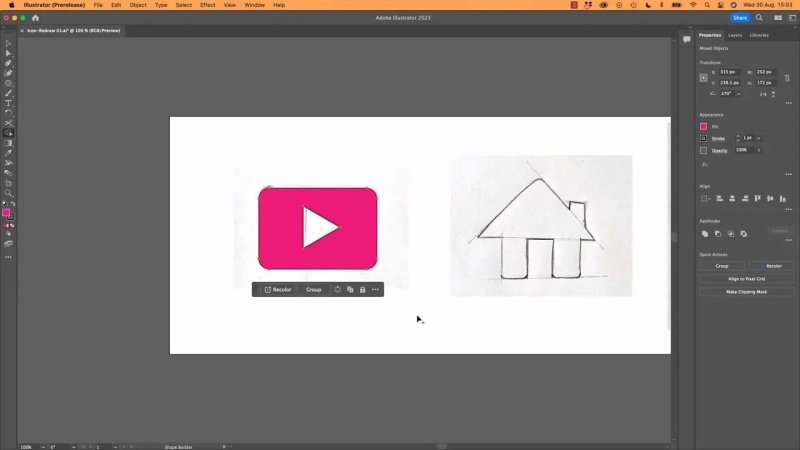
A rectangle and a three-sided polygon are enough to make a clear, punchy play icon.
Icon 2: Construct a house from a triangle and rectangles
The house begins with another three-sided polygon. Because the Polygon tool remembers its most recent side count during the current document session, it should still create a triangle. Draw the roof, rotate it into position and scale it until it sits over the sketch.
If the roof needs only one rounded corner, do not drag every corner widget at once. Switch to the Direct Selection tool with A, click the top anchor point and adjust only that corner. This is one of those little things that catches nearly everybody the first time.
Use a bright temporary stroke colour, such as fluorescent green, while lining the roof up against a pale sketch. Black can disappear against a dark or messy reference, while a high contrast colour makes placement much easier.
Create the walls and chimney
Draw a rectangle for one side of the house, then copy and paste it to create the other side. Use the Selection tool, not Direct Selection, when copying. If only anchor points are selected with the white arrow, copying can produce an unexpected partial path rather than the complete object.
Move the duplicated rectangle into place. Hold Shift while dragging to keep it travelling in a straight line. A narrow rectangle across the top can form the horizontal section beneath the roof.
There is no need to spend forever making every gap mathematically perfect at this stage. A spacer rectangle can help if precise spacing matters, but for this exercise, get it visually close and move on.
Merge the house
Select all the pieces with the black arrow, activate Shape Builder and click across the regions that should become one house. Then return to the Selection tool and remove the stroke.
Turn off the background layer briefly to inspect the result. It may not look exactly like a beautifully engineered house yet, and that is okay. If there is a slight bend, a tiny bump or an imperfect join, leave it for now. The more hardcore clean-up tools come later. The goal here is learning the construction process.
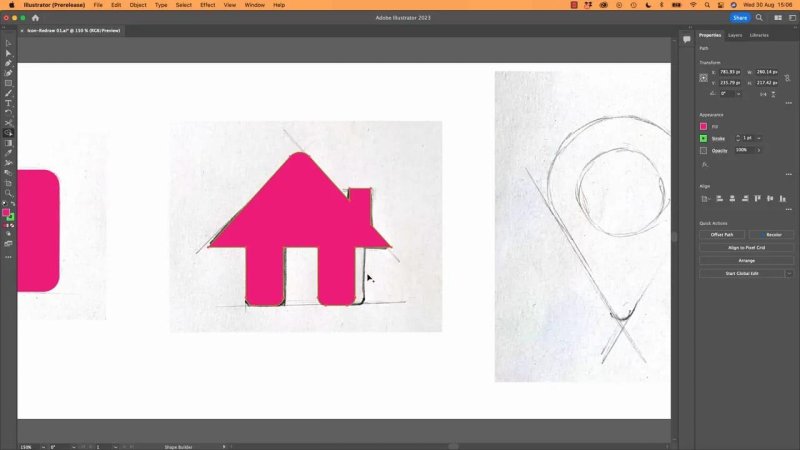
The house comes together by merging a triangle roof and simple rectangular pieces.
Icon 3: Make a location pin with circles and a triangle
The location pin looks complicated, but it is still just basic geometry. Start by drawing a circle with the Ellipse tool. Hold Shift while dragging to keep it perfectly round. Turn the fill off and use a visible stroke while positioning it over the reference.
Copy and paste the circle, align the duplicate with the first, then scale one of the circles larger. Together, these two circles define the outer ring and the inner opening of the pin.
Next, create a triangle using the Polygon tool and rotate it so it points down. The alignment can be a bit fiddly, particularly when trying to make the triangle meet the circle at the same point on both sides.
Do not panic if it is not immaculate. Use the Selection tool to stretch the triangle and use the anchor point you are dragging as your guide. You can make the pin slightly stubbier or taller until it looks close enough.
Round the pin tip and subtract the unwanted pieces
Use the Direct Selection tool to target the bottom point of the triangle and round that corner a little. Then select both circles and the triangle, switch to Shape Builder and hold Option on Mac or Alt on PC to remove the unwanted overlapping regions.
Release Option or Alt when you need to merge regions. The remaining pieces form the outer pin, while the smaller circle creates the central cut-out. If the artwork has become one complete shape, apply the fill directly with the Selection tool. If not, Shape Builder is a reliable way to colour the individual areas.
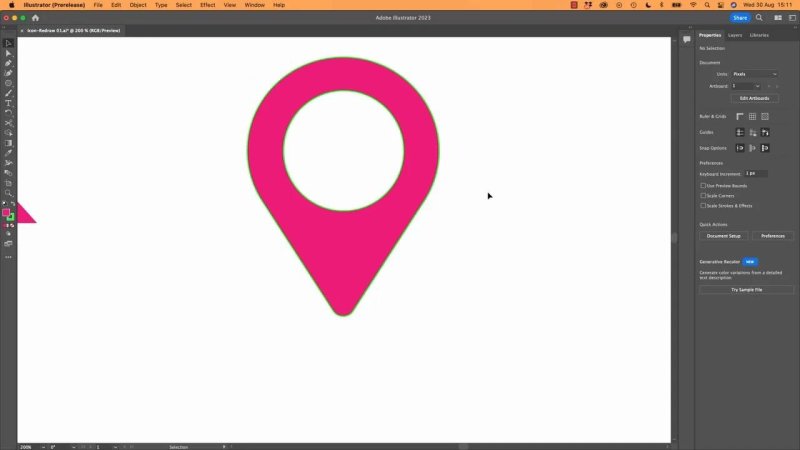
The location pin is built from two circles and a downward triangle, then trimmed into one solid icon.
Icon 4: Build a telephone icon with arcs and simple shapes
The phone icon is the long one. It is also a nice reminder that the best approach is to start with the easiest parts rather than staring at the whole complicated drawing.
Build the handset ends
Start with a small rectangle for one end of the handset. Use the Direct Selection tool to select the two anchor points on one side, hold Shift to add both points to the selection, then drag them into a more suitable position if the end needs a slanted or tapered shape.
Before duplicating it, go back to the black Selection tool. Copy and paste the whole object, then move the duplicate to the lower end of the handset. Holding Shift while dragging keeps it lined up vertically or horizontally.
Create the curved body
A large ellipse can provide the curved handset body. Position it so it follows the reference drawing. Use extra rectangles or lines as temporary cutting shapes to divide and remove sections that do not belong.
There are a couple of perfectly valid ways to create the gaps:
Draw narrow rectangles over the unwanted portions, duplicate them where necessary, then remove the intersecting sections with Shape Builder.
Use the Line tool to make straight dividing lines, holding Shift to keep them straight, then use Shape Builder to delete the segments around them.
When Shape Builder leaves behind random extras, do not feel forced to merge every single leftover shape. Often the good artwork is still sitting underneath. Click away, select the unwanted pieces with the black arrow and delete them one by one. It is a bit like peeling off the scraps.
Draw the signal waves with the Arc tool
The radiating telephone lines are much quicker with the Arc tool than with circles. If the Arc tool is not visible in the toolbar, choose the three dots at the bottom of the toolbar and use Edit Toolbar to find it.
Draw one arc, then use the Selection tool to rotate, stretch and squash it until it roughly follows the sketch. Give it a thicker stroke in the same colour as the icon. Copy and paste it twice, scaling the duplicates larger to create the three signal waves.
For the rounded ends, select the arcs and open the Stroke options. Set the cap to Round Cap. This gives the wave marks those tidy, friendly endpoints rather than flat chopped-off ends.
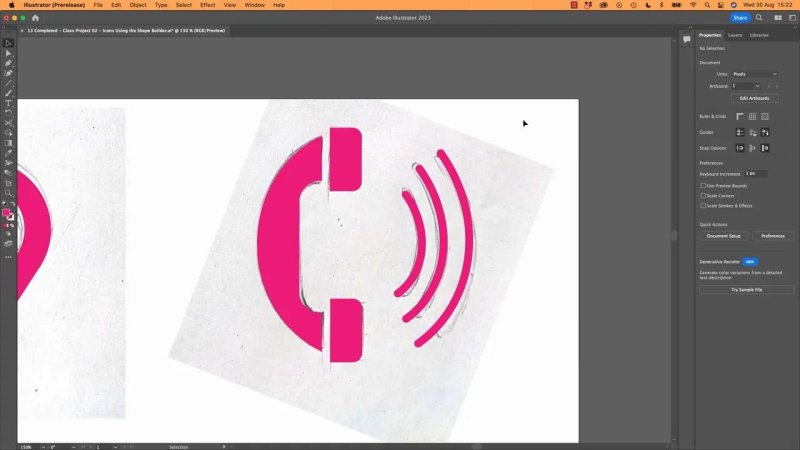
Thick arcs with round caps make the telephone signal marks quickly, without wrestling with circles.
Colour and inspect the finished icon set
Once each icon is built, apply a consistent fill colour and remove strokes where appropriate. Shape Builder can colour separate regions, but completed solid paths can usually be filled directly using the Selection tool.
Turn off the sketch layer now and then. It is the quickest way to see whether the icon reads well by itself. The final set does not need to be perfectly aligned down to the last pixel for a beginner exercise. Tidy the spacing visually, take a breath, and accept “good enough” when it is genuinely good enough.
The important skill is not recreating these exact icons with absolute precision. It is learning to look at an icon, identify the basic shapes inside it, and use Shape Builder to turn those shapes into a clean vector result.
FAQs
Where is the Shape Builder tool in Adobe Illustrator?
Choose the Shape Builder tool from the toolbar, or press Shift + M. Select the overlapping objects first, then use the tool to click regions to merge them.
How do I remove a section with Shape Builder?
Hold Option on a Mac or Alt on a PC while using Shape Builder, then click or drag across the regions you want to remove.
Why will Illustrator not let me draw on my icon file?
Check the Layers panel. The reference artwork may be on a locked background layer, so make sure the unlocked drawing layer is selected before creating a new shape.
How do I make only one corner rounded in Illustrator?
Use the Direct Selection tool with A to select the specific anchor point, then adjust that corner widget. Selecting the whole shape would change every available corner instead.
How do I create rounded ends on telephone signal arcs?
Select the arc strokes, open the Stroke panel and choose Round Cap. This changes the flat default ends into smooth rounded tips.
Written by Daniel Walter Scott — Founder of Bring Your Own Laptop & Chief Instructor
