How To Use And Install Scripts In Adobe InDesign CC
Questions
Student Gallery
Be the first to share something.
Course info
Overview
- You will need a copy of Adobe InDesign 2018 or above. But you find that 95% of all the features in this course will work with earlier version of InDesign (e.g. CS6). A free trial can be downloaded from Adobe.
What am I going to get from this course?
- 70 lectures 5+ hours of well structured content.
- Create PDF Forms
- Master Long Documents.
- Advanced Fonts
- Master Styles
- Shortcut Sheet
- Create Charts & Infographics
- Create Interactive Documents
- Workflow Tactics
- Shortcuts & Speed Tips
- Advanced Creative Cloud Features
- Tips for working with Photoshop & Illustrator
- Using Scripts
- Exporting, Prepress & Printing tricks
- You will get the finished files so you never fall behind.
- Downloadable exercise files & cheat sheet.
- Forum support from me and the rest of the BYOL crew.
- Techniques used by professional graphic designers.
- Professional workflows and shortcuts.
- A wealth of other resources and websites to help your accelerate your career.
What is the target audience?
- This course is for people who already know InDesign and want to take their skills and speed to the maximum level.
- This is an advanced InDesign course, so you’ll need basic InDesign skills to find this course useful.
- This course is perfect for anyone that already knows how to insert images & add text.
- If you a completely new to InDesign try my InDesign Essentials course before starting this one.
- This course is perfect for anyone that has completed my InDesign Essentials course.
Course duration 7 hours 45 mins + your study.

Daniel Walter Scott
Founder of Bring Your Own Laptop & Chief Instructor
I discovered the world of design as an art student when I stumbled upon a lab full of green & blue iMac G3’s. My initial curiosity around using the computer to create ‘art’ developed into a full-blown passion, eventually leading me to become a digital designer and founder of Bring Your Own Laptop.
Sharing and teaching are a huge part of who I am. As a certified Adobe instructor, I've had the honor of winning multiple Adobe teaching awards at their annual MAX conference. I see Bring Your Own Laptop as the supportive community I wished for when I was first starting out and intimidated by design. Through teaching, I hope to bring others along for the ride and empower my students to bring their stories, labors of love, and art into the world.
True to my Kiwi roots, I've lived in many places, and currently, I reside in Ireland with my wife and kids.
Downloads & Exercise files
How do I use scripts in Adobe InDesign?
InDesign scripts automate jobs that would otherwise take ages, including adding guides, creating crop marks, placing batches of images or PDF pages, and sorting text. Open the Scripts panel from Window > Utilities > Scripts, then double-click a script to run it on the selected content or document.
How to Use Scripts in Adobe InDesign
Scripts give InDesign an extra level of awesomeness. They let programmers extend what InDesign can do, so you can automate the fiddly jobs that are not built into the standard tools.
Some scripts ship with InDesign already, while others can be downloaded or commissioned for a specific production workflow. The useful ones are not necessarily exciting, but if they remove a repetitive task, they can save a ridiculous amount of time.
Where to Find the Scripts Panel
Open the panel by going to Window > Utilities > Scripts. Inside, expand the Application folder to find the scripts included with InDesign.
The sample scripts are organised into folders, including AppleScript and JavaScript versions. JavaScript is the common one to start with, and the list is well worth a browse. You might not need most of them every day, but a few become very handy when the right job comes along.
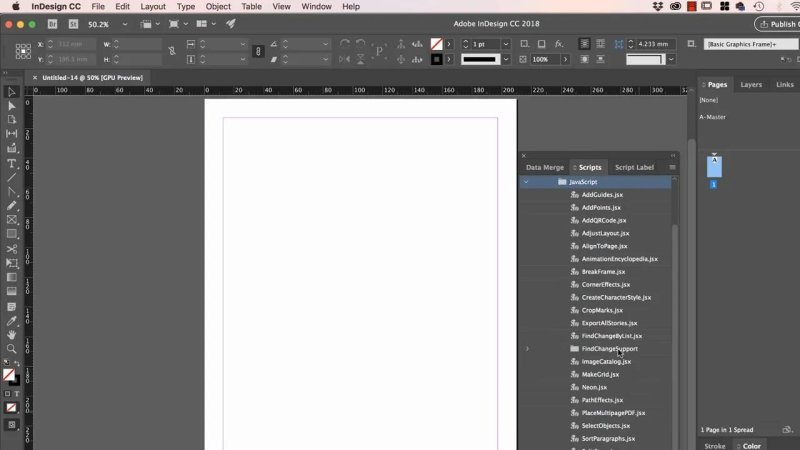
The Application folder contains a surprisingly useful set of sample scripts.
Useful Built-In InDesign Scripts
Add Guides to a Selected Object
Say you have drawn a rectangle and want guides that line up with it. You could turn on rulers and drag guides manually, but there is an easier way.
Select the object, find Add Guides in the Scripts panel, and double-click it. The script creates guides based on the selected object. It also offers options, so you can control the result rather than just accepting the default.
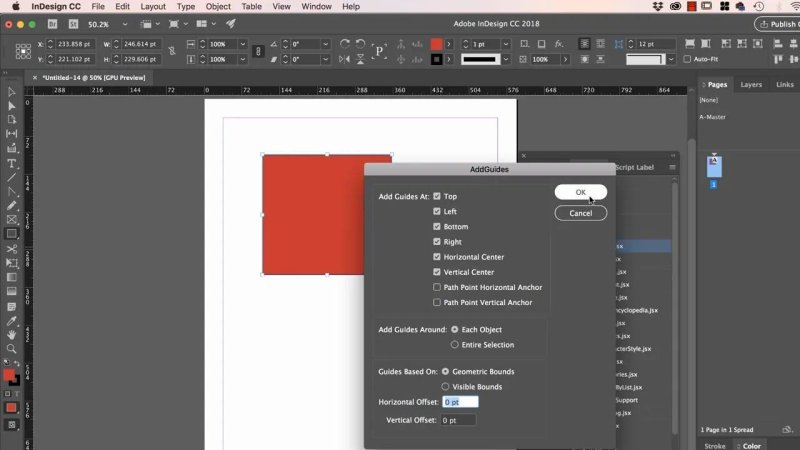
Add Guides quickly turns the edges of a selected object into useful layout guides.
This is exactly the sort of small task that is not difficult, just annoyingly repetitive. A script makes it a couple of clicks.
Add Crop Marks for Simple Printing Jobs
Another handy sample is Crop Marks. Select an object, run the script, choose the options you need, and InDesign adds crop marks and registration marks around it.
This is particularly useful for simple self-printing jobs, such as a sheet of business cards that needs trimming. There is no ordinary Add Crop Marks button sitting in InDesign's tools. Someone wrote a script to do it, and Adobe included it.
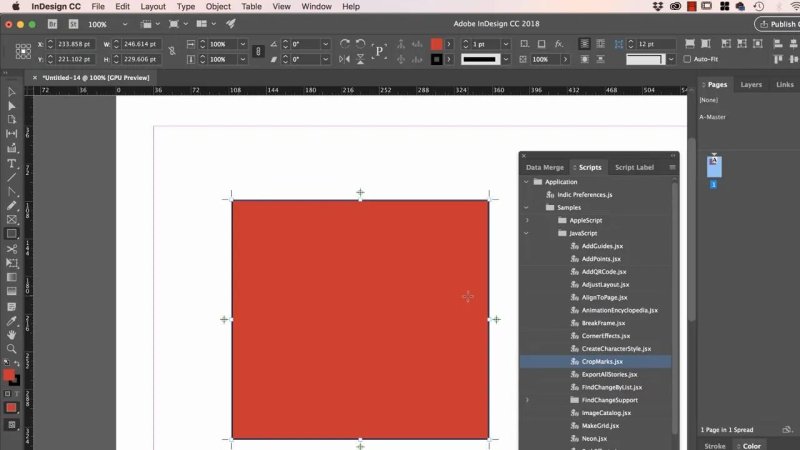
The Crop Marks script handles a common print-production job without manually drawing marks.
Split Linked Text Frames into Separate Stories
Linked text frames are great until you need them not to be linked anymore. Deleting, cutting, or moving one frame can cause the text to reflow, which gets weird very quickly.
When you need to break a threaded story into independent text frames, select all the relevant frames with the Selection tool and run Split Stories. The frames remain in place, but the links between them are removed. Each frame becomes its own story.
It is not the flashiest script in the world, but it solves a very specific layout problem neatly.
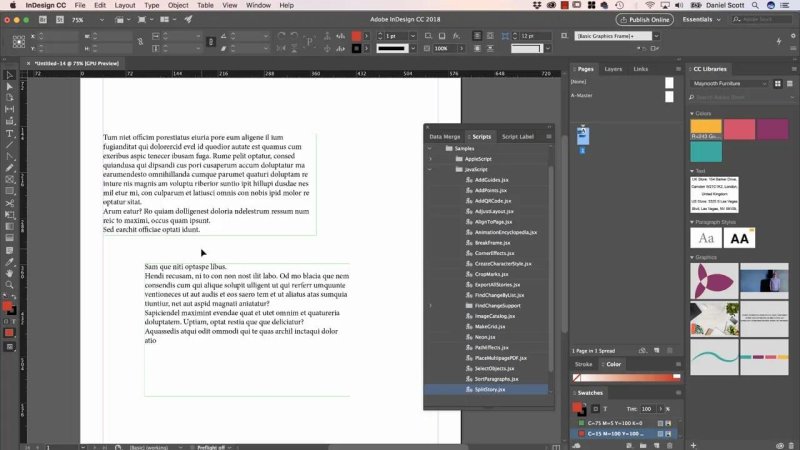
Split Stories converts a linked multi-column story into independent text frames.
Create an Image Catalogue or Contact Sheet
Image Catalog is one of the big time savers. Rather than placing a folder full of images one at a time, it creates a new document and builds the catalogue for you.
Run the script, choose the folder of images, then choose how the images should be arranged. You can set rows and columns, or simply place one image per page. You can also include labels so each image is identified in the resulting document.
InDesign then works through the folder and creates the pages. The result is useful as a contact sheet, especially when managing a collection of photographic or supplied assets.
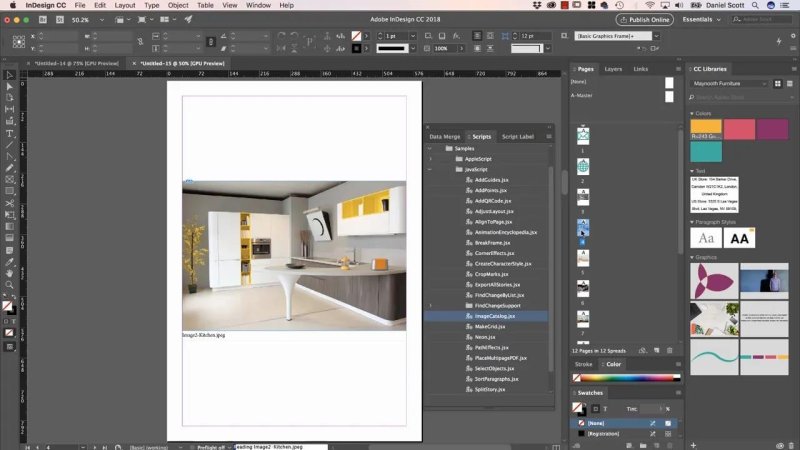
Image Catalog can place each image on its own labelled page automatically.
Place Every Page of a PDF Automatically
Placing a multi-page PDF manually is another classic production chore. You can place a PDF, use Shift while opening it to choose a page range, and then click each page into your document. But that still means placing every single page yourself.
The Place Multiple PDF script removes that repetitive part. Run it, select the PDF, then choose whether to place the pages into the current document or a new document.
The script generates pages and places the PDF pages for you. Depending on the original PDF dimensions, you may need to resize the resulting document or adjust the placed pages afterwards. Still, having every page already placed is a much nicer problem to have.
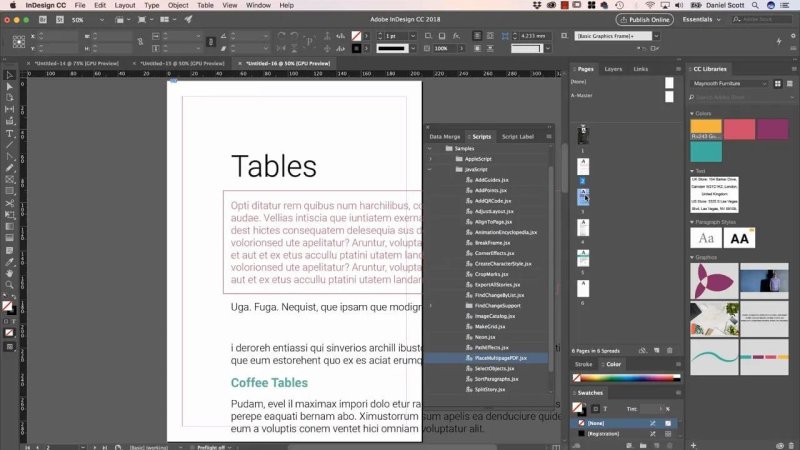
Place Multiple PDF creates a document containing the individual pages from a multi-page PDF.
How to Install a Downloaded InDesign Script
There are loads of InDesign scripts available online. Some are free and some are paid. If you have a production job involving the same actions again and again, search for the task you need followed by InDesign script. There is a good chance somebody has already built something useful.
A good starting point for free scripts is InDesign Secrets, which has a dedicated free scripts area.
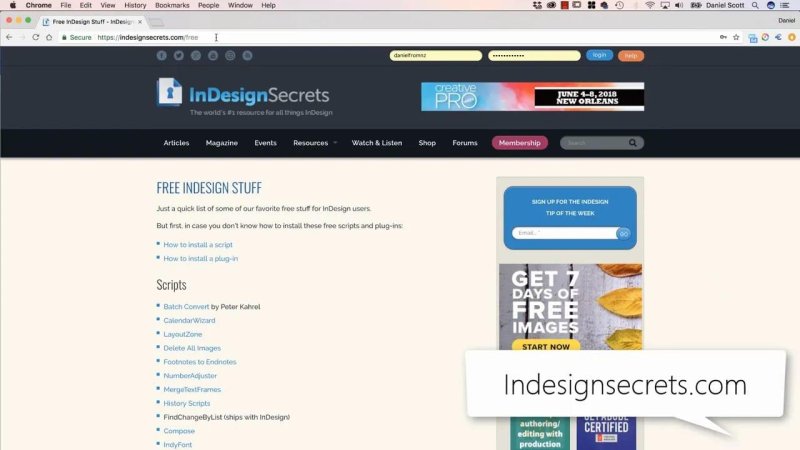
InDesign Secrets is a useful place to start looking for downloadable scripts.
Once you have downloaded a script, install it through the Scripts panel:
Open Window > Utilities > Scripts.
Expand the User folder.
Right-click the User folder.
Choose Reveal in Finder on Mac or Reveal in Explorer on Windows.
Copy the downloaded script file into the revealed folder.
Return to InDesign and expand the User folder to find the new script.
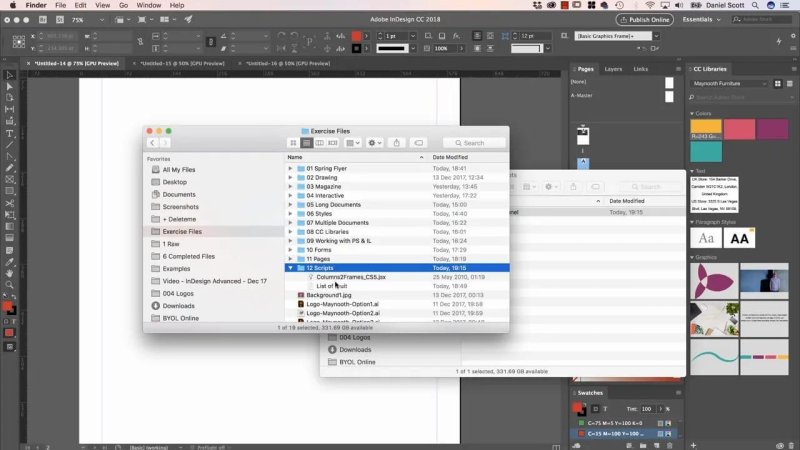
Installing a script is mostly just a matter of copying its file into InDesign's User scripts folder.
Example: Convert Text Columns into Linked Frames
A good example is a script called Columns to Frames. Start with a single text frame that has three columns and contains text. Normally, those columns remain part of one frame.
Run Columns to Frames from the User folder and it separates the columns into individual, linked text frames. The flow is now handled through the out ports between frames rather than through columns inside one large text box.
The result may not change your life on its own, but it demonstrates the point beautifully: scripts can change the structure of a document in ways that would otherwise take a fair bit of manual work.
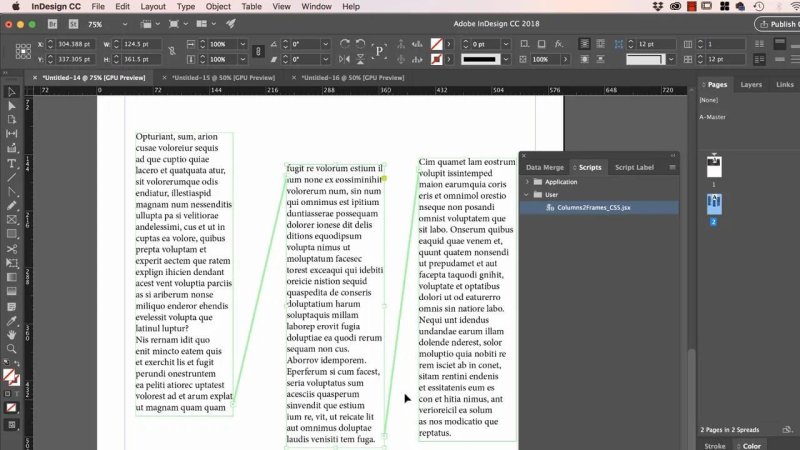
Columns to Frames separates one multi-column text frame into linked individual frames.
Sort Paragraphs Alphabetically
Here is another small but excellent script. Imagine you have a text frame containing a random list of fruit, one item per paragraph, and you want it in alphabetical order.
Select the whole text frame using the Selection tool. In the Application folder, open Samples > JavaScript, then run Sort Paragraphs. InDesign sorts the paragraphs alphanumerically for you.
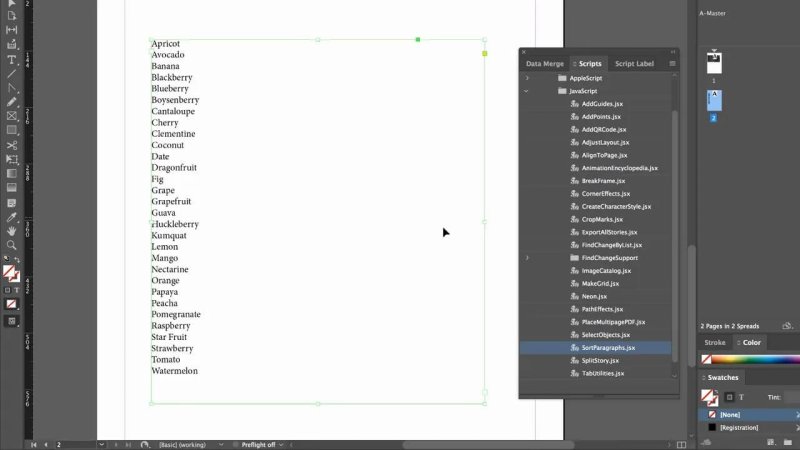
Sort Paragraphs is a simple way to put a list into alphanumeric order.
Again, it is a tiny job until you are doing it repeatedly. That is when scripts become genuinely brilliant.
When It Is Worth Finding or Commissioning a Script
Scripts make the most sense when the task is repetitive and precise. Think about work such as:
Adding guides at consistent offsets
Positioning objects at exact locations
Applying the correct colours or formatting
Pulling specific images from a hard drive
Generating repeating document structures
Preparing large batches of assets for production
If you cannot find an existing script, you can hire somebody to make one. A script developer may already have something similar, or they can quote for building it. If it removes a recurring production headache, the time saved can make the cost well worth it.
One Script You Can Happily Skip
Not every script is a winner. The sample script called Neon applies a neon-style effect to a selected object.
It is terrible. Properly terrible. There is no saving it.
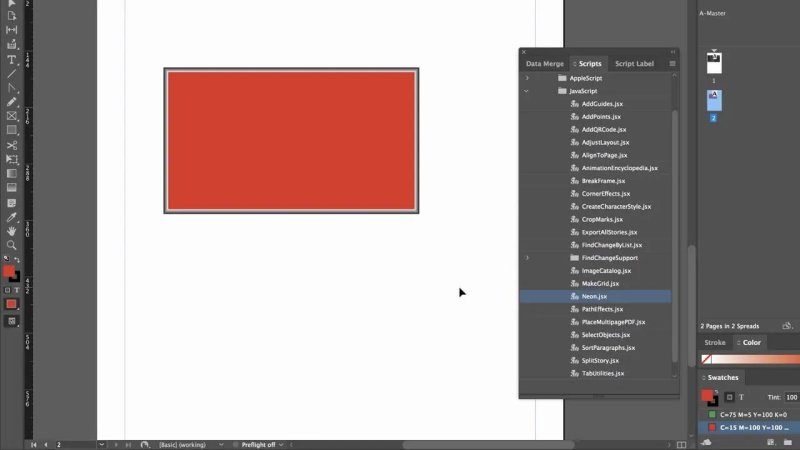
The Neon script exists, but that does not mean it belongs in your document.
Still, that is part of the fun of exploring the Scripts panel. Have a look through the samples, try the ones that sound useful, and keep an eye out for repetitive tasks in your own work. The right script can turn an irritating job into a double-click.
FAQ's
Where is the Scripts panel in InDesign?
Go to Window > Utilities > Scripts. The Application folder contains the scripts included with InDesign, while the User folder is where you can install your own.
Can InDesign scripts automate repetitive tasks?
Yes. Scripts can automate tasks such as adding guides, making crop marks, sorting paragraphs, splitting text stories, building image catalogues, and placing multiple PDF pages.
How do I install an InDesign script?
Right-click the User folder in the Scripts panel and choose Reveal in Finder or Reveal in Explorer. Copy the downloaded script file into that folder, then return to InDesign and find it in the User folder.
Are InDesign scripts free?
Some scripts are included with InDesign, and many others can be downloaded for free. Paid scripts and custom-built scripts are also available for more specialised production tasks.
Written by Daniel Walter Scott — Founder of Bring Your Own Laptop & Chief Instructor
