Setting The Default Font Size For New Documents Adobe InDesign
Questions


Student Gallery
Be the first to share something.
Course info
Overview
- You will need a copy of Adobe InDesign 2018 or above. But you find that 95% of all the features in this course will work with earlier version of InDesign (e.g. CS6). A free trial can be downloaded from Adobe.
What am I going to get from this course?
- 70 lectures 5+ hours of well structured content.
- Create PDF Forms
- Master Long Documents.
- Advanced Fonts
- Master Styles
- Shortcut Sheet
- Create Charts & Infographics
- Create Interactive Documents
- Workflow Tactics
- Shortcuts & Speed Tips
- Advanced Creative Cloud Features
- Tips for working with Photoshop & Illustrator
- Using Scripts
- Exporting, Prepress & Printing tricks
- You will get the finished files so you never fall behind.
- Downloadable exercise files & cheat sheet.
- Forum support from me and the rest of the BYOL crew.
- Techniques used by professional graphic designers.
- Professional workflows and shortcuts.
- A wealth of other resources and websites to help your accelerate your career.
What is the target audience?
- This course is for people who already know InDesign and want to take their skills and speed to the maximum level.
- This is an advanced InDesign course, so you’ll need basic InDesign skills to find this course useful.
- This course is perfect for anyone that already knows how to insert images & add text.
- If you a completely new to InDesign try my InDesign Essentials course before starting this one.
- This course is perfect for anyone that has completed my InDesign Essentials course.
Course duration 7 hours 45 mins + your study.

Daniel Walter Scott
Founder of Bring Your Own Laptop & Chief Instructor
I discovered the world of design as an art student when I stumbled upon a lab full of green & blue iMac G3’s. My initial curiosity around using the computer to create ‘art’ developed into a full-blown passion, eventually leading me to become a digital designer and founder of Bring Your Own Laptop.
Sharing and teaching are a huge part of who I am. As a certified Adobe instructor, I've had the honor of winning multiple Adobe teaching awards at their annual MAX conference. I see Bring Your Own Laptop as the supportive community I wished for when I was first starting out and intimidated by design. Through teaching, I hope to bring others along for the ride and empower my students to bring their stories, labors of love, and art into the world.
True to my Kiwi roots, I've lived in many places, and currently, I reside in Ireland with my wife and kids.
Downloads & Exercise files
How do I change InDesign’s default font settings?
Close every open document, switch out of the Start workspace, select the Type tool, and set the font, size and paragraph options you want. InDesign will then apply those choices whenever you create text in a new document, saving you from repeatedly changing Myriad Pro, 12 point type and hyphenation.
How to Change the Default Font, Font Size and Hyphenation in InDesign
Every new text box in Adobe InDesign tends to begin the same way: Myriad Pro, 12 point, no space after, and hyphenation switched on. If that is not how you work, those defaults become a tiny annoyance you have to fix over and over again.
The good news is that changing InDesign’s default font settings is wonderfully simple. The important part is knowing when to make the changes.
Why InDesign Keeps Starting With Myriad Pro at 12 Point
InDesign uses built-in defaults for newly created text frames. That is why drawing a new text box with the Type tool can give you Myriad Pro at 12 point, along with paragraph settings you may never actually choose yourself.
If most of your design work uses another typeface, a different font size, or no hyphenation, setting your own defaults removes that repetitive formatting step from every new layout.
Close All Open Documents First
This is the trick: close the document you currently have open.
When no documents are open, adjustments made with the Type tool become the defaults for future documents. If you make the same changes while working inside an open file, you are formatting text for that document instead of establishing your preferred starting settings.
After closing the document, InDesign returns to its Start workspace, where recent files and document options are shown.
Switch to a Working Workspace
You cannot conveniently set these defaults from the Start workspace. Use the workspace selector near the top of InDesign and switch to one of the standard working workspaces.
Essentials is a perfectly good choice. The particular workspace is not the point, provided you are in an editing interface where the Type controls and panels are available.
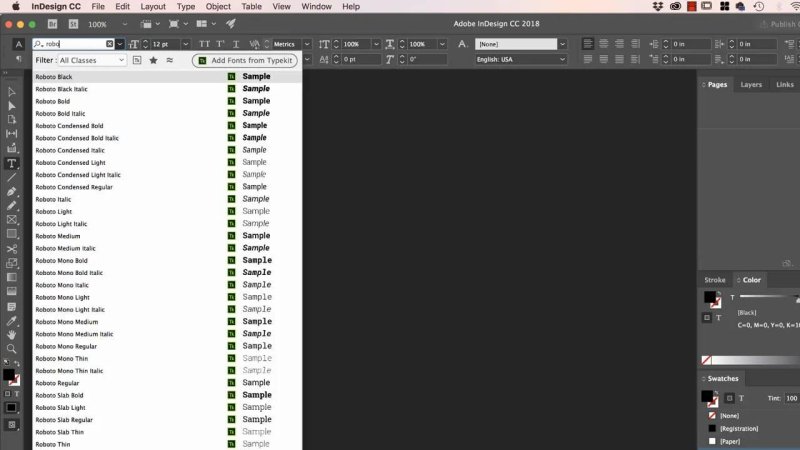
With no document open and the Type tool active, choose the typeface you want InDesign to use by default.
Set Your Preferred Default Typeface and Size
Select the Type tool. Then use the controls at the top of the interface to choose the font family, style and size you want every new text box to begin with.
For example, if most of your work is set in Roboto, you could set:
Font family: Roboto
Font style: Light
Font size: 10 pt
There is nothing special about Roboto Light at 10 point. Those are simply useful example settings. The value of this method is choosing the combination that reflects the typography you actually use, rather than accepting a generic starting point.
Turn Off Default Hyphenation
Font choices are only part of the default text setup. Paragraph behaviour matters too.
Open the paragraph controls and turn Hyphenation off if you do not want InDesign inserting hyphens automatically. This is especially useful when you regularly have to disable hyphenation manually in text frames.
While you are there, check any other paragraph settings that matter to your workflow, such as spacing after paragraphs. The goal is to make new text frames behave sensibly from the first click.
Test the New InDesign Defaults
Once the settings are in place, create a new blank document. Select the Type tool, draw a text box and add some placeholder text.
The new text should now use the font, style and size you selected. In the example above, it appears as Roboto Light at 10 point, with hyphenation disabled.
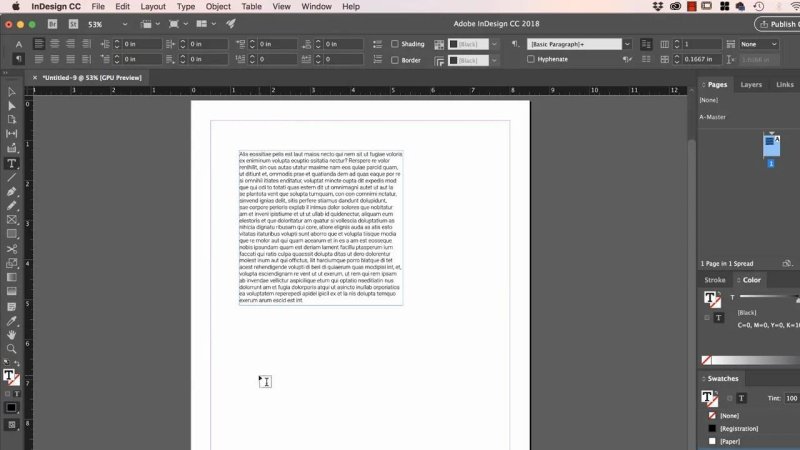
A fresh text frame provides a quick check that your chosen type settings and paragraph behaviour are now in place.
That is all there is to it. No more immediately changing Myriad Pro. No more resetting 12 point text. And, if hyphenation is not your thing, no more turning it off every single time.
FAQ's
Do I need to close my InDesign document before changing default text settings?
Yes. Close all open documents first. Then activate the Type tool and make your changes, so InDesign stores them as defaults for new documents.
Can I change InDesign’s default font from Myriad Pro?
Yes. With no document open, select the Type tool and choose your preferred font family and style from the Type controls. New text frames in new documents will use that choice.
How do I stop InDesign from hyphenating text by default?
With all documents closed and the Type tool selected, open the paragraph controls and disable Hyphenation. New text frames will then start without automatic hyphenation.
Written by Daniel Walter Scott — Founder of Bring Your Own Laptop & Chief Instructor
