How to burn in a logo watermark onto your video in Premiere Pro
Questions

Oops! You need to be a member to join in.
Feel free to browse but if you'd like to jump into the conversation you'll need to join our awesome student community.
Explore 30+ Essential and Advanced courses in Figma, Photoshop, Illustrator, Lightroom, Premiere Pro, Webflow, and more. Enjoy self paced learning, personalized support, earn certificates, and exciting community challenges.
Student Gallery
Be the first to share something.
Course info
Overview
I am here to help you learn Adobe Premiere Pro and to show you the tools you need to become a successful video editor. Premiere Pro is the industry standard used by professional designers to create stunning, high class videos and, after completing this course, you too can become a confident, skillful and efficient creator of stunning videos.
This course is aimed at people who are completely new to Premiere Pro.
If you are self taught using Premiere, this course will show you techniques you never dreamed were necessary or possible and will show you efficiencies to help speed up your workflow.
The course covers many topics - all of them on a step-by-step basis. We will use real world video editing examples to work through:
- An interview
- A wedding video
- A short commercial
- A documentary
- Social media advertising videos
- YouTube ‘how to’ videos
- Talking head footage mixed with screencasts and voiceovers
We will work with text, animation, motion gfx, special effects and we will add music to our video.
We will learn how to do colour correction, colour balancing and also how to create amazing video transitions within our movie. Technical ‘guru’ topics such as HD v 4K, frames per second, exporting work, fixing up bad audio, balancing and synching audio will all become manageable tasks for you. Best of all...I will show you amazing shortcuts and techniques to speed up your workflow.
Throughout the course we will work on mini projects and I will be suggesting assignments which will add value to your portfolio.
Start your Premiere Pro training now and fast track your career as a video editor.
* Please note, you have full permission to transform and upload any work using footage of Daniel as a part of this course.

Daniel Walter Scott
Founder of Bring Your Own Laptop & Chief Instructor
I discovered the world of design as an art student when I stumbled upon a lab full of green & blue iMac G3’s. My initial curiosity around using the computer to create ‘art’ developed into a full-blown passion, eventually leading me to become a digital designer and founder of Bring Your Own Laptop.
Sharing and teaching are a huge part of who I am. As a certified Adobe instructor, I've had the honor of winning multiple Adobe teaching awards at their annual MAX conference. I see Bring Your Own Laptop as the supportive community I wished for when I was first starting out and intimidated by design. Through teaching, I hope to bring others along for the ride and empower my students to bring their stories, labors of love, and art into the world.
True to my Kiwi roots, I've lived in many places, and currently, I reside in Ireland with my wife and kids.
Certificates
We’re awarding certificates for this course!
Check out the How to earn your certificate video for instructions on how to earn yours and click the available certificate levels below for more information.
Downloads & Exercise files
Download Files
Please confirm you would like to download this file, some files can be large. You maybe want to consider downloading on wifi rather than mobile data.
Large file sizes may also take a while to download depending on your internet speed.
Name:
Size:
Download Files
Please confirm you would like to download this file, some files can be large. You maybe want to consider downloading on wifi rather than mobile data.
Large file sizes may also take a while to download depending on your internet speed.
Name:
Size:
How do I add a logo watermark in Premiere Pro?
Add a transparent logo file to a video track above your footage, then resize and position it in the Program Monitor. Use Effect Controls to lower its opacity, extend the static image across the timeline, and optionally apply a Drop Shadow effect so the watermark remains visible on different backgrounds.
How to Add a Logo Watermark in Adobe Premiere Pro
A watermark needs a logo with transparency. If you are editing for a brand, ask them to supply the logo in a suitable format rather than grabbing whatever image happens to be available.
The best choices are:
AI, particularly useful if the logo was made in Adobe Illustrator.
PNG, a reliable option that supports transparency.
PSD, which can support transparency when it has been set up properly in Photoshop.
Try to avoid JPEG files for a logo watermark. JPEG does not support transparency, so the empty areas around the logo are filled with white. That gives you a big white rectangle over the footage instead of a clean logo overlay.
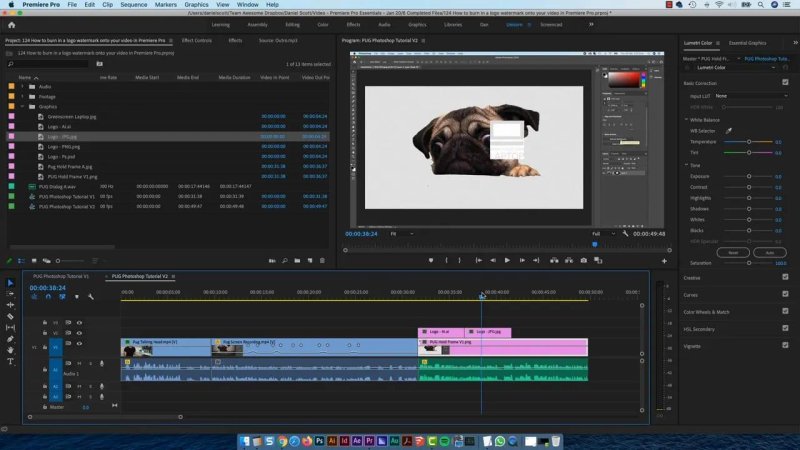
A JPEG logo brings its white background with it, which is exactly what a watermark should avoid.
Add the logo to the timeline
The simple method is to import the logo into your project and drag it onto the timeline on a video track above the footage. An AI, PNG, or properly prepared PSD will sit over the video as a separate graphic layer.
Because the logo is a static image, Premiere Pro treats it like a hold frame. That makes it ideal for a watermark. Once it is on the timeline, drag the end of the logo clip so it spans the entire video.
That is the core of it. The watermark layer sits above the edit and remains on screen from beginning to end.
Position and resize the watermark
Select the logo clip and double-click it in the Program Monitor. You can then move it into position and resize it directly using the corner handles.
The bottom-right corner is a common home for a watermark, but the important thing is that it does not cover a face, product, caption, or other important part of the frame. Keep it small and intentional.
You do not need to hold a special key to resize it here. Simply drag the corners until it feels right, then place it where it is least distracting.
Lower the opacity so the logo stays subtle
With the logo selected, open Effect Controls and reduce its Opacity. A watermark should be visible without dominating the video.
This is very much like background music. It often seems as though it should be louder or brighter than it really needs to be. Then, after a while, it becomes obvious that it is taking over. Your logo needs to identify the brand, not compete with the content.
Start by lowering the opacity until the logo is present but restrained. Check it against a few different parts of the edit, especially bright and dark shots.
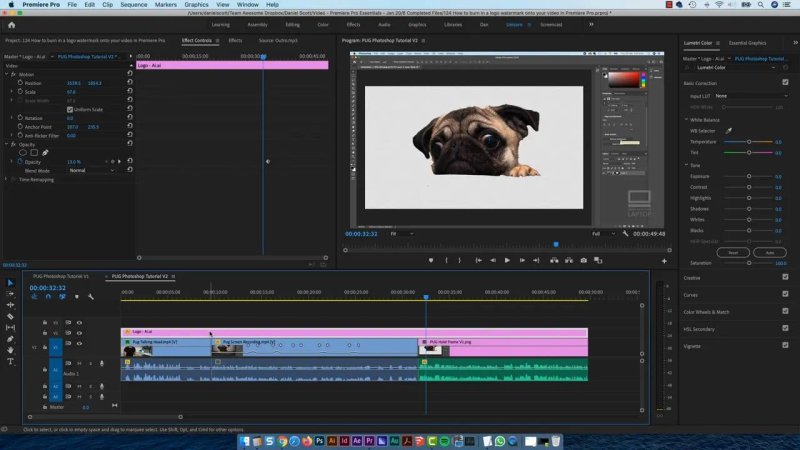
Extend the static logo clip over the full edit so the watermark remains consistent throughout.
Should you use Essential Graphics?
You can also add a logo through the Essential Graphics panel. Choose Edit, click the new-layer icon, and import the PNG. It will place the logo in the sequence in much the same way as dragging an imported file directly onto the timeline.
There is nothing wrong with that approach, but it may not provide all the graphic controls you expect for an imported logo. In particular, options such as drop shadows may not be available through that workflow, depending on the Premiere Pro version.
It can also import another copy of the same asset into the project panel, even if the logo was already there. It is not a serious problem, but it can leave you with unnecessary duplicates. Delete the unused copy if you want to keep the project tidy.
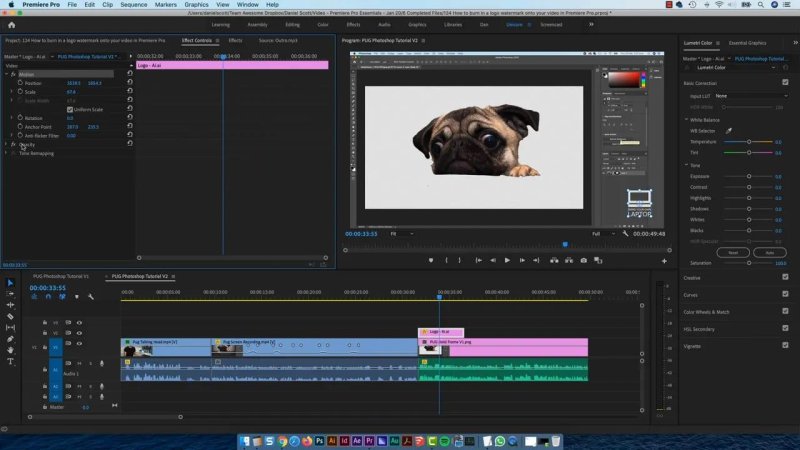
Essential Graphics can import a logo, although a standard timeline graphic is often the more straightforward route.
Add a drop shadow to the watermark
A drop shadow can help a logo stay readable when the footage behind it changes from light to dark. This is useful when the watermark is subtle enough that it could otherwise disappear into the image.
Find and apply the effect
Open the Effects panel and search for Drop Shadow. Searching is much quicker than trying to remember which effects folder it lives in.
Drag the Drop Shadow effect directly onto the logo clip in the timeline. It will not apply by dropping it on the Program Monitor. Once applied, select the logo clip and return to Effect Controls to adjust the effect.
Adjust the shadow settings
The key controls are:
Opacity, which determines how strong the shadow appears.
Direction, which sets the side of the logo where the shadow falls.
Distance, which moves the shadow farther away from the logo.
Softness, which makes the shadow harder or more feathered.
To clearly see what the shadow is doing, temporarily scale the logo up. Once you can see the shadow, refine its direction, distance, and softness, then return the logo to its intended size.
Often, a soft shadow with enough separation to define the logo is all you need. If the logo itself is already semi-transparent, the shadow usually needs to be adjusted with a little more care so it remains useful without looking heavy.
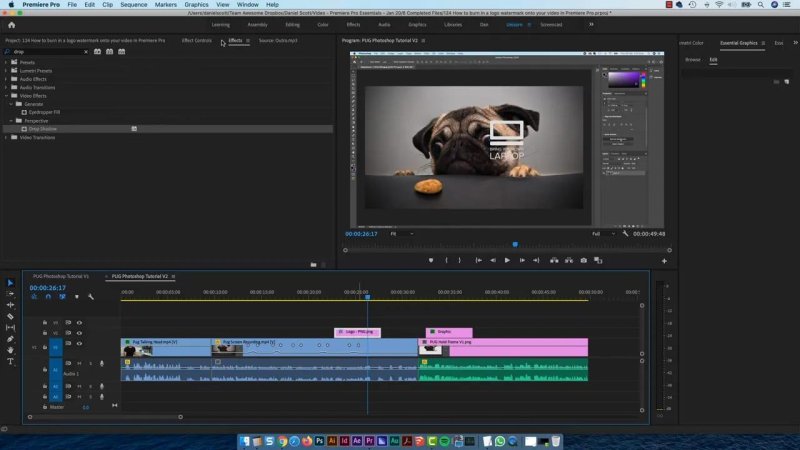
A soft drop shadow gives a subtle watermark enough separation from the footage beneath it.
A simple watermark checklist
Use an AI, PNG, or transparent PSD logo.
Place it on a video track above the footage.
Resize and position it in a corner or another non-intrusive area.
Reduce opacity so the mark does not become distracting.
Extend the graphic clip across the full length of the sequence.
Add and refine a Drop Shadow only if the logo needs better separation.
There is no need to overcomplicate it. Add the logo, put it in the right place, lower the opacity, and use a drop shadow where it genuinely helps. That gives you a clean Premiere Pro watermark that stays present without getting in the way.
FAQs
What logo format should I use for a Premiere Pro watermark?
Use an AI, PNG, or a PSD with transparency enabled. Avoid JPEG because it does not support transparency and will place a white background behind the logo.
How do I make a watermark appear for the whole video in Premiere Pro?
Select the logo clip on the upper video track and drag its end across the complete duration of the sequence. A static logo can simply be extended like a hold frame.
Where do I change logo watermark opacity in Premiere Pro?
Select the logo clip, open Effect Controls, and reduce the Opacity value. Keep the result subtle so the logo identifies the brand without overpowering the footage.
Can I add a drop shadow to a logo in Premiere Pro?
Yes. Search for Drop Shadow in the Effects panel and drag it onto the logo clip in the timeline. Then use Effect Controls to adjust its opacity, direction, distance, and softness.
Written by Daniel Walter Scott — Founder of Bring Your Own Laptop & Chief Instructor
