How to record screen capture for Premiere Pro
Questions


Student Gallery
Be the first to share something.
Course info
Overview
I am here to help you learn Adobe Premiere Pro and to show you the tools you need to become a successful video editor. Premiere Pro is the industry standard used by professional designers to create stunning, high class videos and, after completing this course, you too can become a confident, skillful and efficient creator of stunning videos.
This course is aimed at people who are completely new to Premiere Pro.
If you are self taught using Premiere, this course will show you techniques you never dreamed were necessary or possible and will show you efficiencies to help speed up your workflow.
The course covers many topics - all of them on a step-by-step basis. We will use real world video editing examples to work through:
- An interview
- A wedding video
- A short commercial
- A documentary
- Social media advertising videos
- YouTube ‘how to’ videos
- Talking head footage mixed with screencasts and voiceovers
We will work with text, animation, motion gfx, special effects and we will add music to our video.
We will learn how to do colour correction, colour balancing and also how to create amazing video transitions within our movie. Technical ‘guru’ topics such as HD v 4K, frames per second, exporting work, fixing up bad audio, balancing and synching audio will all become manageable tasks for you. Best of all...I will show you amazing shortcuts and techniques to speed up your workflow.
Throughout the course we will work on mini projects and I will be suggesting assignments which will add value to your portfolio.
Start your Premiere Pro training now and fast track your career as a video editor.
* Please note, you have full permission to transform and upload any work using footage of Daniel as a part of this course.

Daniel Walter Scott
Founder of Bring Your Own Laptop & Chief Instructor
I discovered the world of design as an art student when I stumbled upon a lab full of green & blue iMac G3’s. My initial curiosity around using the computer to create ‘art’ developed into a full-blown passion, eventually leading me to become a digital designer and founder of Bring Your Own Laptop.
Sharing and teaching are a huge part of who I am. As a certified Adobe instructor, I've had the honor of winning multiple Adobe teaching awards at their annual MAX conference. I see Bring Your Own Laptop as the supportive community I wished for when I was first starting out and intimidated by design. Through teaching, I hope to bring others along for the ride and empower my students to bring their stories, labors of love, and art into the world.
True to my Kiwi roots, I've lived in many places, and currently, I reside in Ireland with my wife and kids.
Certificates
We’re awarding certificates for this course!
Check out the How to earn your certificate video for instructions on how to earn yours and click the available certificate levels below for more information.
Downloads & Exercise files
How do I record my screen on a Mac or PC?
On a Mac, the quickest option is QuickTime, which is already installed. On a PC, tools such as CamStudio, OBS Studio, and Shotcut can capture your screen. Once recorded, the resulting video file is ready to import into Premiere Pro and edit.
How to Record Your Screen for Video Editing in Premiere Pro
If you are creating how-to videos, screen capture is the first step. The editing comes afterwards, but getting a usable recording is fairly straightforward. There are loads of tools available, so do not get too caught up hunting for the one perfect screen recorder.
A simple search for screen recording software for your device will uncover plenty of options. For phones and tablets, look in the relevant app store, choose a free option with strong ratings, and get on with making the video.
Screen recording options by device
The tool you use depends largely on what you are recording. The important bit is that it creates a video file you can bring into your editing software afterwards.
Mac: QuickTime is a simple built-in choice. Camtasia is another option.
Windows PC: CamStudio, OBS Studio, and Shotcut are common screen-recording tools.
iPad, iPhone, and Android: Search the app store for screen-recording software and select a well-rated free app that fits your needs.
There are many ways to capture a screen, so the best software is often the one you can get working quickly and reliably. For a Mac, QuickTime is ideal because it is already there and requires very little setup.
How to open QuickTime on a Mac
You can find QuickTime through Finder. Make sure nothing is selected, then choose Go and select Applications. QuickTime lives in that Applications folder.
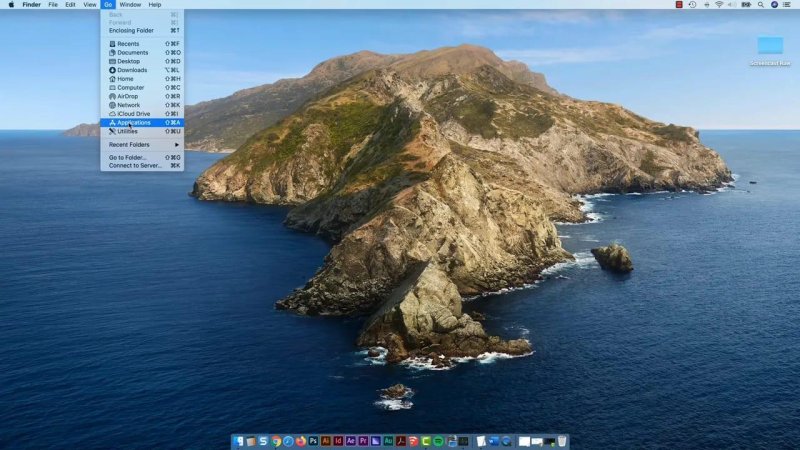
QuickTime can be found through Finder by opening the Applications folder.
The faster route is Spotlight. Press Command + Spacebar, type “Quick”, and QuickTime should appear as the top result. Press Enter to launch it.
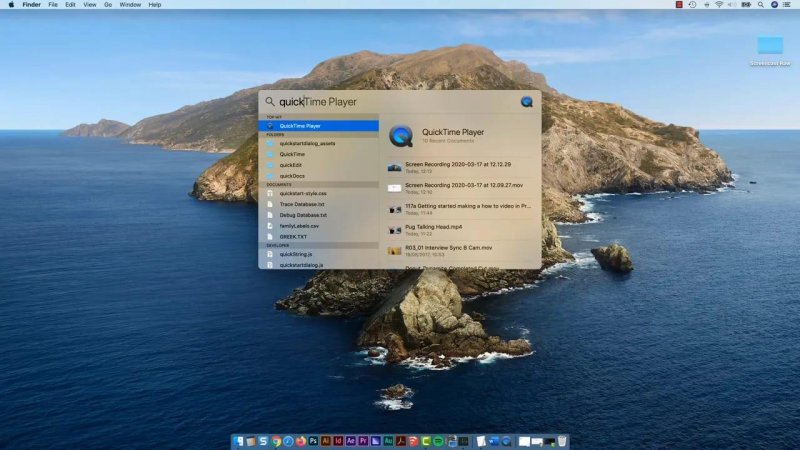
Spotlight is the quickest way to launch QuickTime when you need to start recording.
QuickTime may initially look as though it wants you to open an existing video. That is not what you need here. Go to the File menu and choose New Screen Recording.
Set up your screen recording
Once the screen-recording controls are open, decide exactly what you need to capture. You can record the entire screen or select only a portion of it.
Before hitting record, check these options:
Recording area: Choose the whole screen for a broad demonstration, or select a specific area to keep the recording focused.
Microphone: Choose your microphone if you want to capture narration as you work.
No audio: Select no microphone if you plan to record a voiceover later in Premiere Pro.
Save location: Set where the finished recording will be saved, such as the desktop.
Timer: Use a short countdown so you have time to prepare before recording begins.
Mouse clicks: Enable click indicators when demonstrating software steps, as they make tutorials easier to follow.
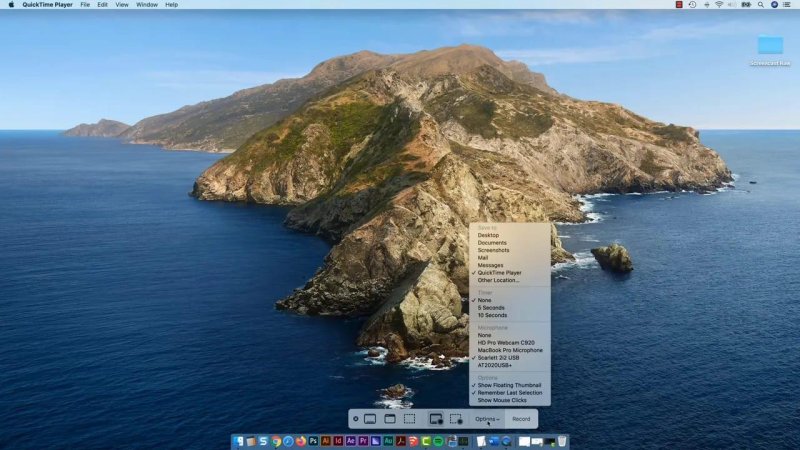
QuickTime gives you practical controls for audio, timing, mouse-click indicators, and the recording area.
For a tutorial, showing mouse clicks is particularly useful. It makes it obvious where an action happens, rather than leaving somebody trying to guess which tiny button was pressed.
Record the demonstration
Set the timer, press record, and carry out the steps you want to demonstrate. Keep the recording focused on the task. Screen recordings do not need to be fancy at this stage. They just need to capture the actions clearly enough that you can shape them into a useful final video later.
When you have finished, use the stop control in the menu bar. QuickTime may take a moment to process the capture, so give it a second. The completed movie file will then appear in the location you chose, such as the desktop.
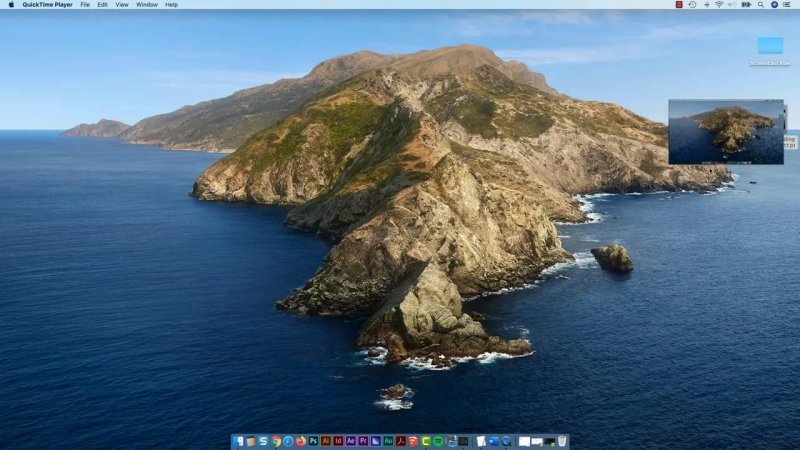
Choose the area to capture before recording, then use the on-screen controls to begin the take.
Check the file before editing
Double-click the new QuickTime movie and play it back. This is your chance to make sure the screen was captured correctly and that the microphone audio is present if you chose to record it.
There is something mildly Inception-like about playing a recording of your own desktop, especially when it includes the screen you are using to play it. But the key thing is simple: you now have a video file.
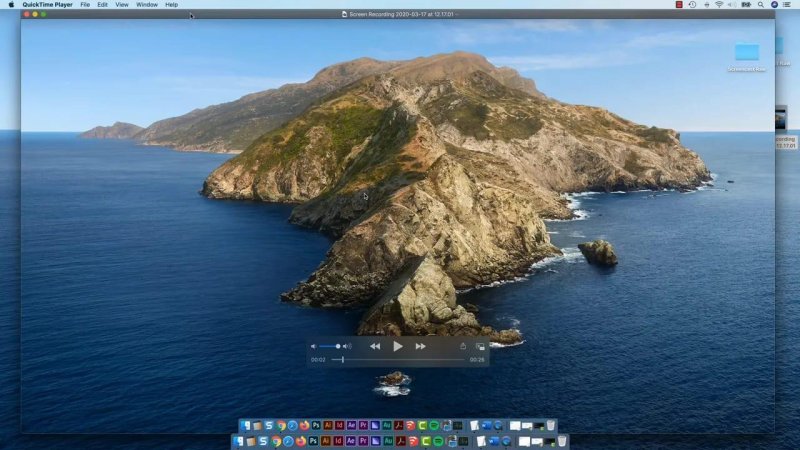
A quick playback check confirms that the screen capture is ready to edit.
Bring the recording into Premiere Pro
It does not matter whether the footage came from QuickTime on a Mac, a recording app on a PC, an iPhone, an iPad, or an Android device. Once the capture is complete, treat it like any other video clip.
Import the file into Premiere Pro, place it on a sequence, and start editing. That is where you can trim awkward pauses, remove mistakes, add a voiceover if needed, and turn a raw screen capture into a clear how-to video.
FAQs
Can QuickTime record my entire Mac screen?
Yes. When creating a new screen recording, QuickTime lets you capture the full display or select a smaller custom area.
Can I record audio with a QuickTime screen recording?
Yes. Select a microphone in the recording options to capture narration, or choose no microphone and add a voiceover later in Premiere Pro.
What are good screen-recording tools for Windows?
CamStudio, OBS Studio, and Shotcut are useful options for recording how-to videos on a Windows PC.
Can I edit phone or tablet screen recordings in Premiere Pro?
Yes. Record the screen using an appropriate iPhone, iPad, or Android app, then import the completed video file into Premiere Pro for editing.
Written by Daniel Walter Scott — Founder of Bring Your Own Laptop & Chief Instructor
